Smooth rebuild
Learn how to perform a smooth rebuild for the provided CMS instance using Optimizely Graph.
You may need to reset the Optimizely Graph service to rebuild indexes or apply significant configuration changes. Depending on your use case, you can reset Optimizely Graph using either a smooth rebuild or a hard reset.
- Smooth rebuild – Creates a new deployment while keeping the current deployment live. This option follows a Blue-Green deployment model and avoids downtime.
- Hard reset – Deletes all indexed data and reindexes content from a clean state. This option is intended for development scenarios where downtime is acceptable.
Choose the option that best fits your requirements.
Smooth rebuild Optimizely Graph
Use smooth rebuild when you need to refresh your Optimizely Graph deployment without downtime. This approach follows a Blue-Green deployment strategy. Optimizely Graph creates a new deployment slot (green) while the current slot (blue) remains active. You can validate the new slot before promoting it to live.
Use a smooth rebuild for the following:
- Start from a clean state to remove legacy defects.
- Test new implementations, such as updated data models, without downtime. Both versions run in parallel for easy comparison.
- Upgrade to new configurations introducing features, bug fixes, or performance improvements.
Perform a smooth rebuild
To perform a smooth rebuild in Optimizely Graph, complete the following:
-
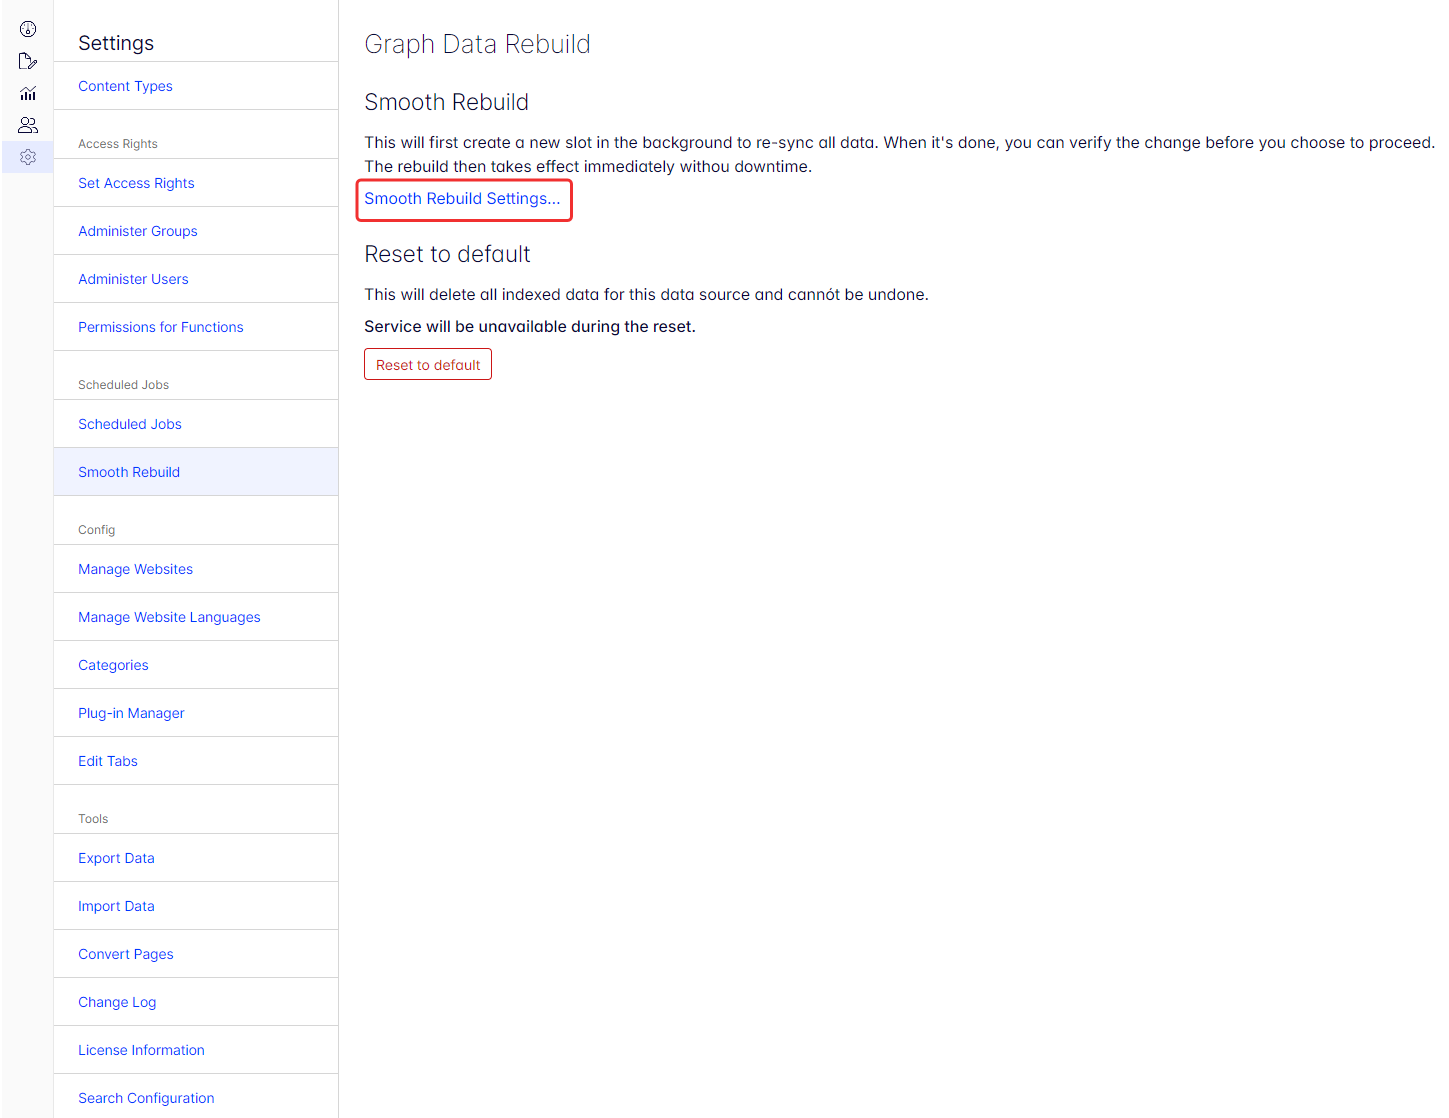
Go to Settings > Smooth Rebuild.
-
Click Smooth Rebuild Settings.
-
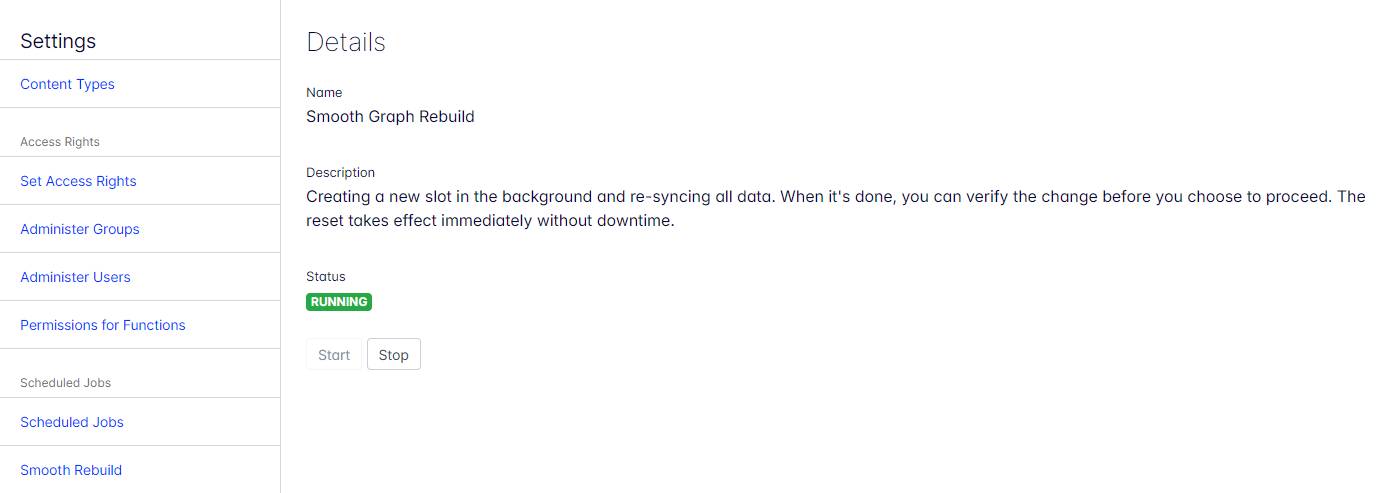
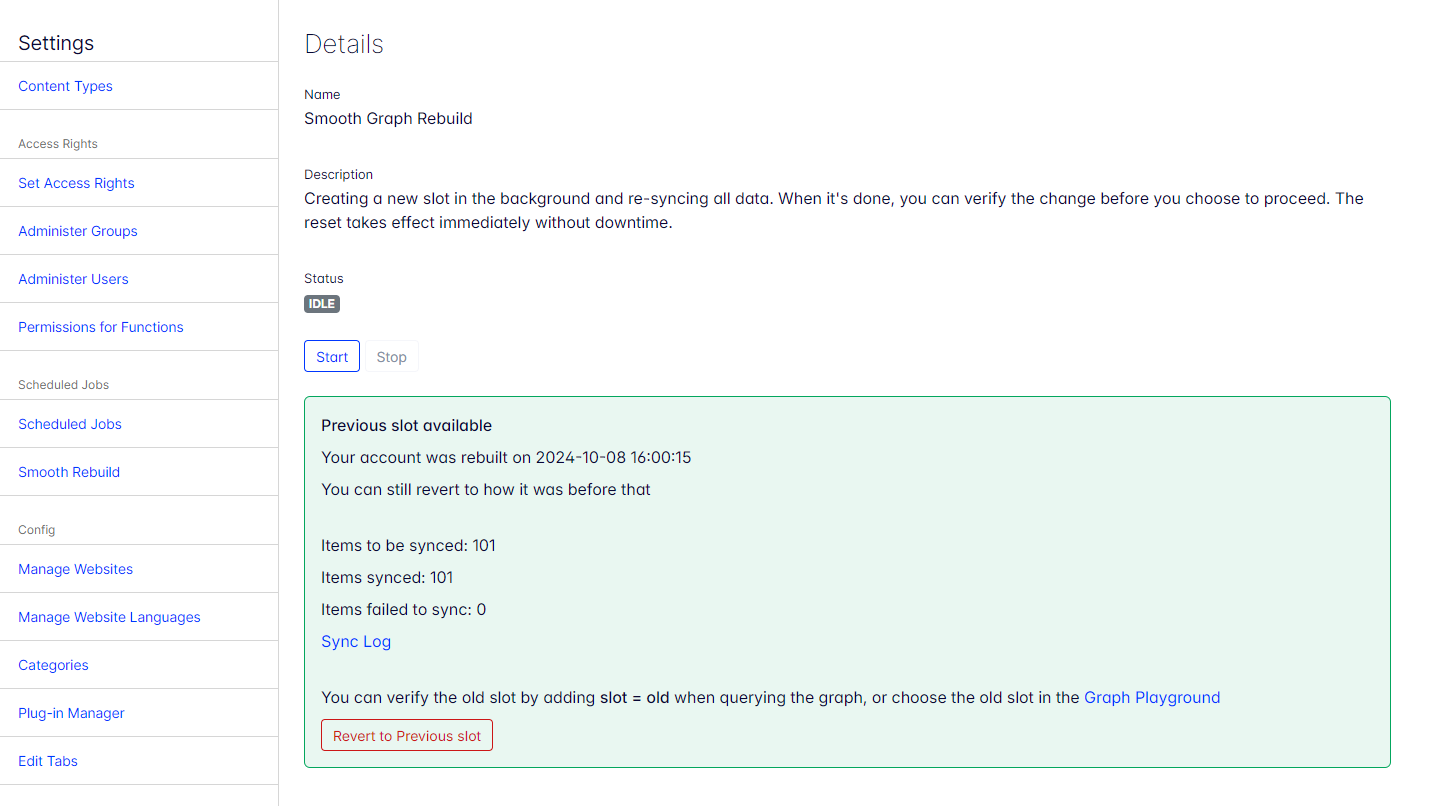
On the Details page, click Start to begin the rebuilding Optimizely Graph.

Smooth rebuild process
After you start the rebuild:
- The Status changes from IDLE to RUNNING.
- Optimizely Graph creates a new deployment slot.
- The system syncs CMS content to the new slot.
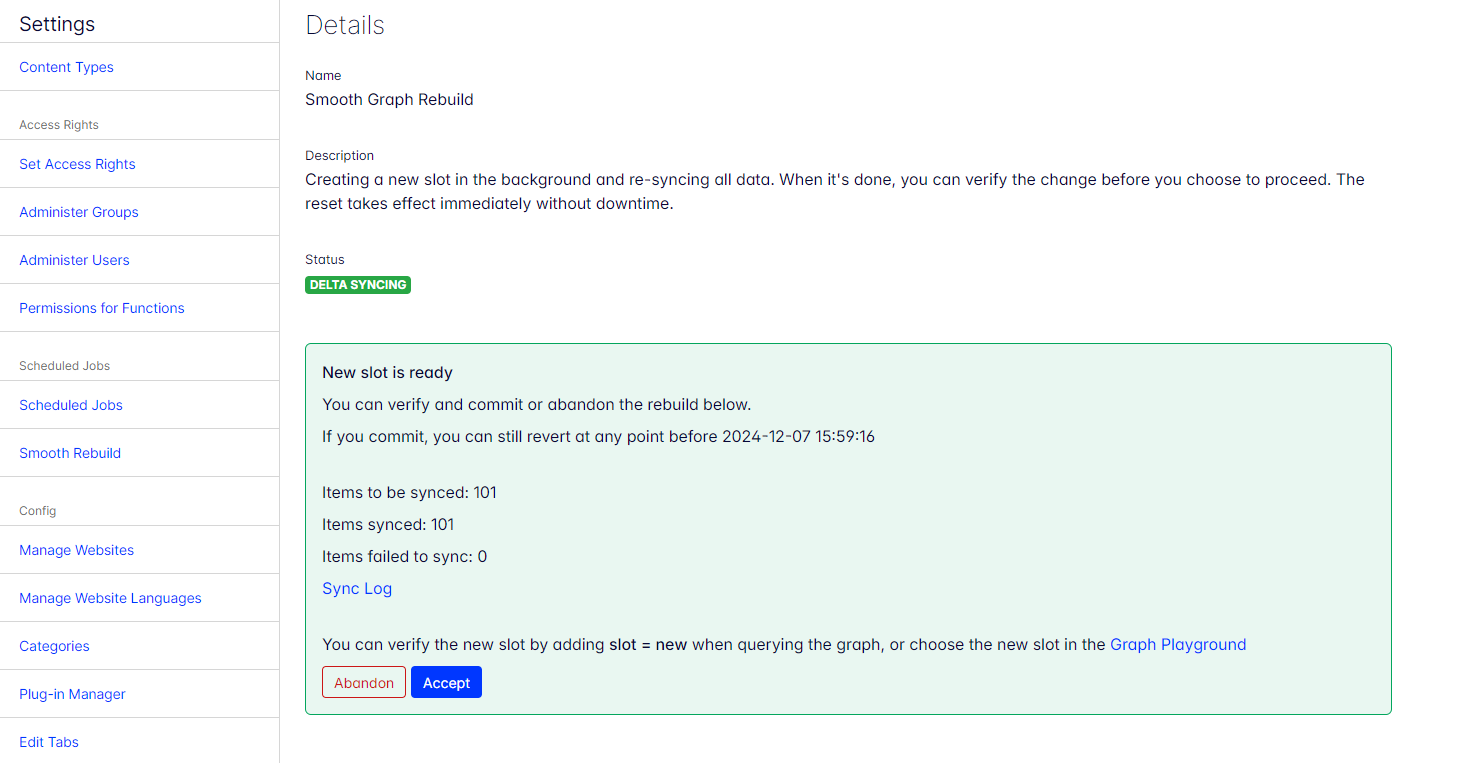
After the first full sync completes, the status changes to DELTA SYNCING. Optimizely Graph continues syncing incremental content changes made since the rebuild started.
On the rebuild page, you can monitor:
- Rebuild start time.
- Pending and completed synced items.
- Failed items.
Test the new slot
After the initial sync completes, test the new slot before promoting it to live.
You can test using the following methods:
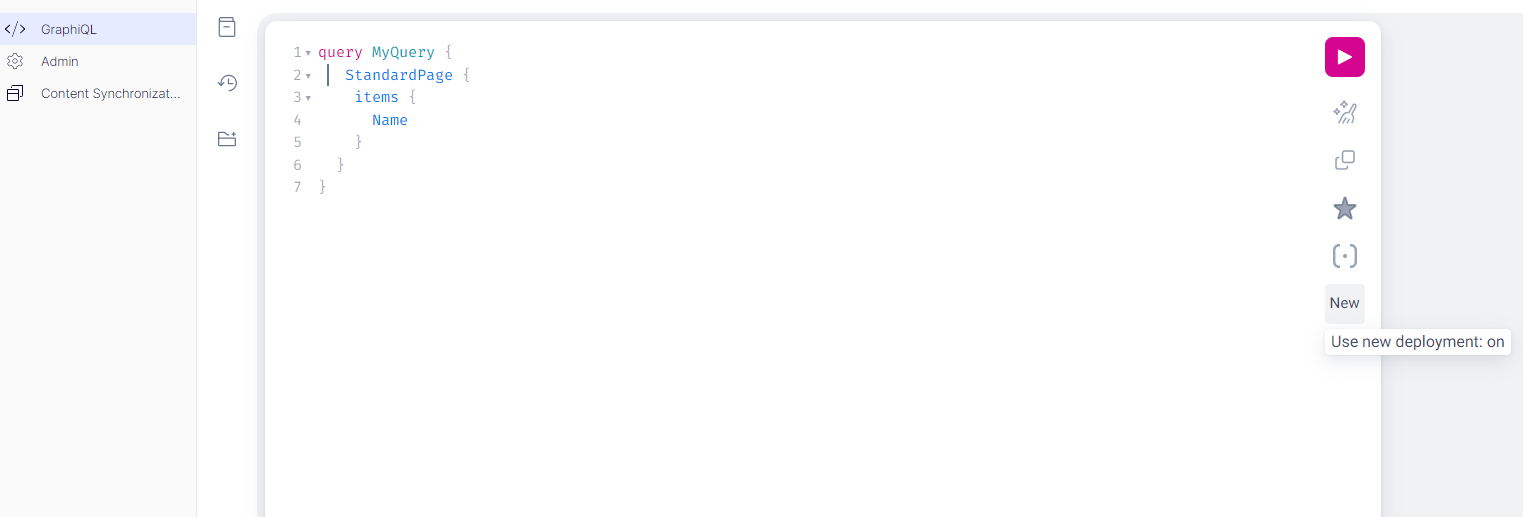
-
Optimizely Graph playground (GraphiQL) – Enable the New option to query the new slot.
-
GraphQL API – Add the request header
cg-query-new: trueto target the new slot.
Finalize or abandon the rebuild
Review failed items carefully before completing the rebuild.
- Select Abandon to discard the new slot and keep the existing deployment.
- Select Accept to promote the new slot as the live version.
WarningSelecting Accept makes the new slot live and routes all requests to it.
You can revert only to the state before the rebuild started. Any changes made after that point are lost.
After promotion:
- The Status returns to IDLE.
- You can revert to the previous slot.
- You can start another smooth rebuild if needed.
Hard reset Optimizely Graph
Use a hard reset when working in development environments where downtime is acceptable. A hard reset deletes all indexed data and recreates standard indexes for the current tenant.
Use a hard reset when:
- The tenant syncs with multiple sites that use different content structures.
- Data models change significantly and require a full reindex.
ImportantHard resetting the account deletes your indexed data and is not a routine maintenance procedure. After resetting, manually run the Content type indexing job and Content indexing job again.
You can use the CMS Admin UI or a GraphQL call (account mutation) to perform the reset account procedure.
Reset with Content Management System Admin UI
After installing the Optimizely.Search.Synchronizer package, the CMS Admin UI includes a Project GraphQL page.
- Go to Admin > Project GraphQL.
- (Or visit
http://<yoursite>/EPiServer/ProjectGraphQL/GraphQLAdmin).
- (Or visit
- Click Reset Account, and confirm the reset procedure for the current account.

Use a reset account mutation (advanced)
You can reset your account by sending a GraphQL call to reset the account mutation.
{
    "query": "mutation { resetAccount }"
}
To use this mutation:
- Use HMAC authentication.
- Set the request header RemoveAllData to true.
Example request
Endpoint
POST https://cg.optimizely.com/content/v2Headers
RemoveAllData: trueBody (JSON)
{
    "query": "mutation { resetAccount }"
}
Authentication script (Postman example)
var crypto = require("crypto-js");
var sdk = require('postman-collection');
var method = pm.request.method;
var key = "yourProvidedSecret";
var secret = CryptoJS.enc.Base64.parse("yourProvidedSecret");
var target = new sdk.Url(request.url).getPathWithQuery();
var timestamp = (new Date()).getTime();
var nonce = Math.random().toString(36).substring(7);
var body = "";
if( pm.request.body )
{
    body = pm.request.body.raw;
}
var bodybase64 = crypto.MD5(body).toString(CryptoJS.enc.Base64);
var hmac = crypto.HmacSHA256(key + method + target + timestamp + nonce + bodybase64, secret);
var base64hmac = CryptoJS.enc.Base64.stringify(hmac);
var header = "epi-hmac " + key + ":" + timestamp +":" + nonce + ":" + base64hmac;
// Add Authorization header with computed HMAC to the request
pm.request.headers.add({
    key: "Authorization",
    value: header});
HMAC keys
var key = "yourProvidedAppKey"
var secret = "yourProvidedSecret"
In the pre-request script, replace yourProvidedSecret and yourProvidedSecret with the corresponding keys from your site's web.config or appsettings.json.
The following is an example of a successful result:
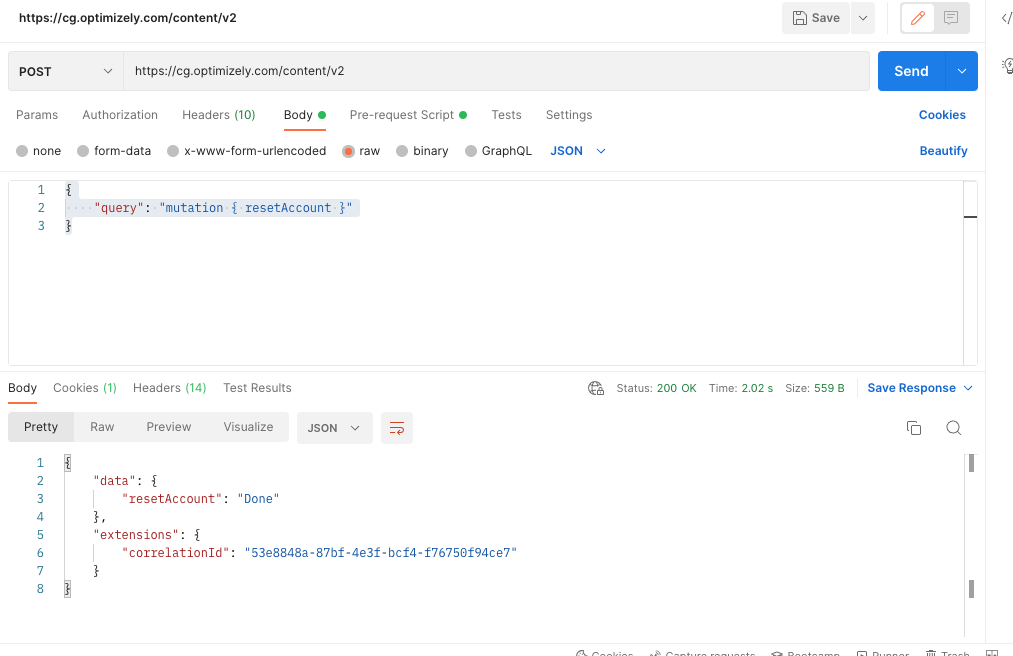
Learn more about GraphQL mutation.