Install CMS apps (add-ons)
Describes how to install, update and disable apps (add-ons).
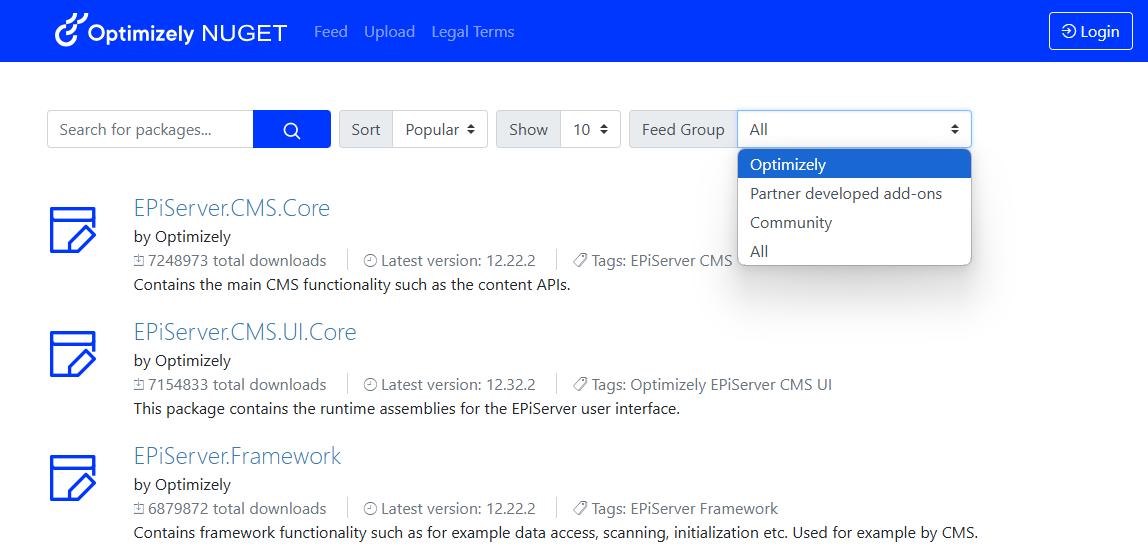
Optimizely uses NuGet for handling Optimizely Content Management System (CMS) applications (apps, sometimes called add-ons) in a standard package format. You can install apps directly from Visual Studio or via the Add-on user interface. You can sort apps in NuGet with the Feed Group drop-down in the following ways.
- Optimizely – Software that was developed, tested, and supported by Optimizely.
- Partner developer add-ons – Software that was developed by Optimizely partners, tested by Optimizely, but supported by the partner (and not Optimizely).
- Community – Software that was developed by Optimizely users and partners, not tested or supported by Optimizely.
See the App Directory, (Browse Apps & Integrations), your one-stop shop to find apps and integrations to your Optimizely products that increase productivity and streamline processes to save you time and money.
NoteFor Azure environments, install app modules only through Visual Studio (and not from the Optimizely Add-ons interface).
Configure installation options
Configure your choice of installation approach in the configuration file as described below.
<episerver.packaging installationMode="MODE">
Values for installationMode are Code or UI. You should install, upgrade, manage, and uninstall add-ons from Visual Studio or the user interface, but not both, because an add-on may not work as expected. For example, if you install an app from Visual Studio, it displays in the app (add-on) user interface, but operations (like disable and uninstall) may be unavailable.
Before you install apps from Visual Studio
- Set
installationModetoCode:<episerver.packaging installationMode="Code"> - If
installationModewas set toUI, run the cmdletConvert-EPiAddonsin the Package Manager Console. This converts existing apps installed with the user interface to Visual Studio format. - Add
https://nuget.episerver.com/feed/packages.svc/as a NuGet source. - Install and upgrade apps as normal via Visual Studio.
Repository.config
The modules/\_protected folder contains a repository.config file, which is created during add-on system initialization. If the server was hardened, IIS does not have write access to the \_protected folder, and the site does not launch (you get an access denied message). To resolve the problem, give IIS_IUSRS modify rights to the \_protected\ folder.
Each web server in a load-balanced environment has a repository.config file. The file contains a unique repository GUID. The app system allows for the execution of custom code when an app is installed, updated, or about to be uninstalled. The app system uses the GUID to verify that the custom code is executed on all servers. When deploying multiple sites, it is a good idea to copy a generated repository.config file (per machine) as part of the deployment.
Because each server's repository.config file has a unique GUID, do not commit the file to source.
Before you install apps from the UI
You can install apps from the add-on user interface without access to Visual Studio. To install add-on packages, you must be a member of the PackagingAdmins user group and have access to the Optimizely user interface.
- Set
installationModetoUI:
<episerver.packaging installationMode="UI">Install app packages from the Optimizely central repository
In Optimizely, select Add-ons (apps) in the global menu. From here, you can install any available app (add-on). Optimizely does the following:
- Optimizely adds packages to a temporary repository.
- Optimizely tries to resolve dependents and dependencies and install the packages to the application from the temporary repository combined with the other repositories.
- Optimizely validates uploaded files and selected add-ons if they are valid NuGet packages marked with proper module tags:
EPiServerModulePackageorEPiServerPublicModulePackage. - After installing a package to the repository, you can instantiate it to any number of applications.
Change the location of the temporary repository
The following list shows the package source repositories:
- Optimizely central repository
- The temporary repository
- The site local repository
Optimizely uses the temporary repository with the virtual packages to resolve dependencies before installation, representing available assemblies on the site and the local repository. By default, the operating system designates the location of the temporary repository directory. To change the directory, change the value of the packagesTemporaryFolder attribute in the episerver.packaging element.
<episerver.packaging packagesTemporaryFolder="...">Change the location of the local repository
Optimizely sets up the site directory, C:\\EPiServer\<SiteName>\\wwwroot\\modules, with correct access rights when you install Optimizely Framework from the Optimizely Deployment Center. Optimizely adds installed packages to the site local repository. To change the directory, change the value of the repositoryPath attribute on the episerver.packaging element:
<episerver.packaging repositoryPath="C:\EPiServer\Sites\MySite\App_Data\Packages">
NoteMake sure that the web application has write access rights for the specified directory.
Add repositories to the configuration
You can add repositories to the configuration, as shown in the following example:
<episerver.packaging>
  <packageRepositories>
    <add name="Gallery" url="\\server\Your\Packages\Folder" />
  </packageRepositories>
</episerver.packaging>
NoteInstalled apps are registered in the file in the site root. Optimizely copies supported files to the corresponding app folder in the
~/modules/directory. See the description for theepiserver.packagingelement in episerver.packaging (Legacy).
Copy app assemblies to the probing path directory
Optimizely copies app assemblies compatible with the current framework version to the probing path directory, which is located at dirmodulesbin under C:/EPiServer/\<SiteName>/wwwroot/. The probing path directory must be available at this location, and you define it in the probingPath attribute in the configuration/episerver.framework/scanAssembly element. You should configure the same path in the privatePath attribute of probing element:
EPiServerFramework.config
<episerver.framework>
<scanAssembly forceBinFolderScan="true" probingPath="modulesbin" />
web.config
<runtime>
<assemblyBinding xmlns="urn:schemas-microsoft-com:asm.v1">
<probing privatePath="modulesbin" />
Complete the installation
After you install app packages, installation results display information about whether you must restart the site (if ASP.NET does not automatically restart it). Site restart is required to load and scan new assemblies and initialize installed apps.
Update an app
The Updates tab shows available updates for installed apps. When you upgrade an app, the old version is uninstalled, and the new version is installed. The update process also updates related apps (dependencies and dependents).
Disable an app
After the upgrade, some apps may become incompatible, and the site might not start. You can disable installed apps from the user interface so they do not block the user interface. Disable an app (such as EPiServer.Cms.AddOns.Blocks in the following example) in the site's configuration file:
<episerver.framework>
	<scanAssembly>
		<add assembly="*" />
		<remove assembly="EPiServer.Cms.AddOns.Blocks" />
	</scanAssembly>
	<!-- other settings -->
</episerver.framework>
Uninstall an app
The Installed tab shows installed apps (add-ons). You can uninstall apps from here, except for system apps (such as the management system app, which cannot be uninstalled; only upgraded). Optimizely removes app files and the corresponding Shell module folder during uninstallation and deletes assemblies from the probing path directory. Optimizely restarts the site to complete the uninstallation procedure and to unload app assemblies from the application domain.
Updated 11 months ago