Media support
Introduces some basic concepts when setting up media support in Optimizely Content Management System (CMS).
Examples in this topic are based on an empty Optimizely Content Management System (CMS) project, as described in Create a starter project.
Optimizely has built-in features that support working with media such as documents, images, and video. Built-in features include multiple file uploads and drag-and-drop of media into the ContentArea, ContentReference, and XhtmlString properties. To use these features, you must first define media types in your content model, just as for other content types.
Like a page type, a media type defines a set of properties. Media, like an image, is an instance of the .NET class that bases the media on defining the media type and implementing the IContent interface. Media is routed like pages but has a built-in template that returns the image or document.
Add media types
You should create specific classes for media of type images, video, and anything generic other than video or image, such as text or PDF files.
The following code sample is a simple media type for images. Inheriting from ImageData adds built-in functionality like thumbnail display in lists and editing previews. See Media types and templates.
namespace MyEpiSite.Models.Media {
  [ContentType(DisplayName = "ImagesMedia", GUID = "a4afb648-f7c0-4207-8ac0-f0c532de99ca",
    Description = "Used for generic image types")]
  [MediaDescriptor(ExtensionString = "jpg,jpeg,jpe,ico,gif,bmp,png")]
  public class ImagesMedia: ImageData {}
}
Media structure
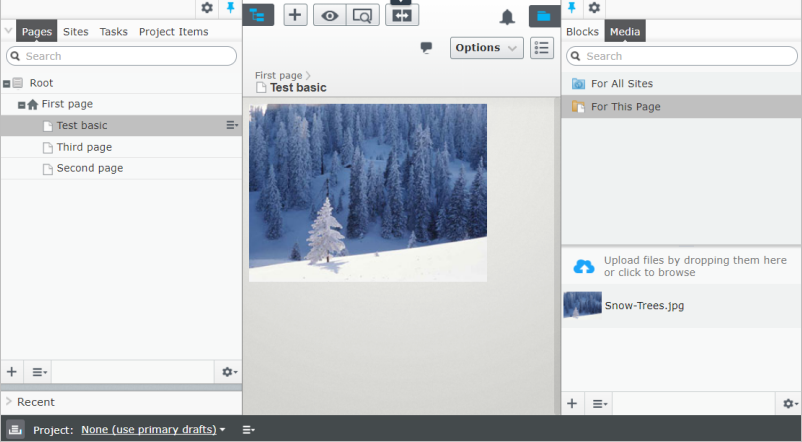
Media used in site content must be available in folders in the Assets panel. Media and blocks share the folder structure, so creating a folder for images creates the same folder for blocks. You can set access rights for folders to restrict editor access.
Use the Assets folder structure as follows:
- For All Sites – Assets are available for sharing across a website or websites in a multi-site scenario.
- For This Site – Assets are available within a site in a multi-site scenario; see Initial configuration.
- For This Page – Assets are only available for a specific page (or block).

See Media types and templates.
Upload media
Media can be uploaded as follows:
- Drag-and-drop into the Assets panel or through the Upload Files option in the context menu (see Optimizely user interface.
- Programmatically by using the CMS API.
- Through a custom provider.
In a standard installation, CMS automatically publishes and indexes media when you upload them (unless you have a content approval workflow in place). You can change this with the UIOptions.AutoPublishMediaOnUpload setting.
Image Editor
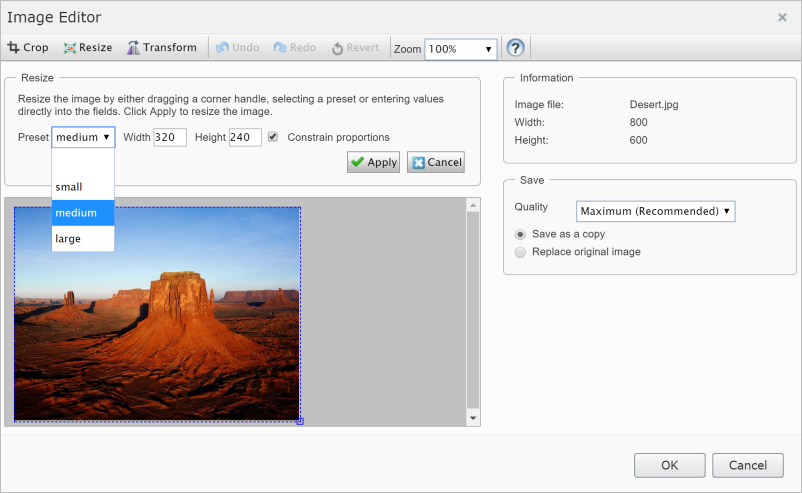
CMS has a built-in image editor providing basic image editing capabilities like resizing and cropping.
To help editors apply the correct image size for content, you can configure preset values that editors can select in the image editor. CMS adds the configuration to the <episerver> section of the web.config file. The configuration example below adds image size options "small", "medium", and "large" to the Image Editor.
<episerver>
  <imageEditor>
    <sizePresets>
      <preset name="small" width="100" height="150" />
      <preset name="medium" width="320" height="240" />
      <preset name="large" width="640" height="480" />
    </sizePresets>
  </imageEditor>
</episerver>
The following image shows the result when editing an image in the Image Editor.
Add an image link property
Link properties let editors select an image from an assets folder and link it to the page for display on the front-end. The following example shows how to add an image link property with rendering to a page.
Using ContentReference you can link to an image. Adding the UIHint.Image attribute lets you specifically select content types that implement IContentImage, so only images are available for selection in the folder structure. Omitting UIHint.Image will display types of content in the folder structure.
namespace MyEpiSite.Models.Pages {
  [ContentType(
    DisplayName = "TestPage",
    GUID = "61f028c8-be3d-4942-b58c-65ea8b28e7b6",
    Description = "Description for this page type")]
  public class TestPage: PageData {
    [CultureSpecific]
    [Display(
      Name = "Page image",
      Description = "Link to image that will be displayed on the page.",
      GroupName = SystemTabNames.Content,
      Order = 1)]
    [UIHint(UIHint.Image)]
    public virtual ContentReference Image {
      get;
      set;
    }
  }
}
This code adds a "Page image" property, letting you link an image to the page through drag-and-drop or by selecting from the asset folder structure.


Add a controller to render the test page.
namespace MyEpiSite.Controllers {
  public class TestPageController: PageController<TestPage> {
    public ActionResult Index(TestPage currentPage) {
      /* Implementation of action.
       * You can create your own view model class that you pass to the view
       * or you can pass the page type for simpler templates */

      return View(currentPage);
    }
  }
}
Add a view to complete the rendering of the linked image on the test page.
@using EPiServer.Core
@using EPiServer.Web.Mvc.Html

@model MyEpiSite.Models.Pages.TestPage

<div>
  <img src="@Url.ContentUrl(Model.Image)"/>
</div>
The following image is rendered in on-page edit and preview views, and on the front end.
See also Assets and media.
Updated 9 days ago