Initial configuration
Describes some typical initial configurations you need to consider when setting up a Optimizely Content Management System (CMS) solution.
Depending on the type of settings, Optimizely Content Management System (CMS) can configure multiple locations. Typical examples are configuration files such as appSettings.json, environment variables, content types, and templates in code and site configuration in the database.
You should install an empty CMS site and add a page type, as described in Create a starter project, before proceeding.
Configure
An ASP.NET Core web application can have several different sources for configuration data such as an appSettings.json configuration file or environment variables. See Configure for more details about default configuration settings when you install CMS.
Content types
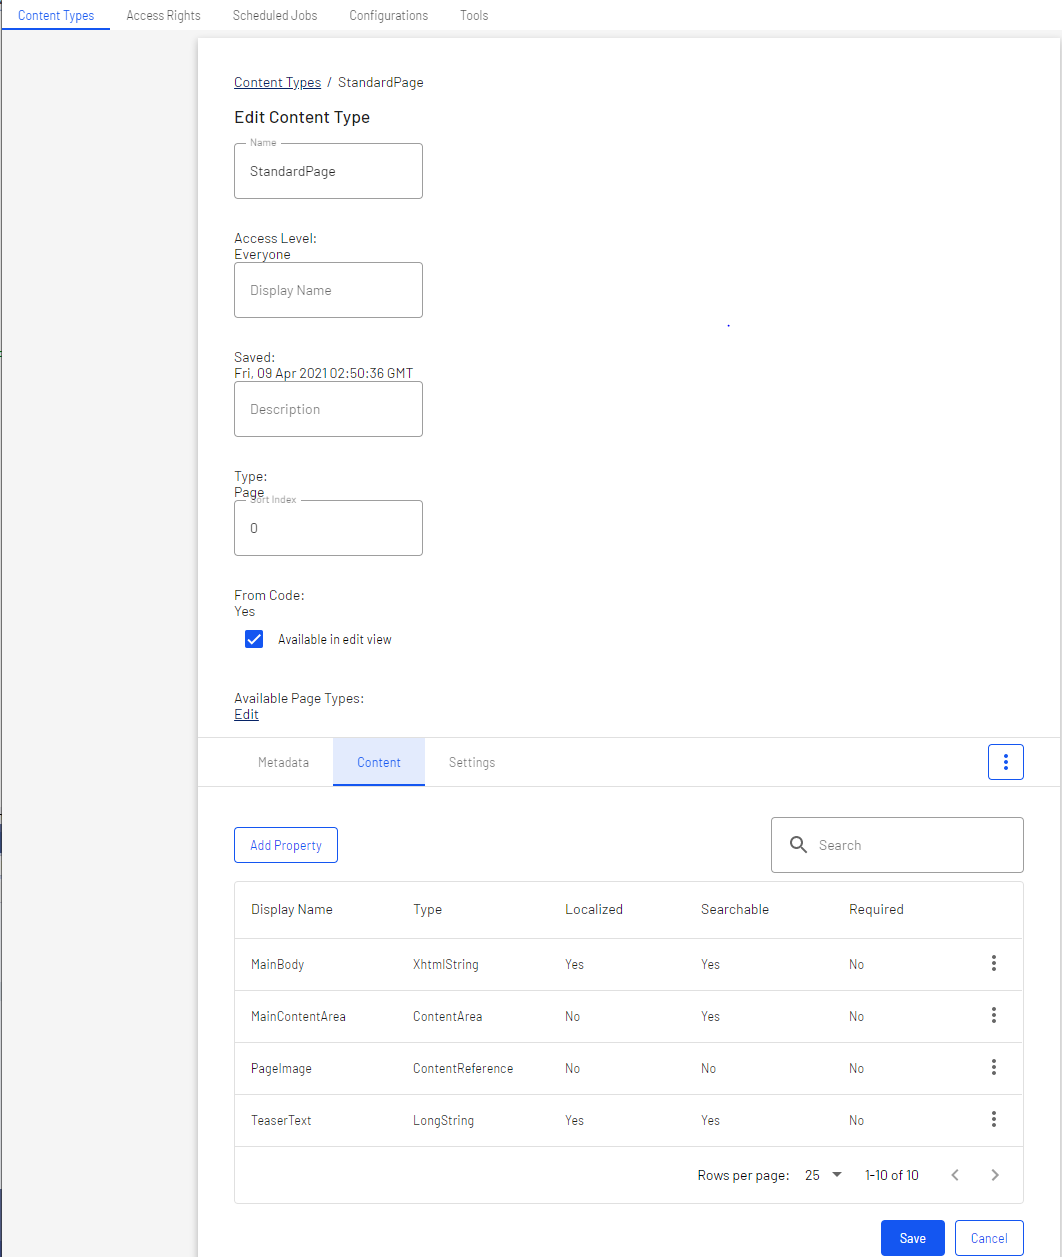
Content types and templates are typically defined in code and stored in the database. Each content type consists of a number of properties, such as Title (MetaTitle) and Main body (MainBody). Available content types are displayed in the admin view, and you can modify their properties from here. For example, administrators can change the tab under which a property is displayed, or the order in which properties are displayed for a content type.
NoteYou can create content types from the admin view, but creating page types from code makes pages more strongly typed.

During website initialization, the CMS synchronization engine scans and validates available content types and properties created in code or from the CMS admin view. See Content model and views.
Database configuration
An important configuration setting is the connection string, which must contain the path to your server and database, and SQL login and password. Make sure your connection string also contains MultipleActiveRecordSet=true. It is enabled by default when you install a website from scratch but not if you are generating a connection string from the server explorer in Visual Studio. By default, CMS uses the connection string named EPiServerDB_._DataAccessOptions to configure a different named connection string.
"ConnectionStrings": {
  "EPiServerDB": "Server=.;Database=EPiServerDB_7607b9ba;User Id=EPiServerDB_7607b9baUser;Password=BEo7Q2jzmX$kv$e;MultipleActiveResultSets=True"
}
You configure the site URL and start page in the admin view and store it in the database. This makes deployment easier and you can add and remove sites dynamically without having to restart the application.
Configure the start page
When you build a website from scratch, you will first create a set of content types and content items. To go to your site, define a site URL and start page, which acts as a default URL to the site when links are generated.
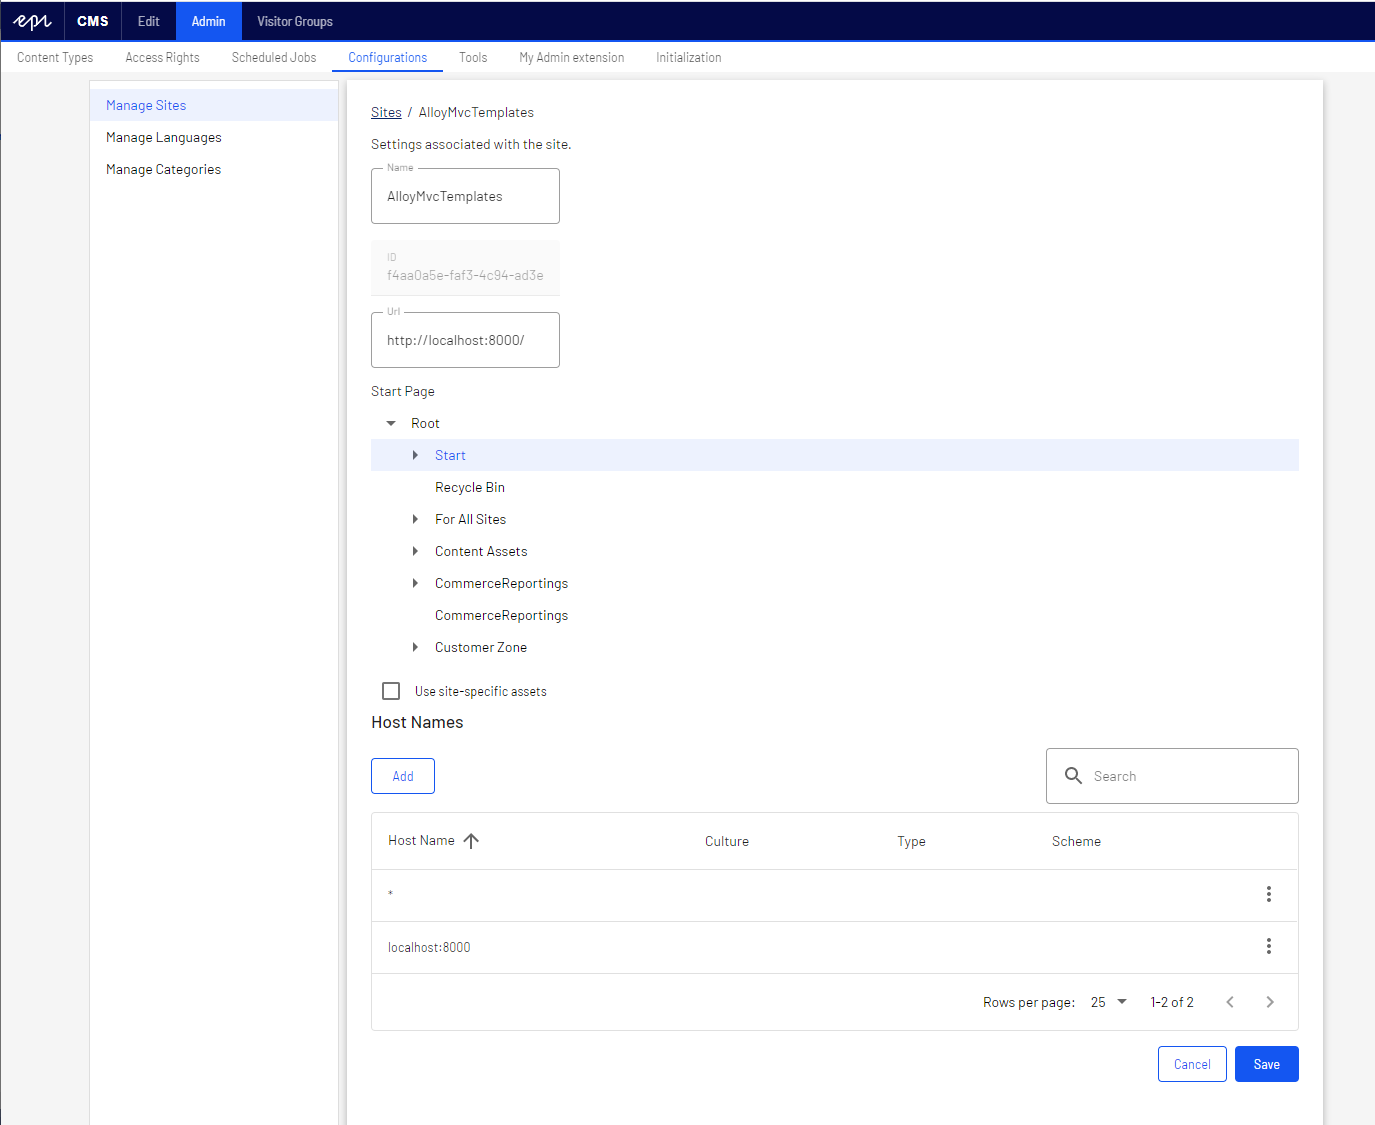
The start page is often a specific page type with unique properties, but you can configure any page type as a start page in the CMS admin view under Config > Manage Websites, by selecting a page in the page tree. The SiteUrl, StartPage, and host mapping settings are stored in the database.

See Create a starter project and Set up multiple sites.
Authenticate and authorize
The default authentication in CMS is based on the ASP.NET Core built-in framework for authentication and authorization. When implementing a CMS solution, you can choose which authentication to use.
Configure authentication
ASP.NET Core Identity authentication
You can configure your website to use ASP.NET Core Identity as authentication for managing users and roles. There is package EPiServer.Cms.UI.AspNetIdentity that is a CMS-specific implementation based on ASP NET Core Identity. See AspNetIdentity.
NoteThe Optimizely sample site (Alloy templates) uses ASP.NET Core Identity for authentication.
Azure AD integration
If you are developing a website for the cloud, you may want to use Azure Active Directory (Azure AD) for directory and identity management. CMS provides the possibility to use OpenID Connect to integrate with Azure AD. See Integrate Azure AD using OpenID Connect.
Configure access rights
CMS uses an extension of the Role concept called VirtualRoles. These are roles that are not original role claims for the user but rather dynamically added claims where the membership criteria are determined at runtime. Virtual roles are controlled by VirtualRoleOptions.
These virtual roles are delivered with Optimizely:
- Administrators
- Everyone – Provides visitor access to front-end
- Authenticated
- Anonymous
- CmsAdmins – Mapped role, maps to WebAdmins, Administrators
- CmsEditors – Mapped role, maps to WebEditors
- Creator
- SearchAdmins – Mapped role, maps to WebAdmins, Administrators
You can also create your own virtual roles in code and register them through VirtualRoleOptions. See Virtual roles.
WebAdmins and WebEditors are non-virtual Optimizely-specific groups. They provide access to the CMS admin and edit views. The groups are predefined in Optimizely, but they need to be added from the admin view to become available for usage, if you manage users in the CMS admin view, using for example EPiServer.Cms.UI.AspNetIdentity package.
When you have configured your authentication, and added users to appropriate groups, you need to define what users can do where in the content structure.
Logging
When you set up a website, configure logging, such as for troubleshooting. You can use different logging tools. Logging within CMS is based on the logging framework within ASP.NET Core so configuring logging for a CMS application is the same as for other ASP.NET Core applications. See Logging.
Updated 3 months ago
