
Run a beta
How to run a beta using a targeted delivery flag rule in Optimizely Feature Experimentation.
Run a beta by showing a flag to a specific subset of users instead of rolling your flag out to a random percentage of your user base.
Prerequisites
This topic assumes you have already created a feature flag.
Decide on an attribute
An attribute is a property in your data that can be used to target a flag to a given customer or user. Decide which attribute to use for your beta based on the data you have available in your application. For example:
-
If you have a business application that has multiple accounts and want to run a beta account by account, consider making the unique account identifier in your application an attribute in Optimizely Feature Experimentation (for instance,
customerId,accountId,projectId, and so on). -
If you have a consumer application with multiple users, and you would like to run your beta user by user, consider making the unique user identifier in your application an attribute in Optimizely Feature Experimentation (for example,
userId).
Implement the attribute
The next step is to create an attribute in Optimizely Feature Experimentation for the attribute selected above. For example, if you were running a beta by enabling flags for a particular customerId, create an attribute in Optimizely Feature Experimentation with the keycustomertId.
In your code, pass the value from the data available in your application as an attribute to create a user. The following example shows how you would do this if you were running a beta based on customerId:
// create a hardcoded beta user. Edit this example to fetch accountID & userID (for example, from customer dB)
let user = optimizely.createUserContext(userId: "123", attributes: ["customerId": 789])
let decision = user.decide(key: "new_feature")

// execute code based on flag enabled state
let enabled = decision.enabled
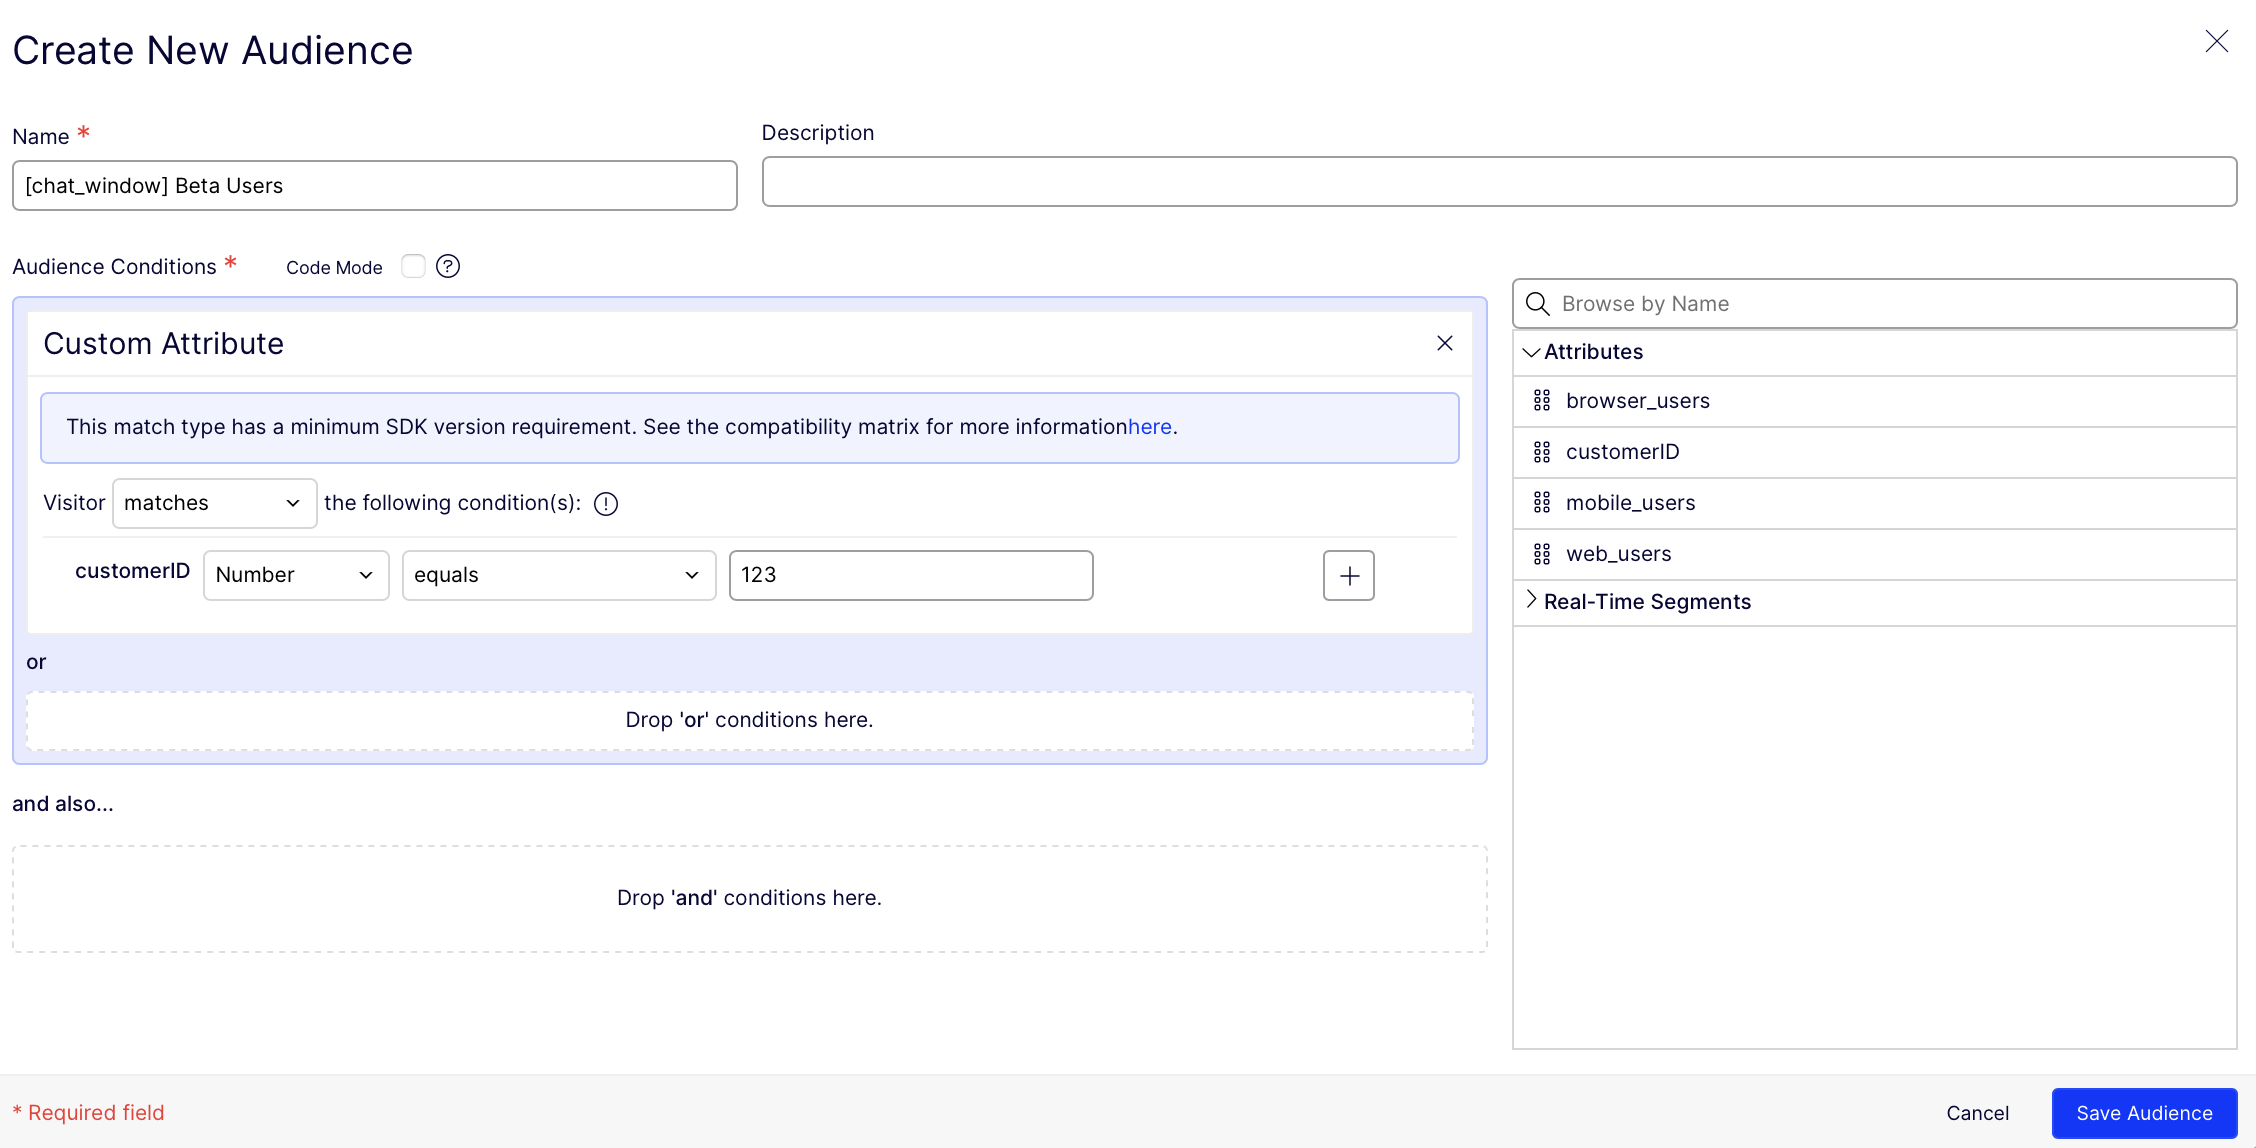
Create a beta audience
After creating and implementing the attribute in your code, use it to Target audiences for the beta users of your flag.
-
Name – Include the flag key in the audience name to determine which flag this audience is for. For example, if your flag key was
chat_window, name the the audience "[chat_window] Beta Users". -
Audience conditions – Drag and drop the attribute determining who gets the beta access. For the value of the condition, use an internal or test identifier to include yourself in the beta first to ensure everything is correctly set up.
Important
Be sure to match the value with the attribute's appropriate type.
- If your attribute is an integer, select Number equals.
- If your attribute is a string, select String equals.
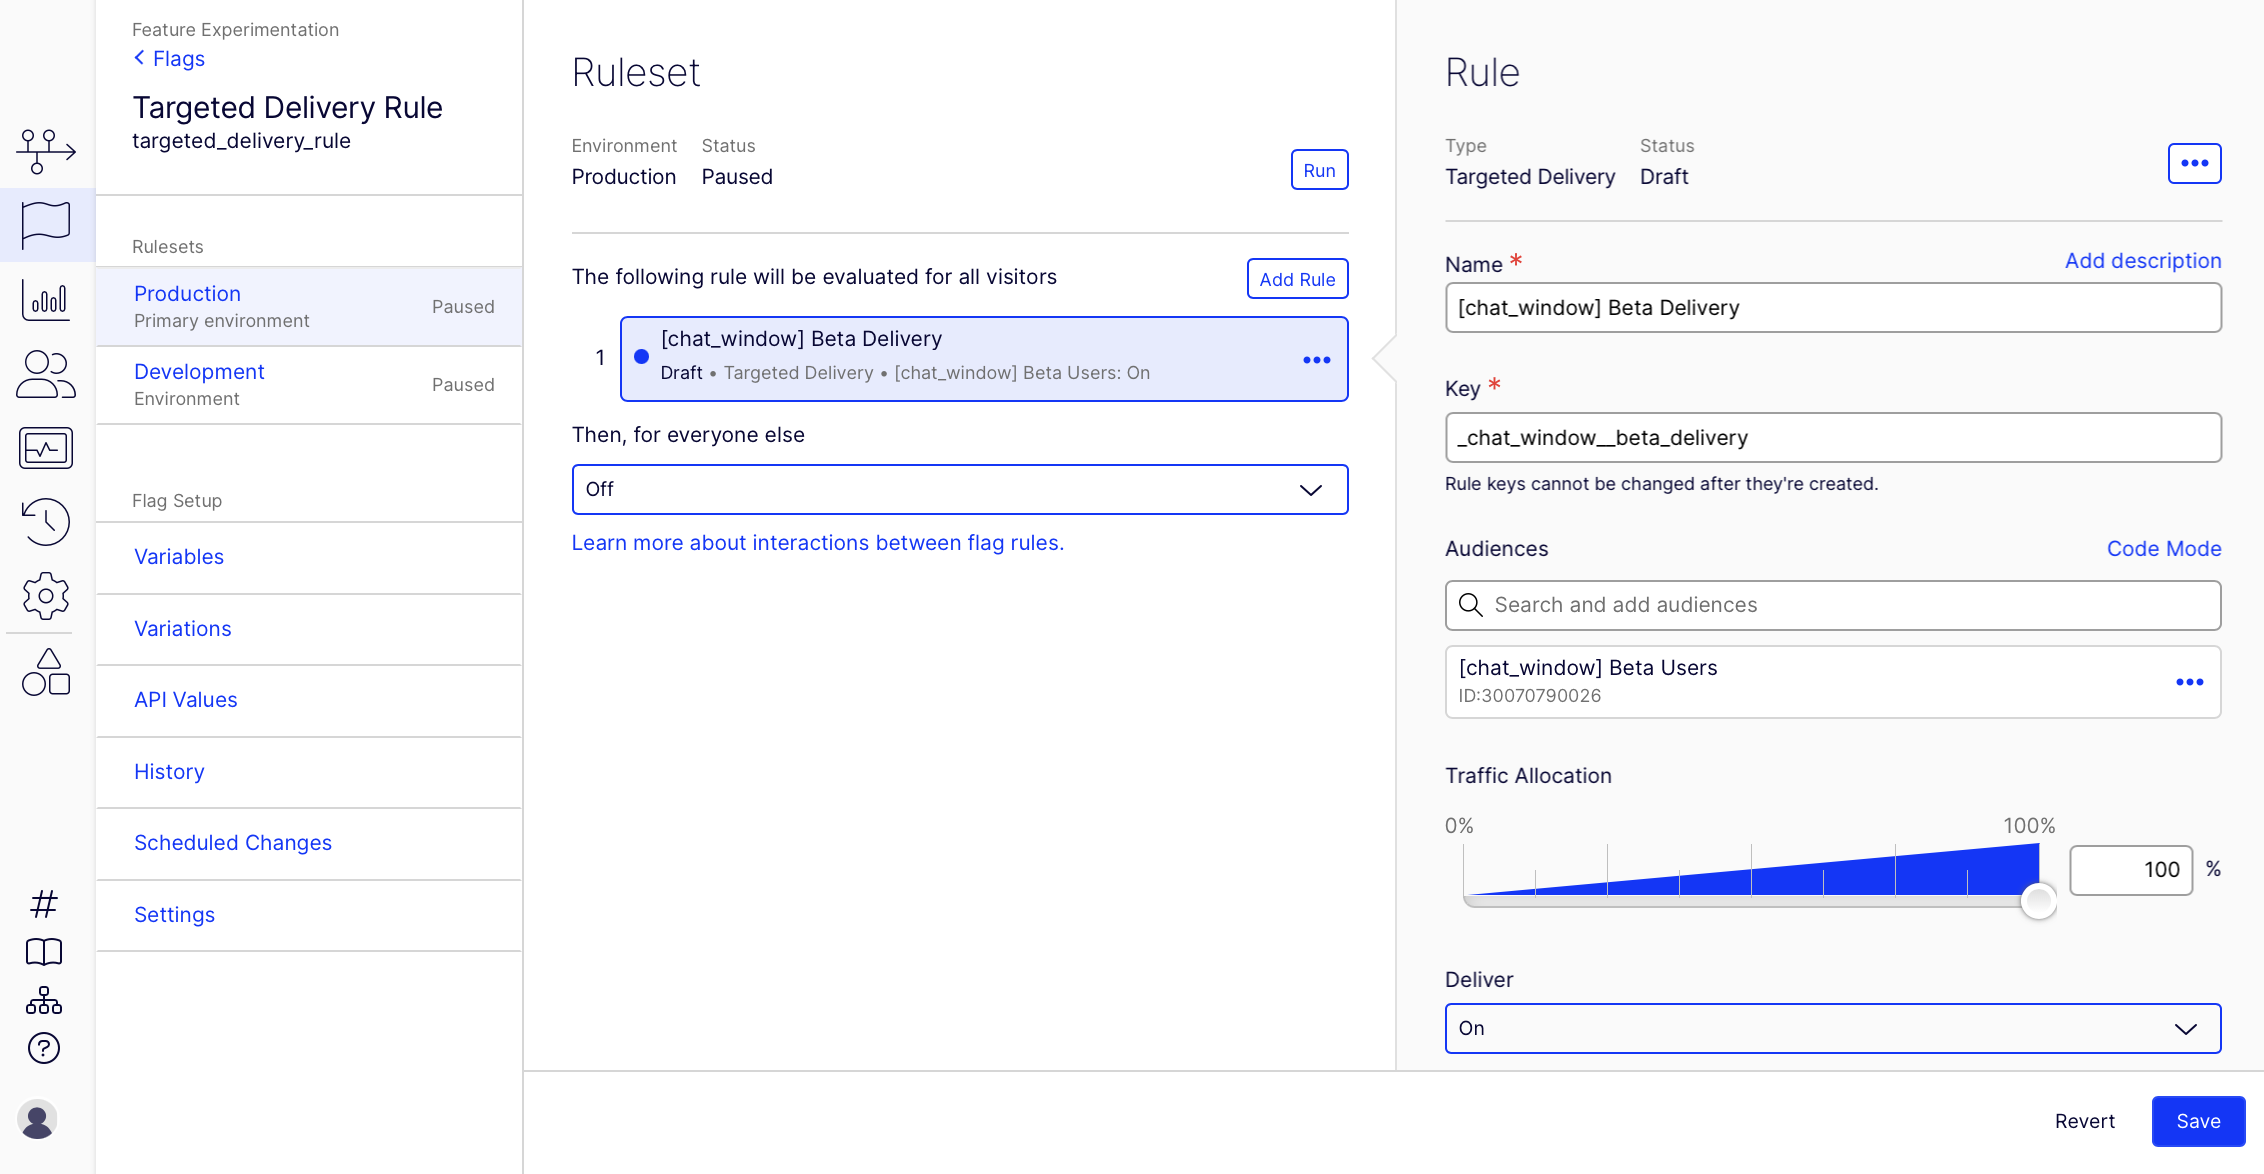
Create a targeted delivery rule. Add the audience you created previously and select On for the delivery. Ensure that the Traffic Allocation is configured to 100%. Click Save and then click Run.
Add further audiences
After starting your ruleset, your beta is running. After your first beta audience, you can retain them at 100% and strategically roll out to a sequence of audiences using multiple targeted deliveries. For example, you could define audiences to roll out to, such as:
- Other beta audiences.
- Lowest value customers.
- Difficult migration customers.
- All customers signed up in the last 20 days.
- Highest value customers.
Launch
When your audiences are at 100% traffic, you launched! Congratulations!
Next steps
To optimize your feature flag during or after delivery, test variations of your flag. For information, see Run A/B tests.
Updated 4 months ago