Create content and a page using the REST API
Create Optimizely Content Management System (SaaS) content from scratch using the REST API and access your content externally.
Setting up an Optimizely Content Management System (SaaS) instance through the REST API offers a flexible and programmatic approach to configuring your content structure. With the REST API, you can automate the creation of content types, define properties, and manage content items. This method is ideal for developers who want to integrate CMS (SaaS) configuration into their existing workflows or need to perform bulk operations.
The REST API lets you script and customize all aspects of your CMS (SaaS) instance, giving you full control over content model definition and deployment. This enables efficient configuration and integration with other systems through API calls.
The content resource is the primary resource type of CMS (SaaS). Content can represent webpages, components, media, and almost any other type. A content item holds data in a structured way described by a schema defined by the content type. Every content item is an instance of a content type.
Before creating your first content item, you define a content type. A content type describes a content item's characteristics and data model schema. Before you create your content types, you must develop a content model. Content modeling helps provide a framework for how your content is structured in CMS (SaaS). See Content modeling.
Prerequisites
- Generate a token. See Authentication and authorization for information.
- Run the following REST API calls using a REST client such as Postman or Insomnia.
Create a content type
Use the Create content type endpoint to create a Page content type.
POST https://api.cms.optimizely.com/v1/contenttypes
Content-Type: application/json{
"key": "examplePage",
"baseType": "_page",
"displayName": "Example page",
"properties": {
"heading": {
"type": "string",
"displayName": "Heading",
"group": "Content"
}
}
}Create a page
Use the Create content endpoint to create an example page using the Page content type you just created.
POST https://api.cms.optimizely.com/v1/content
Content-Type: application/json{
"key": "019003fe597f70c8b9b5f6231c74ed96",
"contentType": "examplePage",
"container": "43f936c99b234ea397b261c538ad07c9",
"initialVersion": {
"displayName": "Hello world!",
"locale": "en",
"properties": {
"heading": {
"value": "Hello, everyone!"
}
}
}
}- Key – Any universally unique identifier (UUID) with the same number of numbers.
ImportantUUIDs include hyphens (-). Remove hyphens from the key when querying to avoid errors.
-
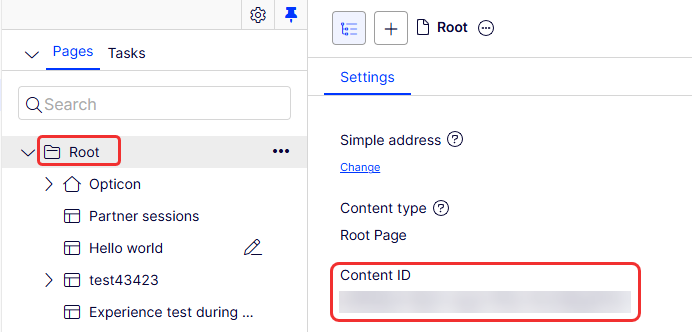
Container – UUID of the Root on the Settings tab of the All Properties editing view.
Define a website and host
-
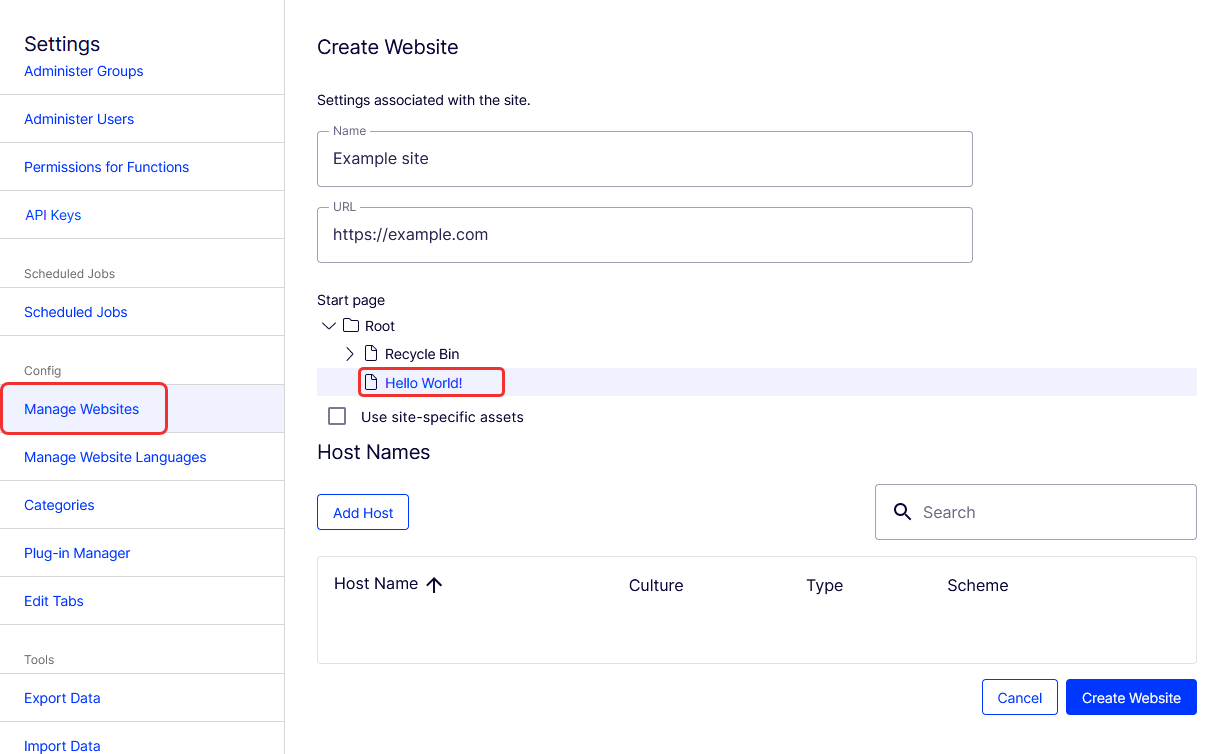
Go to Settings > Manage Websites.
-
Click Create Website and add a name and the URL that you use for your frontend.
-
Select the Hello World! page you created as your start page.
-
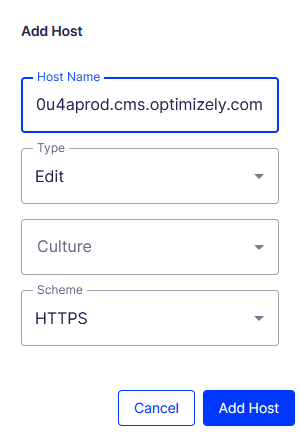
Click Add Host and copy the hostname of your instance into the Host Name field. The value should not include the scheme (
https://) or the path. -
Select Edit for the Type and HTTPS for Scheme.
-
Click Add Host.
- Click Save Website.
Run the Optimizely Graph sync job
BetaThis step is currently required to ensure that indexing works. However, this requirement is expected to be removed during the beta phase.
Before you can access the content externally, you must sync the content with Optimizely Graph.
Go to Settings > Scheduled Jobs and start the Optimizely Graph Full Synchronization.
Retrieve content using Optimizely Graph
Go to Optimizely Graph to retrieve your page using a GraphQL query.
Add the following query in the GraphiQL interface:
{
  examplePage
	{
    items
    {
      Name,
      Status,
      Heading
    }
  }
}
The result is similar to the following:
{
  "data": {
    "examplePage": {
      "items": [
        {
          "Name": "Hello World!",
          "Status": "Published",
          "Heading": "Hello, everyone!"
        }
      ]
    }
  },
  "extensions": {
    "correlationId": "814a782fbff65d32",
    "cost": 23,
    "costSummary": [
      "examplePage(23) = limit(20) + fields(3)"
    ]
  }
}
See Get started with Optimizely Graph.
Create a complete site
After you see the basic components in play, you can build your frontend based on CMS (SaaS).
For demonstrations that use popular serverless platforms to host websites, see Create a demo site using CMS (SaaS) and Vercel and Create a demo site using CMS (SaaS) and Netlify.
Updated 4 days ago