Create an Optimizely cloud account
Describes how to set up an Optimizely cloud account and to get access to the self-service capabilities included in Optimizely Digital Experience Platform.
The Optimizely cloud account identifies a user and ensures proper authorization when accessing information for your DXP projects.
PrerequisiteYou need an organizational email address like
[email protected], associated with an enabled business Microsoft Live account. If your organization already has a verified Microsoft account, you can also use this.
NoteYou cannot use generic accounts like
[email protected], or private hotmail-type accounts like[email protected].
Step 1 – Request access
Submit the following form for each customer or environment you want access to.
Make sure you provide correct and complete information. When Optimizely receives the information, you are granted access within three business days. You receive an email notification when access is provided.
| Power-user | Contributor | Analytic | |
|---|---|---|---|
| PaaS deployment and self-service tools on Integration and Preproduction environments | Yes | Yes | No |
| PaaS deployment and self-service tools on Production environments | Yes | No | No |
| Azure portal Integration environment | Yes | Yes | No |
| Application Insights | Yes | Yes | Yes |
| DXP dashboard | Yes | Yes | No |
Step 2 – Confirm the invitation and log in
After you receive an invitation email from Optimizely, you can log in to the dashboard and the portals.
- Follow the instructions in Get started with DXP > DXP Dashboard to log in and access information for your projects.
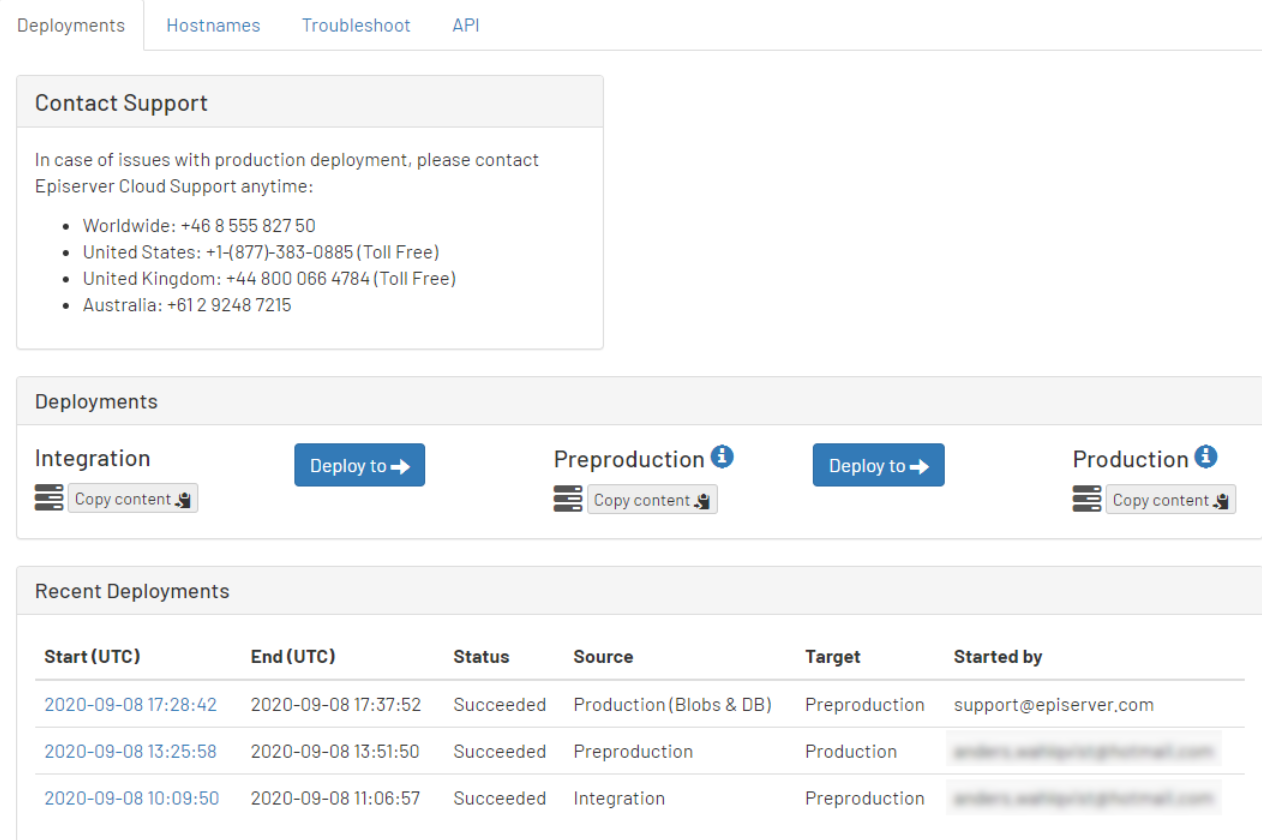
- Follow the instructions in the DXP self-deployment guide to log in to the Management Portal and deploy.
See the following related topics
- Access Azure information to learn how to log into the Azure portal and access the information.
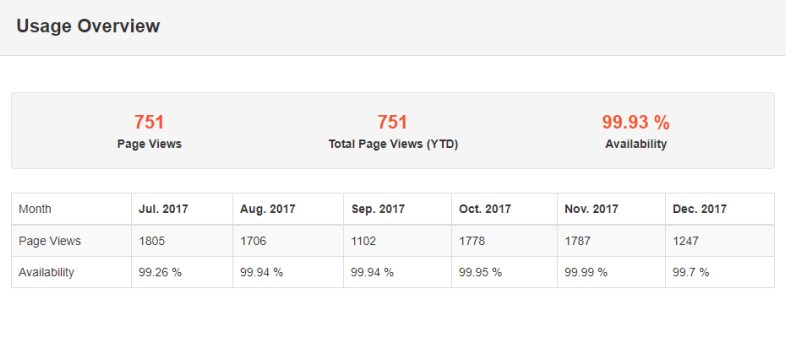
- DXP Dashboard
- DXP self-deployment guide
Updated about 6 hours ago