Deploy a new CMS site
Describes a deployment onboarding scenario where you create a website based on the Optimizely Alloy sample site, and deploy the application, database and content to the Integration environment in Optimizely Digital Experience Platform (DXP).
When is this applicable?This is an onboarding scenario for a first-time/onboarding deployment of a new site based on the Optimizely sample templates to use from start for development in a cloud environment. A new site like this does not require database restore, and the database schema is created during initial deployment.
Before you start
This example uses deployment API to publish code.
-
See DXP requirements for recommended software versions, tools, and services when deploying.
-
See Get started with DXP for deployment information.
-
See Install Optimizely for instructions on how to add the Optimizely NuGet feed to Visual Studio.
-
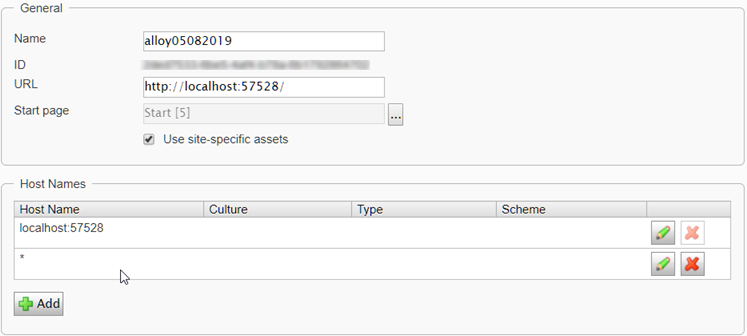
Before deploying, add a wildcard binding to the site in the Manage Websites screen. This helps prevent failures from URL-dependent code when migrating the database between environments. The following image shows an example of wildcard binding.
-
Go to Admin > Config > Manage Websites.
-
Click Add and add a wildcard (*) Host Name.
-
Deployment steps
The following steps create a website, add Azure and Search & Navigation (formerly called Find), and deploy the code and database with content to the Integration environment in DXP. The deployment uses the publishing profiles provided by Optimizely with your DXP setup.
NoteOptimizely has a bootstrap feature for deploying content. If
[SolutionDir]\\App\_Data\\DefaultSiteContent.episerverdatacontains an export package, the bootstrap feature imports that package during initialization and creates a site with content. The system applies the bootstrap only if the web app site does not have any existing content.
Step 1 – Create a website with Azure
-
Click Create a new project in Visual Studio.
-
Search for Episerver, select Episerver Web site, and click Next.
-
Complete the Configuration dialog box:
a. Enter Project name.
b. Enter Location.
c. Enter Solution name.
d. Select your Framework. This example uses .Net Framework 4.7.2.
e. Click Create.
-
Complete the Template dialog box:
a. Select Alloy (MVC or Web Forms).
b. Clear the Configure Search option. Optimizely Search and Navigation is added in a later step.
c. Click OK.
-
Select Tools > NuGet Package Manager > Manage NuGet Packages for Solution to update the website to the latest Optimizely NuGet packages.
-
Set the NuGet Package manager:
a. Select Updates.
b. Select Optimizely Packages in the Package source field to locate the latest updates.
c. Enable Select all packages.
d. Click Update and confirm the updates.
-
Add Azure to the website. In the NuGet package manager:
a. Select Browse.
b. Search and install packageEPiServer.Azure.c. Search and install package
Episerver.CloudPlatform.Cms.
-
Select Tools > NuGet Package Manager > Package Manager Console.
-
Enter
update-epidatabaseat the Package Manager prompt (PM> ). -
Run the solution.
-
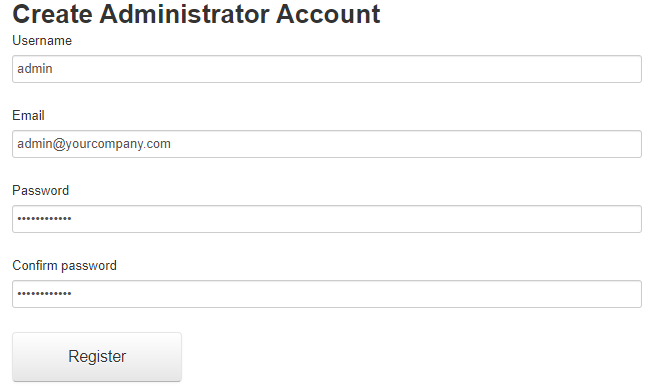
Follow the instructions to update the database, add an admin account (if needed), and click Register. The Alloy site display.
Step 2 – Update the configuration
You need to change some configurations for the website to work with Azure. The container attribute for the BLOB provider and topic for the event provider should be unique per site within the same storage or service bus account. You must update the mapping for BLOBs and event providers.
ImportantDo not skip this step! If you do, assets are stored locally and do not deploy properly to the Azure BLOB storage.
NoteThe installation of NuGet package Episerver.CloudPlatform.Cms is optional. It is expected to see a warning at DXP Management Portal during the deployment if your code does not have the package.
-
Open
Global.asax.csin Visual Studio, and create or edit the methodApplicationStart:protected void Application_Start() { AreaRegistration.RegisterAllAreas(); GlobalConfiguration.Configure(config => WebApiConfig.Register(config, "")); // Custom code and routing configs go here GlobalConfiguration.Configuration.EnsureInitialized(); } -
Open
web.configand add the following configuration under the episerver.framework section.ImportantDo not change the values for connectionStringName because these are overwritten with the correct environment-specific values during deployment. Optionally, you can change the container and topic names mysitemedia and MySiteEvents to names of your choice. The storage container name must be in lowercase, for example
mysitemedia, for DNS compatibility.<blob defaultProvider="azureblobs"> <providers> <add name="azureblobs" type="EPiServer.Azure.Blobs.AzureBlobProvider,EPiServer.Azure" connectionStringName="EPiServerAzureBlobs" container="mysitemedia"/> </providers> </blob> <event defaultProvider="azureevents"> <providers> <add name="azureevents" type="EPiServer.Azure.Events.AzureEventProvider,EPiServer.Azure" connectionStringName="EPiServerAzureEvents" topic="MySiteEvents"/> </providers> </event> -
Compile and run the solution (Build > Build Solution).
NoteYour local site displays an error message because the site is pointing to Azure after the configuration changes. This is corrected when you publish the project to Azure.
NoteWhen you deploy a website, you may want settings in the deployed application's
web.configto be different from your local developmentweb.config. Instead of changing these settings for your local installation (as done here), you can apply a transformation of the web.config file when you deploy to Azure to avoid breaking your local site.
Step 3 – Publish the website with content
-
Go to Solution Explorer, right-click the project in Visual Studio, and select Publish.
-
Select App Service and Select Existing, then select Create Profile > Publish immediately. The App Service dialog box displays.

-
Click Create.

-
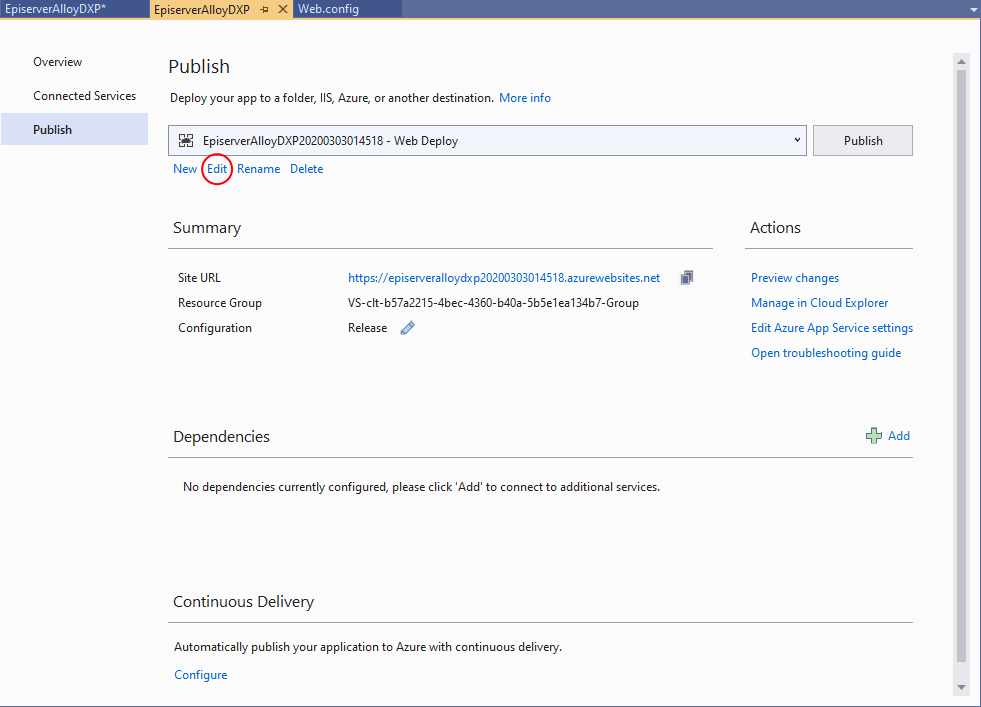
Go to Publish > Edit. Connection should display the imported publish profile settings. No changes are required here.
-
Click Next.

-
Enter the remote connection string to SQL Database by selecting it under EPiServerDB (copy and paste it from the publish profile if it does not display in the list).

-
Enable Update database, and click Configure database updates.
NoteIf this is not the first time you are publishing to the Azure Web App (for example, you are republishing), disable this option because there are already database objects created.
-
Clear the [Auto schema update] option, click Add SQL Script, and go to to the
EPiServer.CMS.Core NuGetpackages (located in[SolutionDir]\packages\EPServer.CMS.Core.N.N.N\tools\)and selectEPiServer.Cms.Core.sql.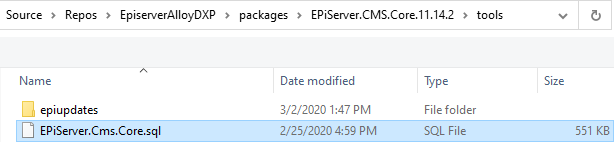

-
Click Save in the Settings section.
-
Click Publish to publish the website with content. The website opens in a browser when finalized. If not, you can access it with the default URL for the environment publishing profiles provided by Optimizely with your DXP setup.
Step 4 – Verify the website
- Go to the default access URLs for the environment, such as
http://[projectNNNNinte].dxcloud.episerver.net. - Log in to the website with the administrator user (see below).
- Verify that the website is working.
When creating an Alloy sample site, you are prompted to add an admin account. However, the system stores these credentials in your local database and does not deploy them to the Web App. You may need to create an admin user to log in after deployment.
If you do not have an admin account, you can create and upload an .aspx file to your Web App and let it create an account. See these example files for ASP.NET Membership and ASP.NET Identity. Select the appropriate one depending on your provider (ASP.NET Identity for an Alloy sample site). Follow the instructions in the file. Use Kudu to upload the file to the website root folder and open the file once in a browser. Log in by adding /episerver to the site URL and using the credentials in the uploaded file.
NoteWhen you have successfully logged in, remove the
.aspxfile from the site in the Web App.
Step 5 – Add Optimizely Search & Navigation
DXP automatically configures an index. You can add Optimizely Search & Navigation (formerly Find) as the default search for your solution and publish the changes to Integration.
-
Go to the NuGet package manager for your project, locate the
EPiServer.Find.Cms_ package, and click Install.
-
Modify
<episerver.framework>to<episerver.framework createDatabaseSchema="true">inweb.config. -
Go to Solution Explorer, right-click the project in Visual Studio, and select Publish.
-
If selected, go to Edit > Publish > Settings and deselect Update database.
-
Click Publish.
-
Verify that the website is working.
Updated about 6 hours ago