Authenticate with Deployment API
Describes how to authenticate with the Deployment API for Optimizely Digital Experience Platform (DXP).
The Deployment API for Optimizely Digital Experience Platform (DXP) authenticates each user request using a pair of client key and a client secret.
You can create one or more credentials with the self-service option in the DXP management portal and associate them with DXP environments. Associating a single credential to one or more environments simplifies the authentication process, providing flexibility for API users.
Add API credentials
For each environment to which you can deploy, you can add one or more credentials that can be used to deploy through API.
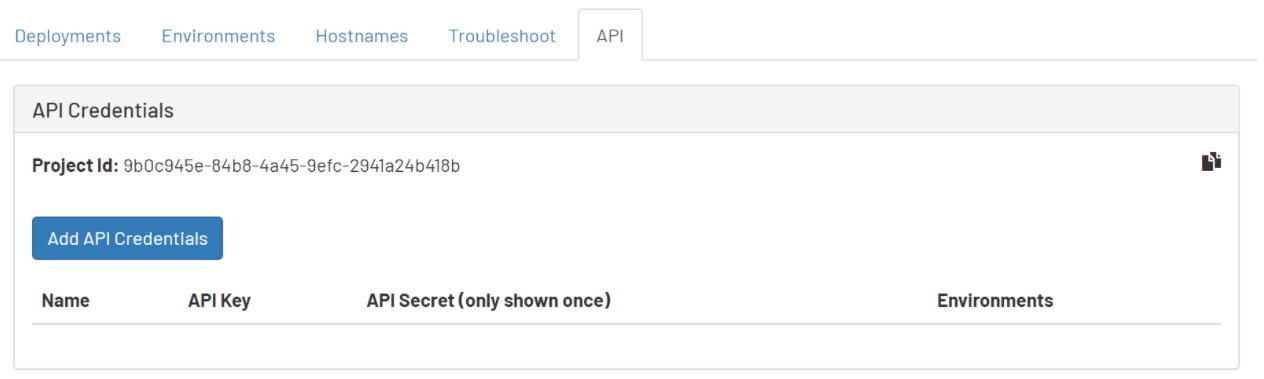
You can add an API credential or retrieve existing credentials on the API tab in the DXP Management Portal.
-
Open the API tab. A list of existing credentials displays.
-
Click Add API credentials .
-
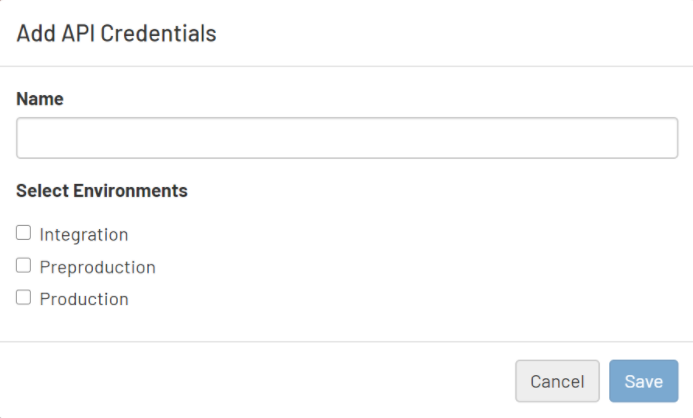
In the window that displays, enter the name for the credential, select applicable environments, and click Save to add an API credential.
 Note
NoteYou can add a duplicate credential for the same combination of environments by using the Name credential as an informatory field in such instances. Also, you must select at least one environment for adding a new credential.
When deploying code from a source environment to a target using Deployment API, the credentials supplied by API request should have access to both source and target environments. For example, when promoting code from a Preproduction environment to Production, the supplied credentials should have been created by selecting Preproduction and Production in the Add API Credentials screen (above).
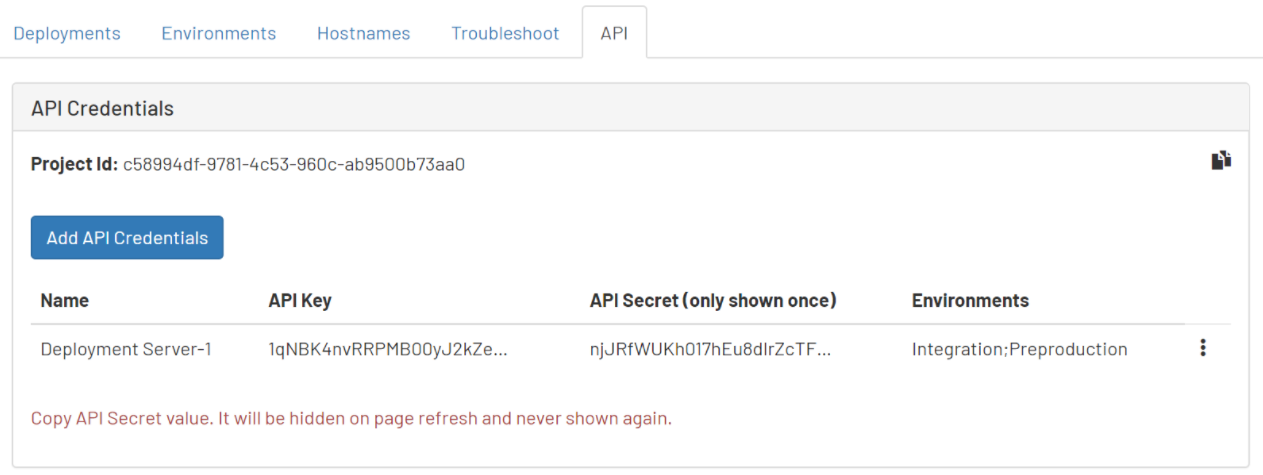
Added credentials display in the credentials list. The API secret value is only shown once when the credential is added until the next page refresh happens. When you refresh the page, the credential secret is removed.
-
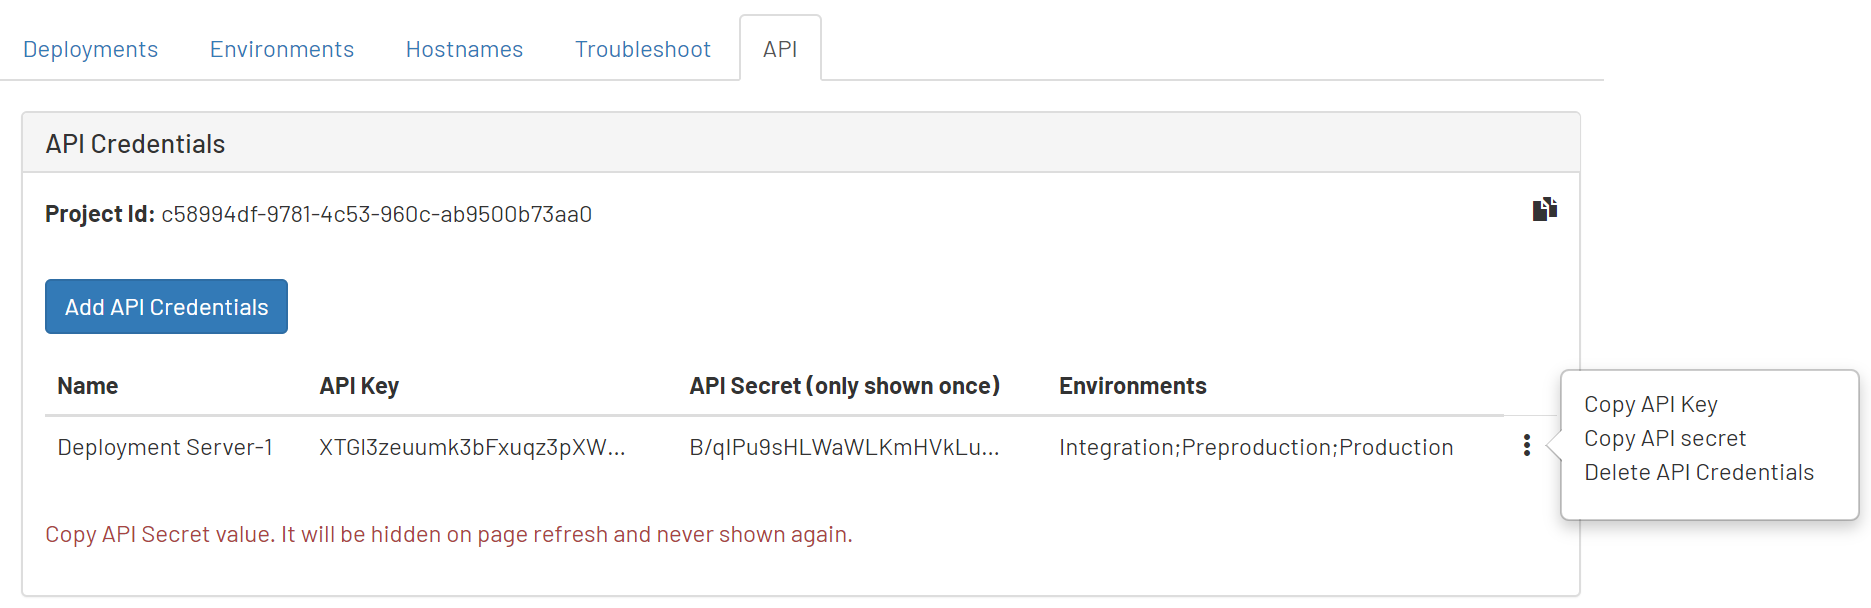
Open each credential's (vertical ellipsis) menu to perform operations such as Copy API Key, Copy API Secret, and Delete API Credential.
 Important
If you lose the API secret or did not copy it as mentioned in the previous step, you need to delete the credential, and add a new credential.
HMAC computation
Before issuing a request, the client must compute a hash-based message authentication code (HMAC) that is unique to that request. The HMAC is computed as follows:
-
A message is assembled by concatenating the following parameters:
- API Key – This is a unique identifier provided to the client upon platform registration.
- HTTP request method – GET, POST, DELETE, and so on, as uppercase.
- HTTP request target – Original request target.
- Timestamp – Time at which the request was created, UTC in milliseconds from Unix epoch.
- Nonce – A random, unique identifier generated by the client.
- MD5 hash of the HTTP request body.
-
The message is hashed using a SHA256-based HMAC algorithm to produce a signature. The hashing mechanism uses the API secret as a cryptographic key.
NoteThe secret is never communicated across the Internet.
-
The bytes representing the signature are converted to a base64 encoded string.
Authorization header
Each request must include an "Authorization" HTTP header, which includes the computed HMAC and other supporting parameters. The value of the header must be in the following format:
epi-hmac <api-key>:<timestamp>:<nonce>:<hmac>
The parameters comprising this header include:
API Key– This is a unique identifier provided to the client upon platform registration.Timestamp– Time the request was created; UTC in milliseconds from Unix epoch.Nonce– A random, unique identifier generated by the client.HMAC– The signature computed for the header.
Updated about 6 hours ago