
Migrate hosting regions on CMS 12 or 13
Describes how to migrate an Optimizely CMS 12 or 13 project to a different hosting region without affecting your live site.
Use the Project Migration tab to move a CMS 12 or 13 project to a different hosting region without affecting your live site.
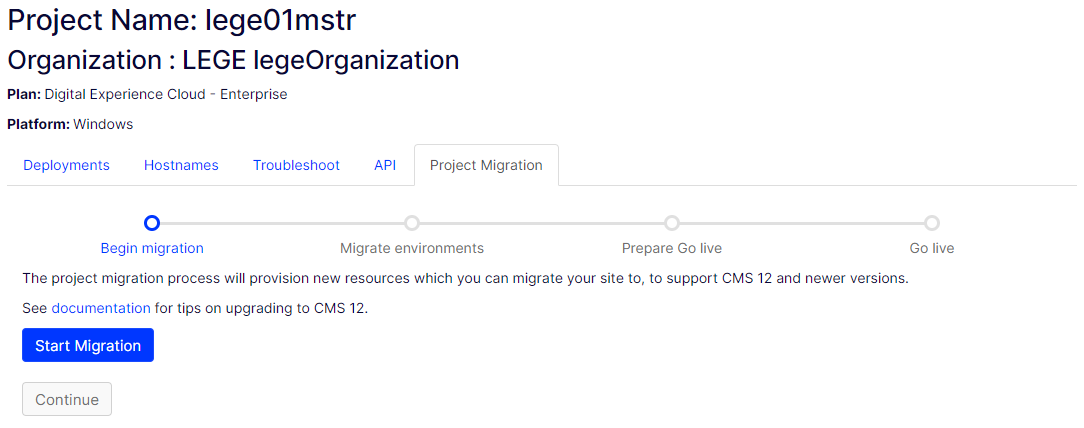
After you initiate the migration process with your Optimizely Customer Success representative, the Project Migration tab displays in your Developer portal project. This migration creates a project in your new region as the migration target.
VPN, certificates, SendGrid, and ADE environments
Review the following considerations before you start a migration:
- If a warning displays about certificates, Virtual Private Networks (VPN), or Advanced Delivery Environments (ADE), contact Optimizely Support to proceed.
- If your project uses the ADE environment, it does not display in Project Migration. Contact Optimizely Support to provision an ADE environment in your new project and migrate content.
- If you use a VPN in the current project, provision and configure a VPN for the target project. Optimizely deletes the old VPN connection when you complete the migration.
- Configure and link a SendGrid service to the new project. Contact Optimizely Support to proceed.
Click Abort Migration to delete the target project at any time if you no longer need it.
Deploy and validate the target environment
-
Generate API keys for your deployment tooling to deploy code packages and test them in the target environment.
-
Deploy the updated code to the environment and validate that it works. Add and configure the
EPiServer.CloudPlatform.Cmspackage as described in Deploy a CMS site. Start with the Integration environment, then continue with Preproduction and Production.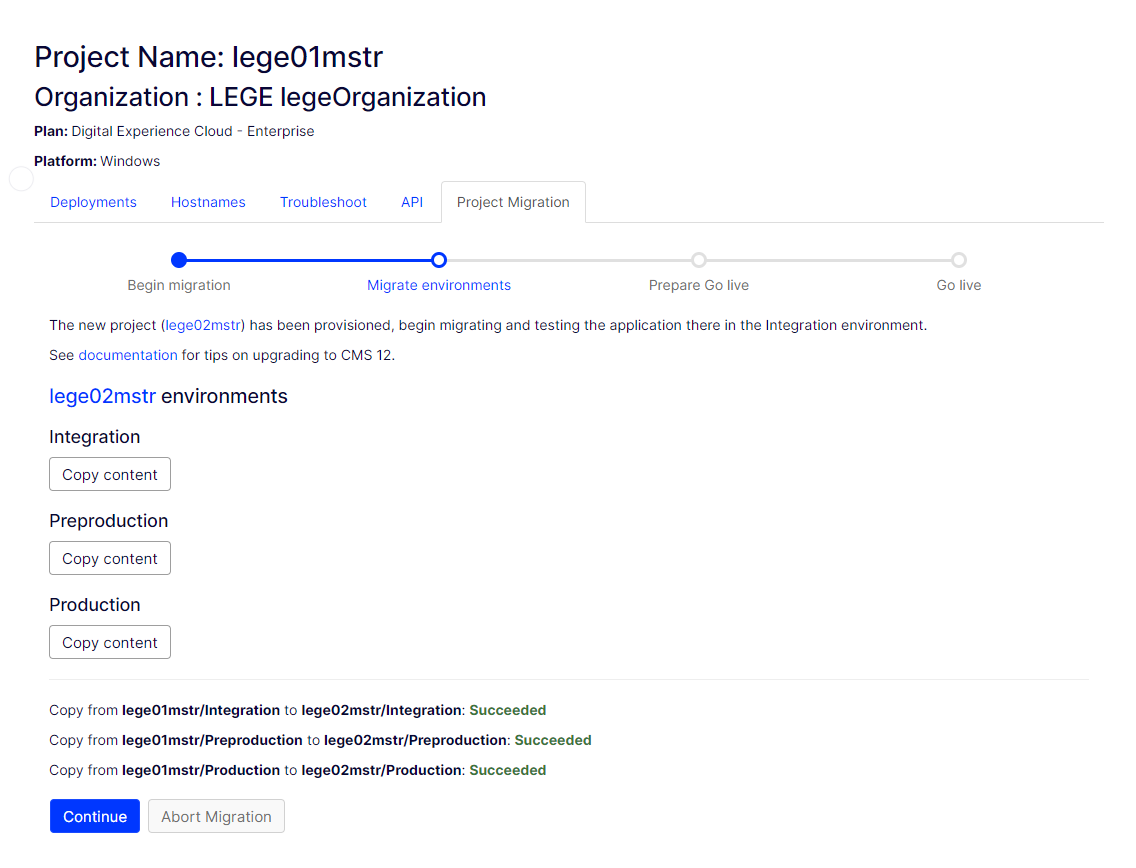
Consider the following options during deployment:
- Copy content from the source to the target project to verify compatibility with the same data. Any environment is valid as the source.
- Copy content during the go-live step to ensure you have the latest data when you finalize the migration.
-
Access tools and logs for troubleshooting in the Azure portal.
-
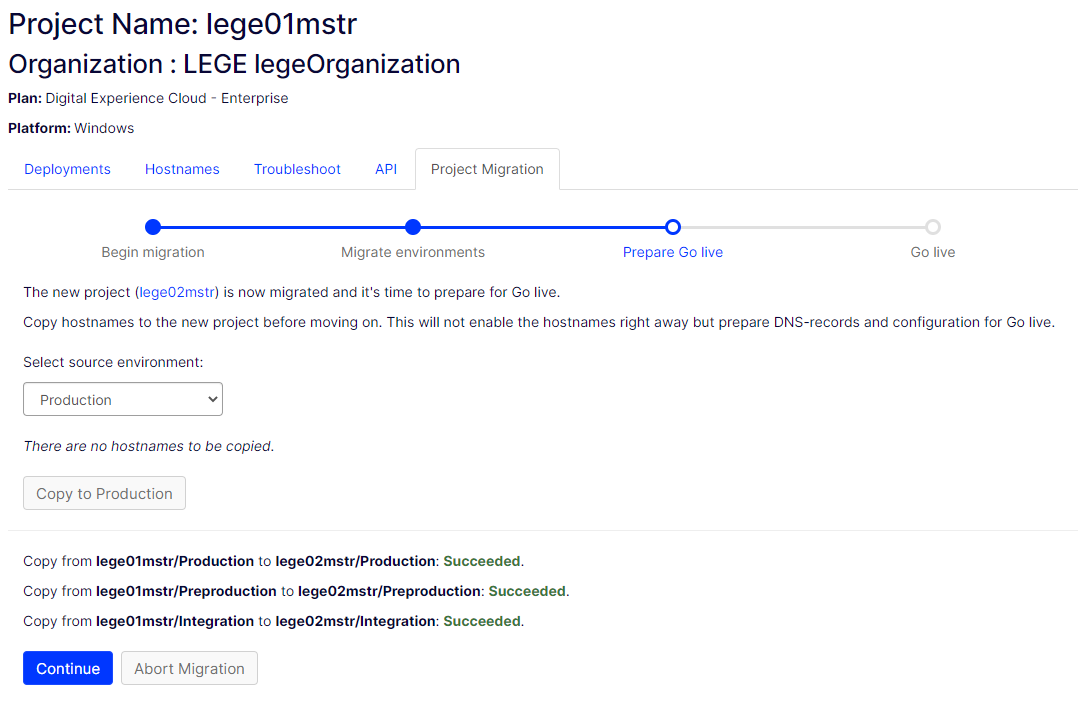
Copy hostnames to the target project to prepare for go-live. The system prepares the hostnames, but they remain inactive. Some older hostnames require DNS verification records to work in the project. Add these records during the following step.
-
Click Check DNS records to verify the DNS record status after you add the records.
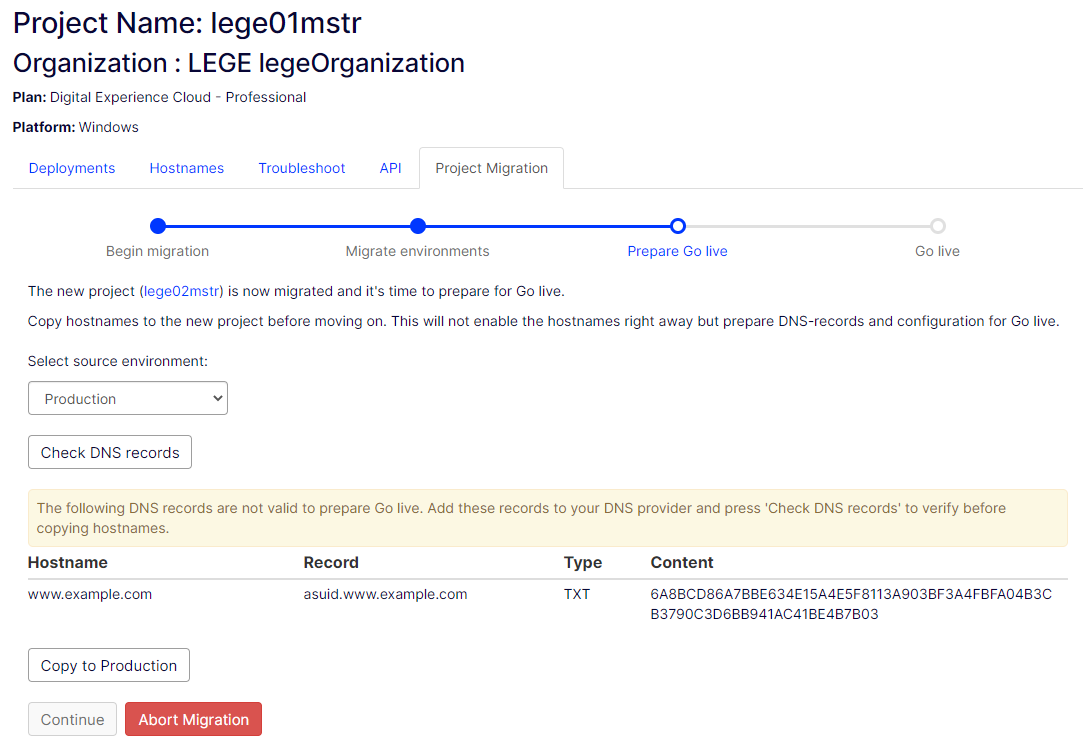
After DNS verification completes, migrate the whole project or migrate hostnames individually.
Migrate the whole project
Sync content from the source to the target project before going live. Pause the environments in the source project during this final phase. Put each environment into maintenance mode to prevent data changes during the swap. After you enter maintenance mode, you cannot abort the migration until you cancel it.
Complete the migrationAfter you migrate the last environment and move all hostnames to the target project, CMS keeps the old environment for 14 days after the last go-live. To extend this period, click Need More Time? in the notification.

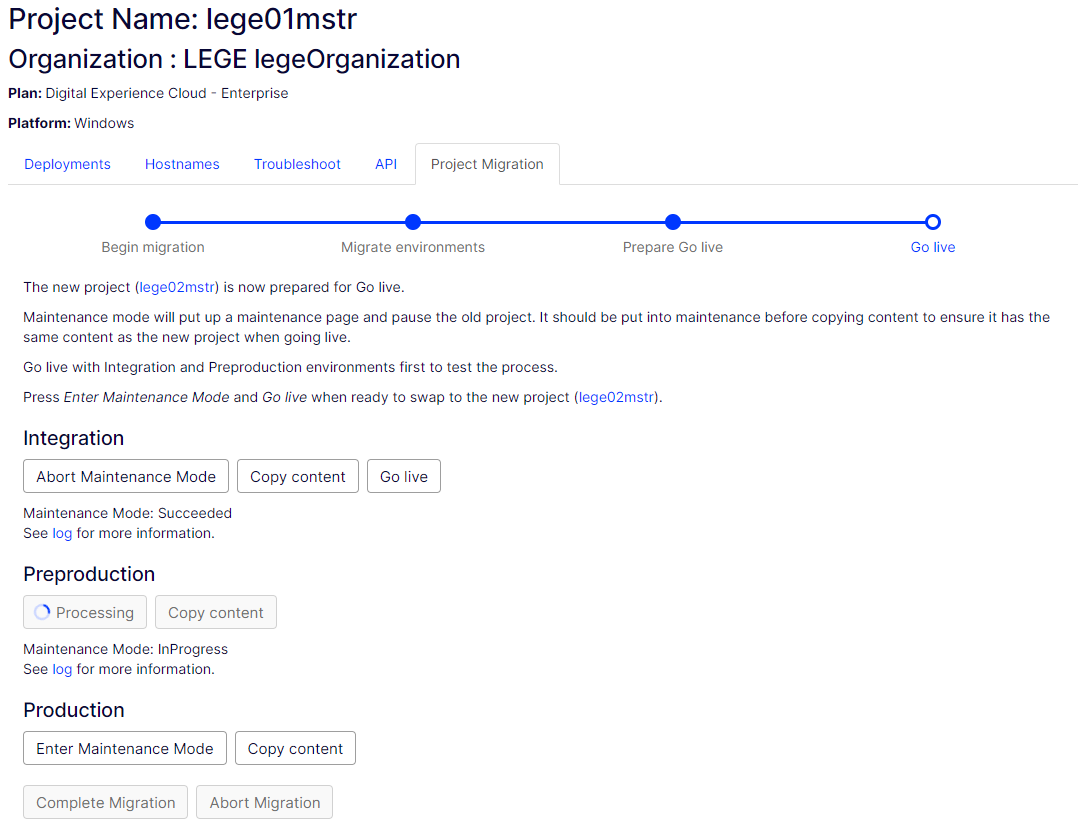
- Activate maintenance mode through the Maintenance Page or by putting the source environment into Read Only mode. Read Only mode must be supported in the source project. Go to Configure database mode for implementation details.
- Click Abort Maintenance Mode if you encounter a problem. After you activate maintenance mode, the environment is ready for go-live.
Test maintenance modeTest maintenance mode and go-live on Integration and Preproduction before proceeding to Production because downtime is possible.
After you enter maintenance mode, follow these steps:
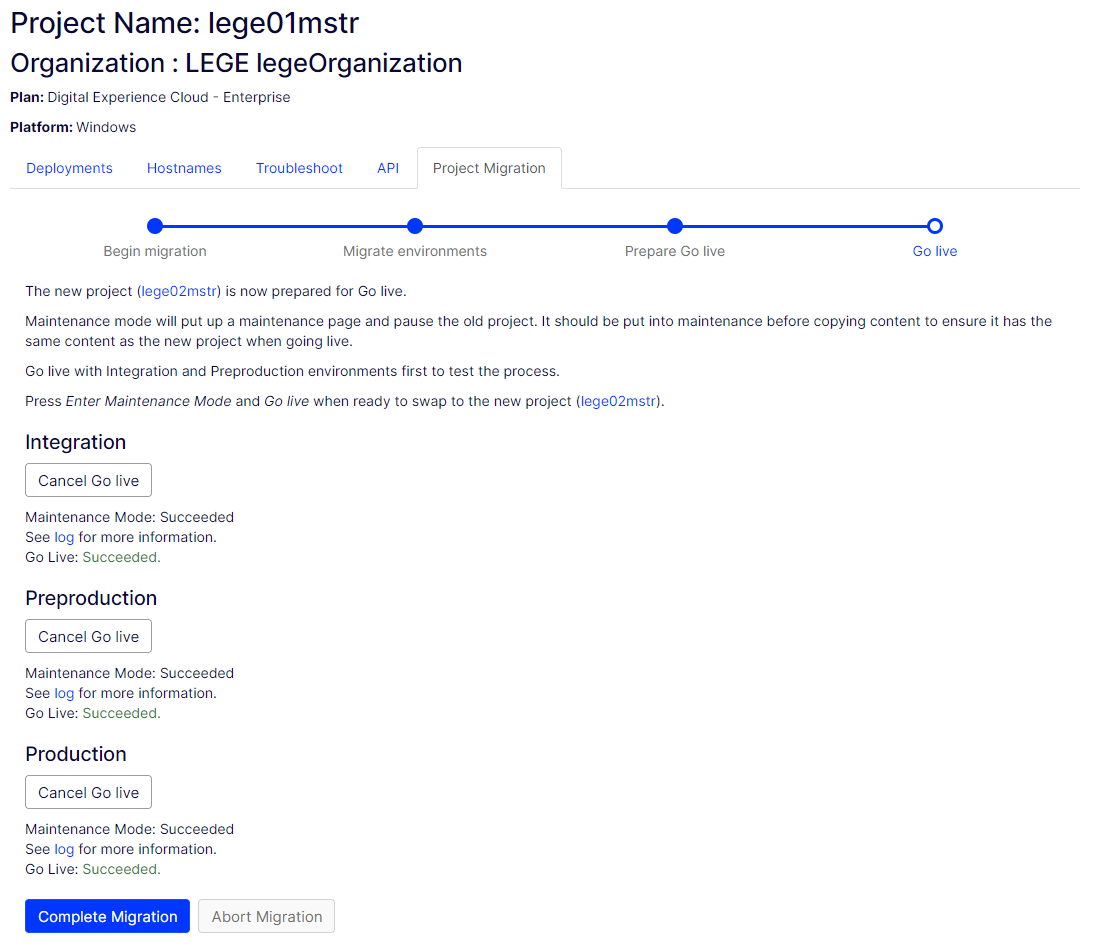
- Click Go Live to make the environment live in the project.
- (Optional) Click Cancel Go Live to reverse the operation if needed.
Migrate hostnames individually
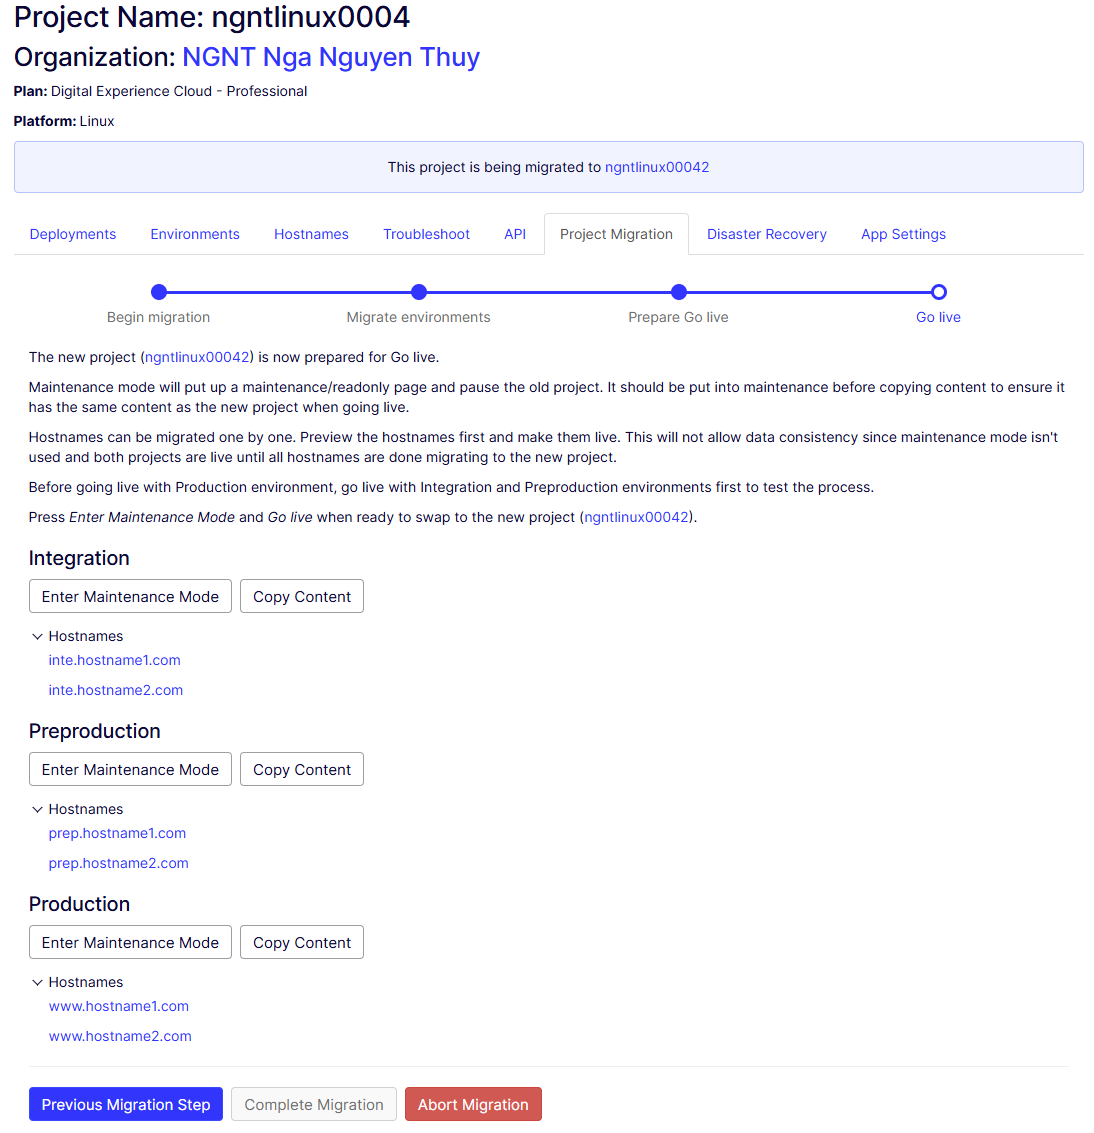
If you do not need data consistency between the two projects, migrate one hostname at a time. With this approach, both projects are live, but some hostnames target the previous project while others are active in the target project.
-
Click a hostname to preview it.
-
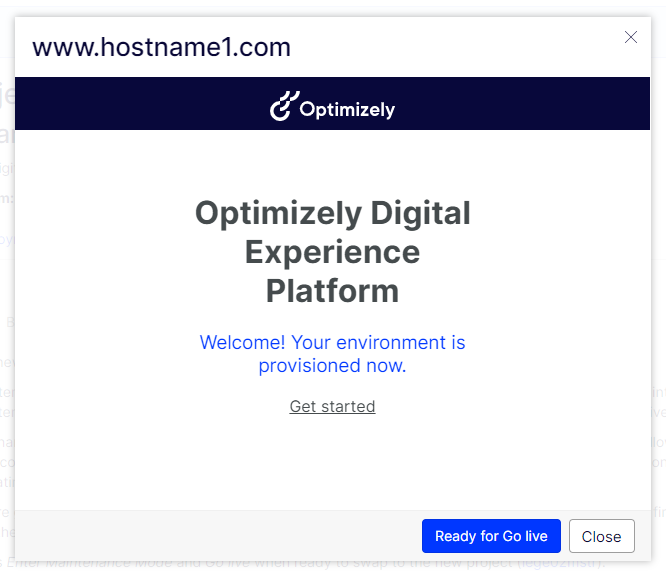
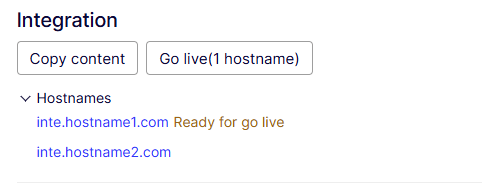
Click Ready for Go live if the hostname renders as expected.
-
Click Go live when all hostnames that should go live display Ready for go live.
-
Verify that the hostnames marked Ready for go live are live in the target project.
-
Click Complete Migration after the Integration, Preproduction, and Production environments are live. The system schedules resources in the source project for decommissioning.
When you migrate hostnames, complete one of the following actions:
- Migrate all hostnames from the previous project to your new project through the migration tool.
- Delete unused hostnames from the old project that you do not want to move. All hostnames must be migrated or deleted to complete the migration.
For headless implementations (Optimizely-hosted or external), deploy to the front end after you complete the CMS migration steps. For Optimizely-hosted front ends, request a front-end environment through an Optimizely Support ticket. Deploy your front-end code and move the hostnames with Optimizely Support.
Click Complete Migration to finish. Optimizely keeps the source project for seven days before removing it. You cannot cancel Complete Migration.
Updated about 1 month ago