Deploy a new Commerce Connect site
Describes an onboarding deployment scenario to create a new Commerce Connect website and deploy the application, database, and content to the Integration environment in Optimizely DXP.
When is this applicable?This is an onboarding scenario for a first-time deployment when you want to set up a site and run development in a cloud environment from the beginning. Through Visual Studio you can deploy an empty database. A new site like this does not require database restore, and the database schema will be created during initial deployment.
Before you start
This topic uses Visual Studio with the Optimizely extensions and publish profiles. However, you can also use other deployment methods.
- See DXP requirements for recommended software versions, tools, and services when deploying.
- See Get started with DXP for deployment information.
Deployment steps
This section describes how to create a website with an Optimizely Content Management System (CMS), Commerce Connect, and Azure and deploy the code and database with content to the Integration environment in DXP. The deployment is done from the deployment API using the publishing profiles provided with your DXP setup.
ImportantA Commerce Connect solution consists of two databases: one for CMS and one for Commerce Connect. So, you need to repeat some deployment steps for each site.
Step 1 – Create Optimizely project
dotnet new epi-commerce-empty-
Go to Tools > NuGet Package Manager > Manage NuGet Packages for Solution to update the website to the latest Optimizely NuGet packages.
-
In the NuGet Package manager:
- Select Updates.
- Select Optimizely Packages in the Package source field to locate the latest updates.
- Enable Select all packages.
- Click Update and confirm the updates.

-
Add a cloud platform to the website. In the NuGet package manager:
- Select Browse.
- Enter Optimizely Azure in the search field.
- Select the
EPiServer.CloudPlatform.Commercepackage. - Select your project.
- Click Install and confirm the installation.

-
To configure the
EPiServer.CloudPlatform.Cmspackage, you need to add this code inConfigureServicesmethod instartup.csfile.ImportantAddCmsCloudPlatformSupportis required for all DXP environments because it is needed for cache events and BLOB storage.public class Startup { private readonly IWebHostEnvironment _webHostingEnvironment; private readonly IConfiguration _configuration; public Startup(IWebHostEnvironment webHostingEnvironment, IConfiguration configuration) { _webHostingEnvironment = webHostingEnvironment; _configuration = configuration; } public void ConfigureServices(IServiceCollection services){ ... services.AddCmsCloudPlatformSupport(_configuration); services.AddCommerceCloudPlatformSupport(_configuration); } }NoteIf you only want to add the
EPiServer.CloudPlatform.Cmspackage to specific environments, you can run something similar to the following code to check the environment.public class Startup { private readonly IWebHostEnvironment _webHostingEnvironment; private readonly IConfiguration _configuration; public Startup(IWebHostEnvironment webHostingEnvironment, IConfiguration configuration) { _webHostingEnvironment = webHostingEnvironment; _configuration = configuration; } public void ConfigureServices(IServiceCollection services){ ... if (!_webHostingEnvironment.IsDevelopment()) { services.AddCmsCloudPlatformSupport(_configuration); services.AddCommerceCloudPlatformSupport(_configuration); } } } -
Run the solution.
Step 2 – Publish the website to create a code package
-
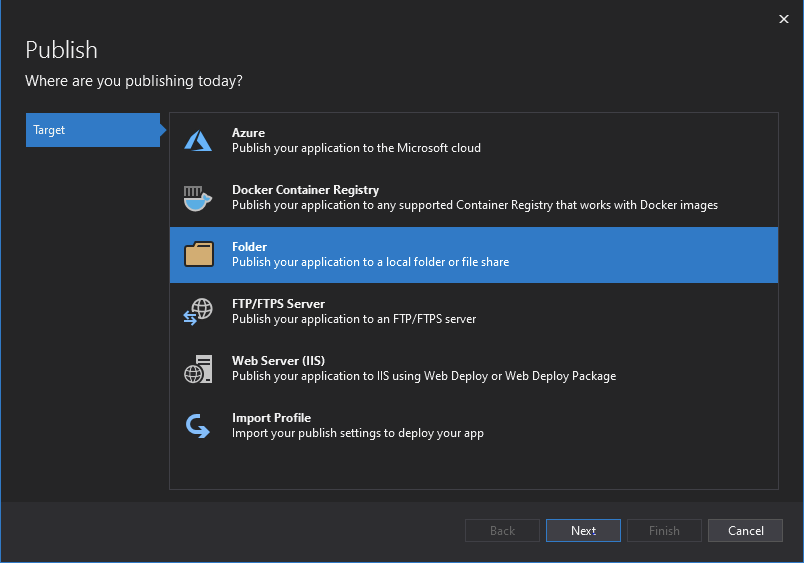
Right-click the project in Visual Studio's Solution Explorer and select Publish.
-
In the Pick a publish target dialog box, select New Folder.
-
Click Next.
-
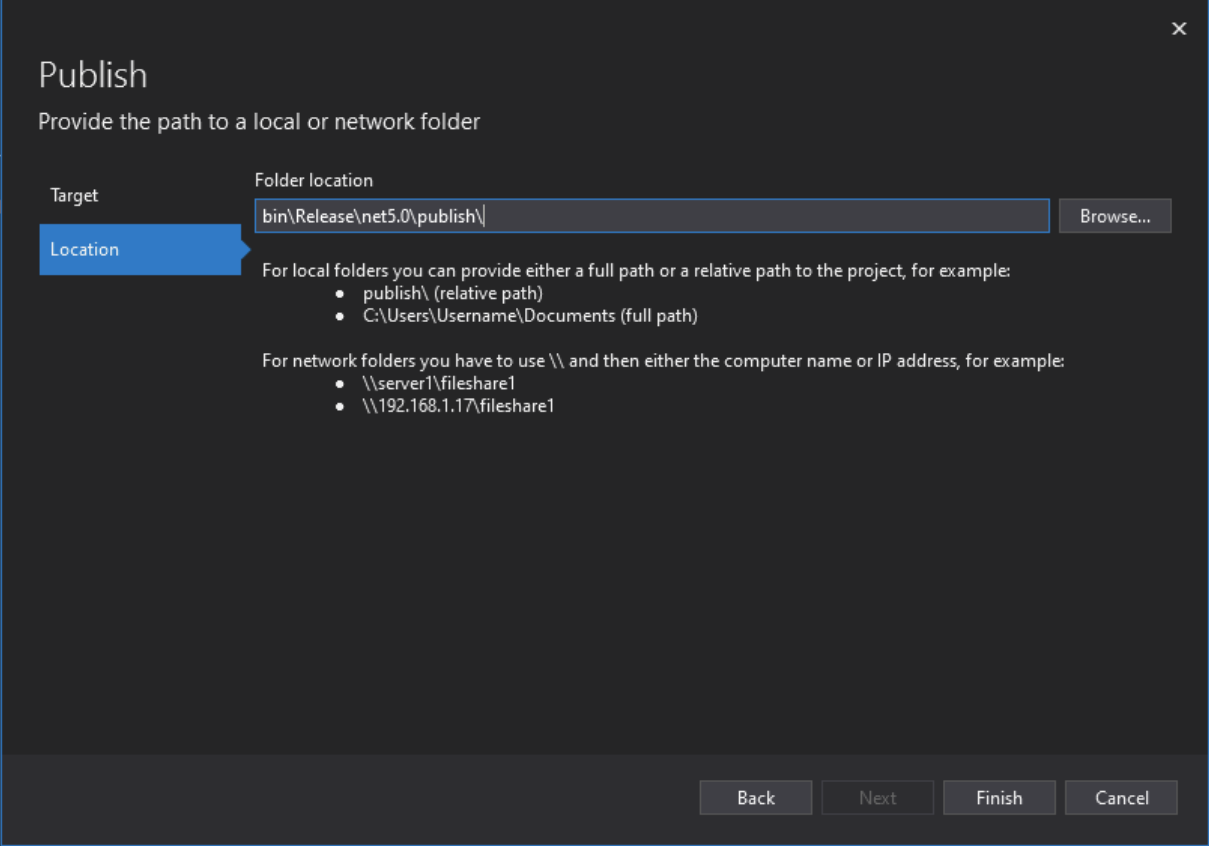
Choose a location or keep the default.
-
Click Finish.
-
Zip the contents of the publish directory and rename to
ProjectName.cms.app.00001.nukpg.
Step 3 – Deploy the package
Get API credentials. See Deployment API authentication.
The following sample uses PowerShell to deploy the code. Any deployment API method will work as long as you deploy a package.
# Connect EpiCloud using credentials from portal
Connect-EpiCloud -ProjectId "projectId" -ClientKey "key" -ClientSecret "secret"

# Upload .NET Core Alloy to blob storage
$sasUrl = Get-EpiDeploymentPackageLocation
Add-EpiDeploymentPackage -SasUrl $sasUrl -Path .\AlloyNetCore.cms.app.0.1.0.nupkg

# Deploy package to environment. This will first build a docker image out of the package and then deploy it to the target environment.
Start-EpiDeployment -DeploymentPackage "AlloyNetCore.cms.app.0.1.0.nupkg" -TargetEnvironment "Integration" -DirectDeploy -Wait
Step 4 – Verify the website
- Go to the default access URLs for the environment, for example
http://\[projectNNNNinte\].dxcloud.episerver.net. - Log in as an administrator to the website.
- Verify that the website is working.
Step 5 – Add Search & Navigation
An index is automatically set up and configured as part of DXP. In this step, you add Optimizely Search & Navigation (formerly Optimizely Find) as the default search for your solution and publish the changes to Integration.
-
In the NuGet package manager for your project, locate the
EPiServer.Find.Cmspackage and click Install.
-
In Solution Explorer, right-click the project in Visual Studio and select Publish.
-
Click Publish.
-
Verify that the website is working.
Updated 5 days ago