Use mutual exclusion
Describes how mutual exclusion and exclusion groups work for Optimizely Full Stack.
By default, your experiments in an Optimizely Full Stack project may overlap with one another so that a single user could be exposed to multiple experiments at the same time. Mutually exclusive experiments help you ensure that a single user cannot be exposed to two different experiments running at the same time by ensuring that users are only exposed to one particular experiment.
For example, imagine that you are running two experiments that test the same algorithm. Users who see both experiments could cause interaction effects that taint your experiment results by behaving differently from users who see each experiment in isolation. To clearly understand the impact of each set of changes, make the two experiments mutually exclusive.
In Full Stack projects, you can make two or more experiments mutually exclusive to each other using exclusion groups. Using exclusion groups doesn't require any change in the SDKs. The Activate, Is Feature Enabled, and Get Variation methods automatically evaluate whether an experiment is in a group and assign users to the appropriate experiment and variation.
Create an exclusion group
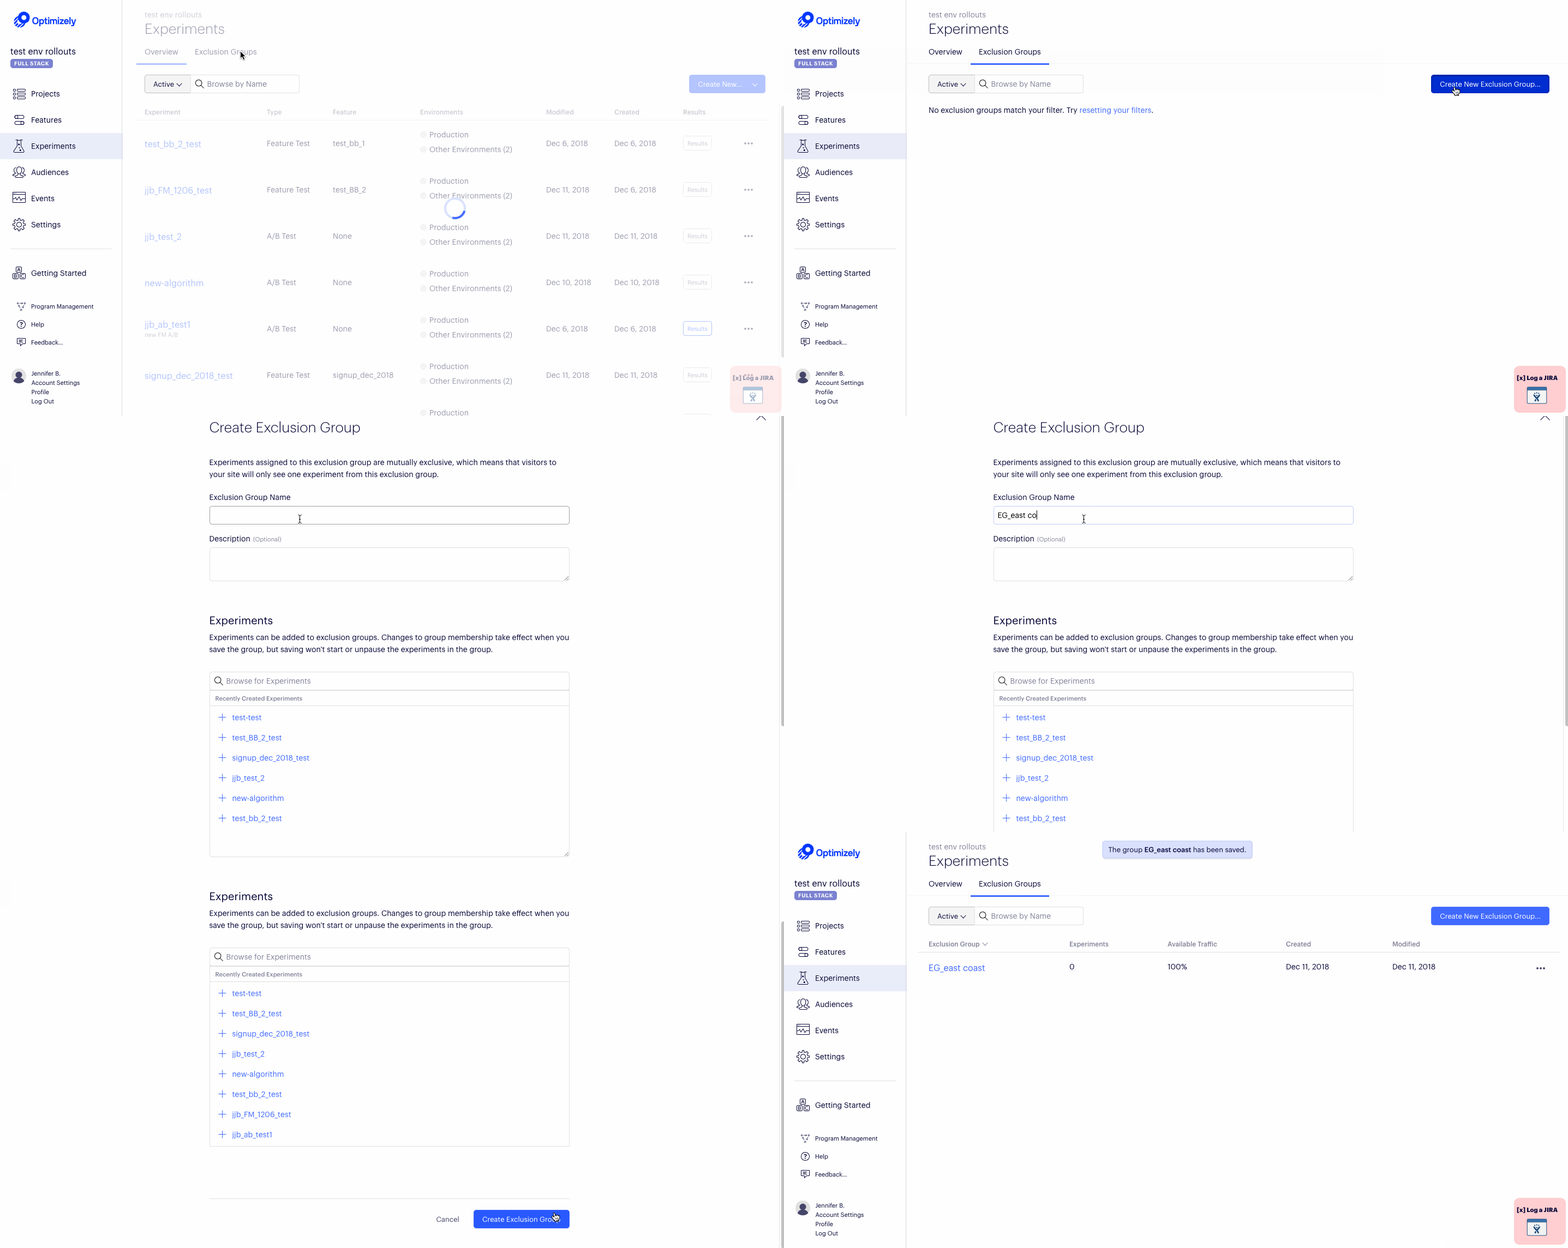
To create an exclusion group:
- Navigate to the Experiments dashboard and select the Exclusion Groups tab.
- Click Create an Exclusion Group.
- Name and describe the exclusion group.
- Click Create Exclusion Group.

Best practice
For reliable results, we recommend as a best practice that you start all the experiments or campaigns in an exclusion group at the same time, after you have added them to the exclusion group. We do not recommend adding or removing running experiments in an exclusion group because it may have unintended effects on your results. For more information, see How bucketing works.
Add an experiment to an exclusion group
To add an experiment to an exclusion group before running your experiments:
- Under Experiments > Exclusion Groups, click the group name.
- Browse for experiments and click the one you want.
- Add the percentage of the exclusion group traffic that should be allocated to the experiment.
- Click Save.
Remove an experiment from an exclusion group
Remove finished experiments from the exclusion group to make space for other experiments.
- Click the remove icon (X) next to the experiment name.
- Click Save.
Important
When you remove an experiment from the group, the experiment retains the latest traffic allocation you set for it in the group.
For example, say you add an experiment to a group and allot 20% of group traffic to it. When you remove it, the experiment's total traffic allocation is still set by default to 20%.
Archive and unarchive an exclusion group
To archive an exclusion group:
- Navigate to Experiments > Exclusion Groups.
- Click the More icon (...) of the exclusion group you want to archive.
- Select Archive.

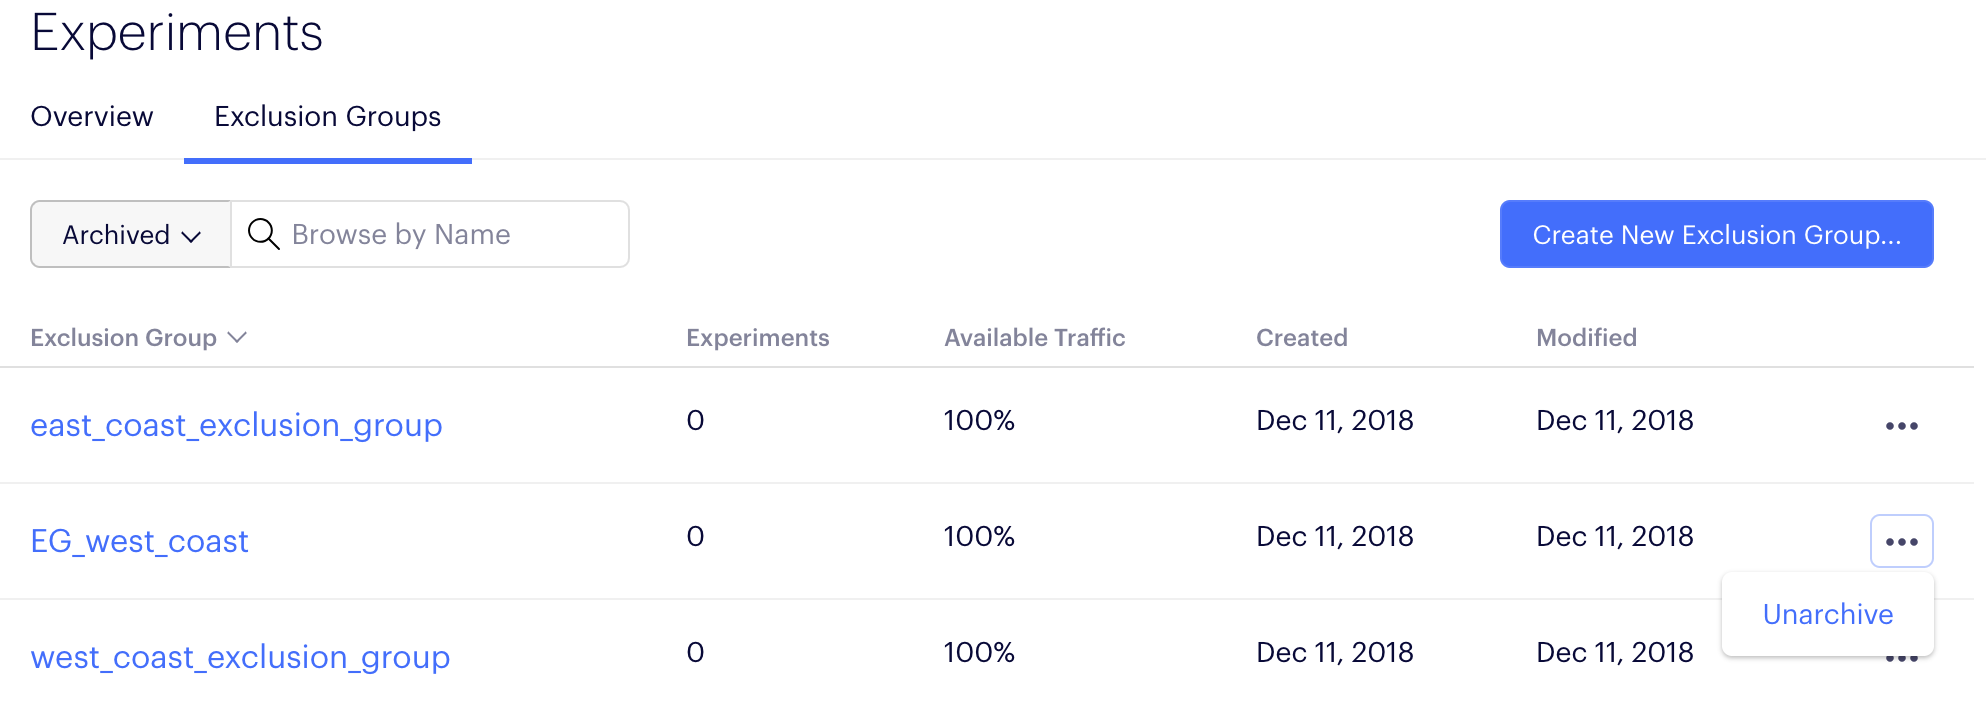
To find archived exclusion groups and unarchive them:
- Navigate to Experiments > Exclusion Groups.
- Filter the list to show your archived exclusion groups.
- Click the More icon (...) of the exclusion group you want to unarchive.
- Select Unarchive.

Bucketing
The following table shows how exclusion groups can interact with other bucketing methods. For more detail, see How bucketing works.
| Bucketing | Comment |
|---|---|
| Exclusion groups evaluate before this user bucketing method: | - Traffic allocation |
| Exclusion groups evaluate after these user bucketing methods: | - Forced variation (setForcedVariation method) - User whitelisting - User profile service - Audience targeting |
Important
If there is ever a conflict over how a user should be bucketed, then the first user-bucketing method to be evaluated overrides any conflicting method. For more information, view the End-to-end Bucketing Workflow on How bucketing works.
Updated over 1 year ago