
Configure Real-Time Segments for Web Experimentation
You can integrate Optimizely Web Experimentation with Optimizely Data Platform (ODP) to use real-time segments from ODP as audiences in your Optimizely Web Experimentation experiments.
Prerequisites
- Have an Optimizely Web Experimentation account
- Have an Optimizely Data Platform (ODP) account
- Add the Optimizely Web Experimentation snippet to your site
- Add the ODP snippet to your site
Important
The ODP snippet is optional if you select the Web • Visitor ID in step 7 below, or if you do not use ODP as your customer data platform (CDP) and are implementing the audience sync version of this integration.
If you add the ODP snippet to your site, it must be before the Optimizely Web Experimentation snippet so that the Optimizely Web Experimentation snippet can pull the ID that the ODP snippet generates.
- Have real-time segments set up in ODP (pre-built and/or custom)
Integration considerations
- Third-party CDP – If you do not use ODP as your CDP, you still need an ODP account but do not have to implement the ODP snippet on your site. To configure the Real-Time Segments for Web Experimentation integration using a third-party CDP, skip to Integrate with other CDPs.
- ODP – If you use ODP as your CDP, continue to Configure Real-Time Segments for Web Experimentation.
Configure Real-Time Segments for Web Experimentation
-
Go to Settings > Integrations > Real-Time Segments in Optimizely Web Experimentation.

-
Toggle the integration status to On.
-
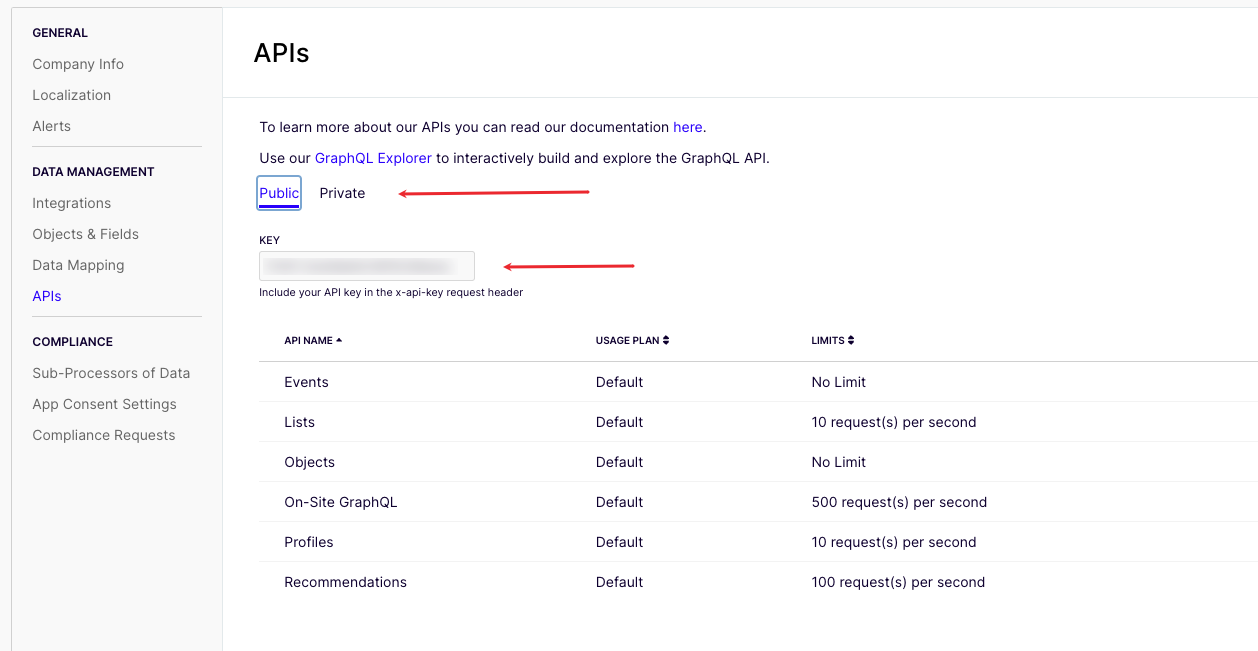
Click You can find your API key in ODP to go to the APIs page in ODP.
-
Copy the KEY value in the Public and Private tabs on the APIs page in ODP.
-
Go back to Optimizely Web Experimentation and paste these values into the corresponding fields (ODP Public Key (required) and ODP Private Key (required)).

-
Select your region from the ODP Host (required) drop-down list.
-
Select your desired User ID:
- ODP • VUID – The ID that ODP assigns to each customer cookie. This is the default ID for the integration.
- Web • Visitor ID – (Default) The ID that your Optimizely Web Experimentation snippet is using. Depending on your snippet settings, this is either the default Optimizely Web Experimentation visitor ID or another ID of your choice.
Important
For help with selecting the User ID, see Select your User ID.
-
Select your desired Confidence Level for the User ID you selected above:
- Low confidence – Low confidence identifiers are unique to a device or browser and may resolve to multiple customers in certain situations. Select this option when there is a weak degree of confidence that your chosen User ID accurately represents a single customer.
Note
Low confidence is the only option available if you select ODP • VUID for your User ID.
- High confidence – High confidence identifiers are unique to an individual customer. Select this option only when you have a high degree of confidence that your chosen User ID accurately represents a single customer.
See Overview of customer identity and resolution for more information.
- Low confidence – Low confidence identifiers are unique to a device or browser and may resolve to multiple customers in certain situations. Select this option when there is a weak degree of confidence that your chosen User ID accurately represents a single customer.
-
Click Save.
Select your User ID
When deciding which User ID to select, consider the following requirements for each option:
ODP • VUID
- You must implement both the ODP and Optimizely Web Experimentation snippets on your site.
- You must have the ODP snippet activated before the Optimizely Web Experimentation snippet.
- You cannot implement the ODP snippet asynchronously.
- This is a low-confidence identifier.
Web • Visitor ID
- You must implement the Optimizely Web Experimentation snippet on your site.
- Implementing the ODP snippet is optional. If you choose not to implement it, just implement the Optimizely Web Experimentation snippet, then skip directly to Use ODP real-time segments in your Optimizely Web Experimentation experiments.
- You can keep your performance budget for your site lower by only implementing one snippet as opposed to implementing both.
- You can select whether you want this to be a low-confidence or high-confidence identifier.
Integrate with other CDPs
Important
If you use ODP as your CDP, do not complete this section. Skip to Use ODP real-time segments in your Optimizely Web Experimentation experiments.
If you use a third-party CDP:
- Configure the third-party CDP integration in ODP.
- Go to Settings > Integrations > Real-Time Segments in Optimizely Web Experimentation.
- Toggle the integration status to On.
- Click You can find your API key in ODP to navigate to the APIs page in ODP.
- Copy the KEY value in the Public and Private tabs on the APIs page in ODP.
- Go back to Optimizely Web Experimentation and paste these values into the corresponding fields (ODP Public Key (required) and ODP Private Key (required)).
- Select your region from the ODP Host (required) drop-down list.
- Select the CDP Audience Sync Implementation checkbox.
- Select an Identifier Type.
Important
Select an identifier type that matches the identifier sent from your CDP to ODP to increase the likelihood of user bucketing. See the user documentation on identifier types for information.
- Enter the Identifier Name.
Use ODP real-time segments in your Optimizely Web Experimentation experiments
Now you can begin building audiences in Optimizely Web Experimentation using ODP's pre-built and custom real-time segments.
Note
The segments on the Customers > Segments page in ODP are not available for use in this integration.
Create an audience using ODP's real-time segments
You can create and add an audience directly in your experiment (described below), or you can create the audience outside of the experiment (using the audience builder) and add it to your experiment later.
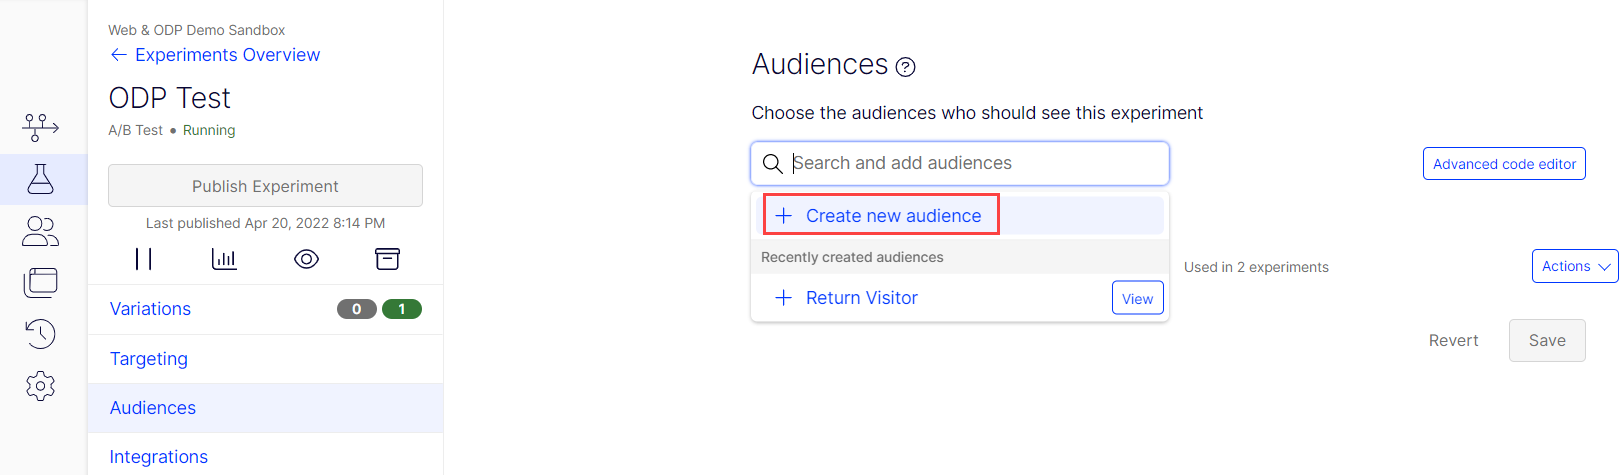
- Go to Audiences in your experiment.
- Select Create new audience in the Search and add audiences drop-down list.
-
Complete the Name (required) and Description (optional) fields.
-
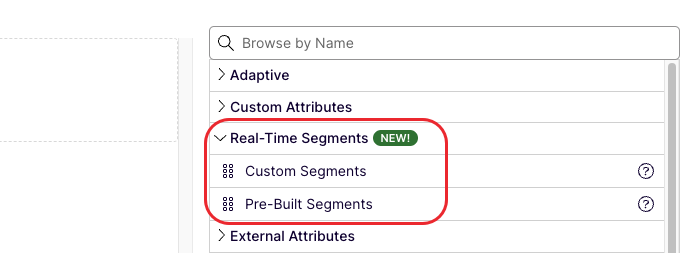
Expand Real-Time Segments in the audience conditions options.
-
Drag and drop either Custom Segments or Pre-built Segments to the Audience Conditions section.
-
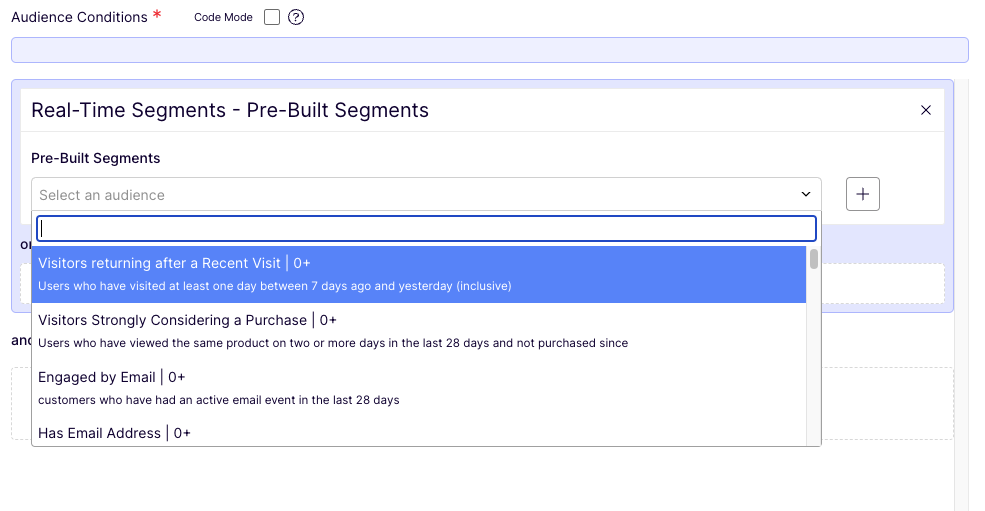
Configure the audience as desired (the real-time segments from ODP display in the Select an audience drop-down list).
-
Click Save Audience.
-
Click Save on the Audiences page.
Note
The Optimizely Web Experimentation snippet does not evaluate ODP real-time segment membership unless you add an audience that uses ODP real-time segments to a live experiment that is being activated. Add the audience you create (using the steps above) to an experiment to see this integration function on a particular webpage.
If you check for a value that could change ODP real-time segment membership mid-session, a page needs to be activated for an experiment using an audience to force re-evaluation (as it normally would for any other audience condition). See order of activation for information.
Troubleshoot the integration
If you do not see the issue you are experiencing below, contact Optimizely Support.
Visitors are not getting bucketed into experiments
API key daily request limit
In rare cases, you may reach ODP's public API key daily request limit of 1 million. This prevents Web Experimentation from bucketing visitors into experiments that use Real-Time Segments for Web Experimentation. Other experiments will continue to work, and experiments using Real-Time Segments for Web Experimentation will resume the next day.
It is extremely improbable that hitting the ODP public API key daily request limit would cause a sample ratio mismatch (SRM). SRM is related to overall traffic allocation to experiments, not traffic distribution among variations.
If you reach the ODP public API key request limit and the API calls fail for the rest of the day, there may be a slight delay in reaching statistical significance. While the time to the conclusion of a test is driven by an accumulation of evidence, it is mainly driven by an accumulation of evidence where there is a consistent, compelling effect to be found. What impacts the speed to a conclusion is more about a thoughtfully designed experiment.
ID not found
You may see a message from ODP that it could not locate a visitor's ID to bucket them. This is not bad and is a possibility in the integration due to what is called a race condition.
When the snippet activates, it evaluates the URL targeting in the project. When the page's targeting conditions are passed, the page activates, and Optimizely Web Experimentation evaluates the experiments for that page and whether a visitor should be in the experiment, based on traffic allocation and audience conditions. If both audience and traffic conditions are passed, the experiment activates.
During bucketing, Optimizely Web Experimentation generates a random ID for the user and sets it as a cookie while activating the snippet. With Real-Time Segments, Optimizely Web Experimentation calls ODP to retrieve the segments for the visitor's ID. If the snippet asks for the ID before the ID has reached ODP, ODP may give an unrecognized ID response because sending data to ODP is slower than the snipper activation. This is called a race condition, where the end result differs based on the order in which concurrent logic is completed.
After receiving this response from ODP, Optimizely Web Experimentation does not attempt to finish bucketing for that experiment or campaign and moves to the next experience.
Network request interception
When an experiment targets Real-Time Segments from ODP, Web Experimentation uses the GraphQL API from ODP to fetch the visitor's RTS membership. As with any other third-party audience integrations, Web Experimentation waits for a response for a maximum of 2 seconds. If the API response does not return within 2 seconds, the audience is evaluated as false, and the visitor is not bucketed into the experiment.
On some websites, your JavaScript framework may intercept the network requests that Web Experimentation initiates. This interception adds overhead and can delay the network request and response, causing Web Experimentation to receive the response from ODP after 2 seconds.
To prevent this, Optimizely Support can enable sandboxing in the Web Experimentation project. This is a project-level setting not directly accessible to you. When enabled, the snippet adds an empty iframe to the <head> section of your website. The API requests to third-party audience integrations are then passed through that iframe, which should prevent them from being intercepted. This lets the responses get back to Web Experimentation in time to evaluate the audiences correctly.
To see if this issue is occurring, open Developer tools > Network. Filter the network logs for graphql, and select the Initiator tab. The initiator stack should show the snippet. If the stack shows another script, this indicates the request from the snippet was intercepted, and delays may occur. Contact the Support team for further investigation and possible enabling of the Sandboxing setting.
Check which real-time segments you are assigned to in ODP
When Real-Time Segments for Web Experimentation is enabled, Optimizely Web Experimentation makes a request to the ODP GraphQL API to retrieve the current visitor's assigned real-time segments. To inspect the data returned by that call, open the developer console and check the value of this attribute:
window["optimizely"].get("visitor")['vendor.odp']['audiences']
The content of this array should be populated with any real-time segments to which you are currently assigned.
If you do not see any real-time segments in the odp.audiences[] array, first check to see if you are a member of the returning_visitors real-time segment by navigating away from the page and returning to it. If you see yourself in the returning_visitors real-time segment on your second visit to the page, the problem most likely is that you do not belong to any other segments, or those segments have not been enabled for that page.
If, however, you are not in the returning_visitors real-time segment, it is likely that the ODP tracker is disabled. This often happens when a visitor deletes their browser cookies mid-session. In this case, the ODP tracker needs to reacquire a tracking cookie before it can identify the user. If the ODP JavaScript snippet cannot find the cookie, ODP returns an empty array of audience memberships. You can reset the cookie by logging out and back into the site.
Updated about 2 months ago