Integrate Clarity
Integrate Clarity with Optimizely Web Experimentation to view your experiment results and analyze how users interact with your website.
NoteThis is a third-party integration and is not an Optimizely subprocessor. See Optimizely's Third-Party Add-Ons & Platform Integration Terms.
NoteYou must have an account set up for Clarity. Sign up for an account if you do not already have one. When prompted, select the installation method you prefer.
It can take up to 2 hours for your dashboard to be created after you select your installation method.
Configure Clarity
- Log in to Optimizely.
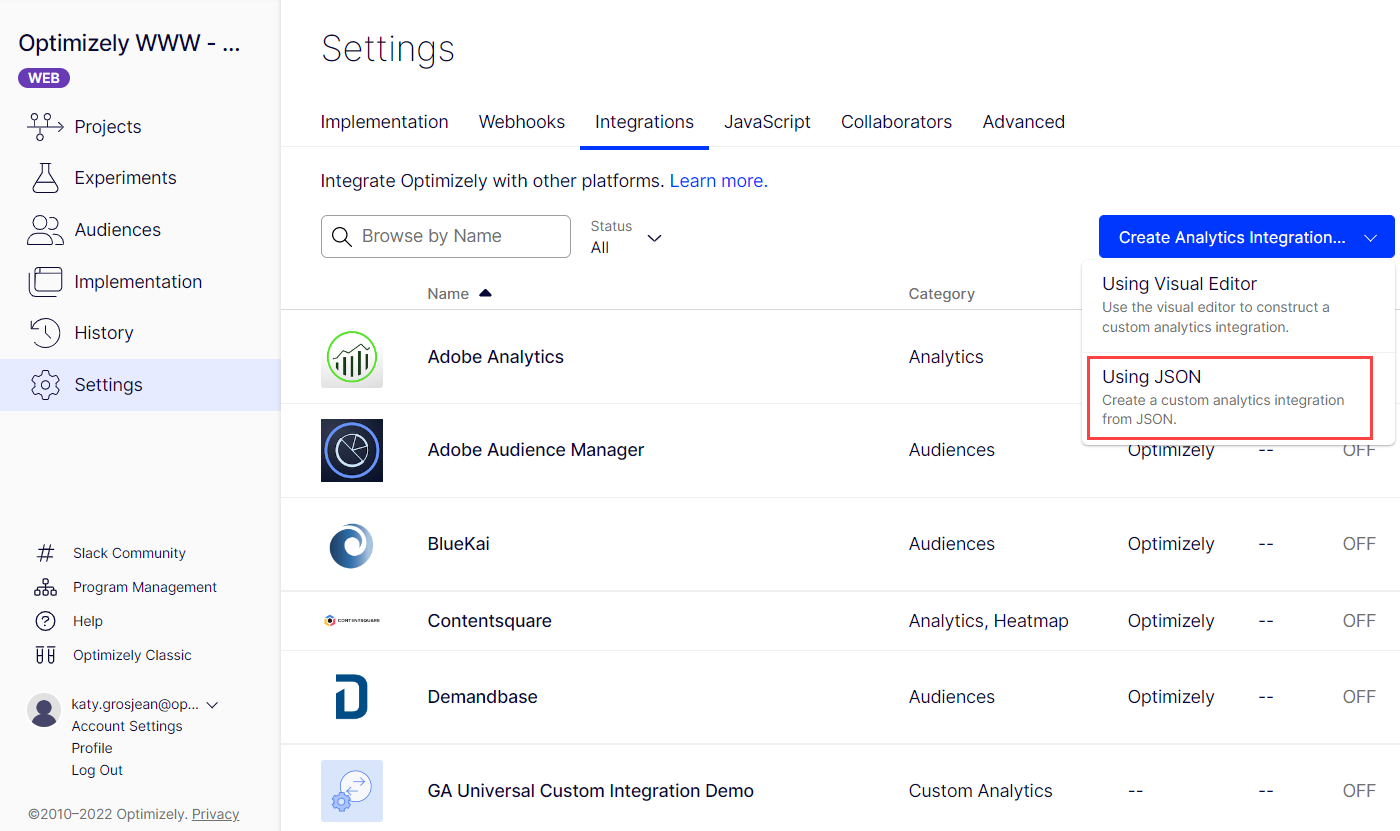
- Go to Settings > Integrations.
- Expand the Create Analytics Integration drop-down list and select Using JSON.

- Paste the following code into the JSON Code field:
{
 "plugin_type": "analytics_integration",
 "name": "Custom Clarity integration",
 "form_schema": [],
 "description": "",
 "options": {
   "track_layer_decision": "var state = window['optimizely'].get('state');\nvar campaignObject = state.getDecisionObject({'campaignId':campaignId});\n\nif(campaignObject !== null){\n var utils = window[\"optimizely\"].get(\"utils\");\n utils.waitUntil(function() {\n \treturn typeof(clarity) === 'function';\n }).then(function() {\n   console.log('clarity is finally a function. Sending now.');\n   clarity(\"set\", \"Optimizely\", campaignObject.experiment +' - ' + campaignObject.variation);\n });\n}\n"
 }
}- Click Create Extension.
NoteA console log in the code above displays the following message in the console of a browser: "Clarity is finally a function. Sending now."
Once you see this, you can remove this line of code or comment it out by going to Settings > Integrations > Custom Clarity integration > Edit.
Turn on the app
The custom app (integration) that you just added displays on the Settings > Integrations page. To turn it on, select Custom Clarity integration from the list and set the Enable Integration field to On.
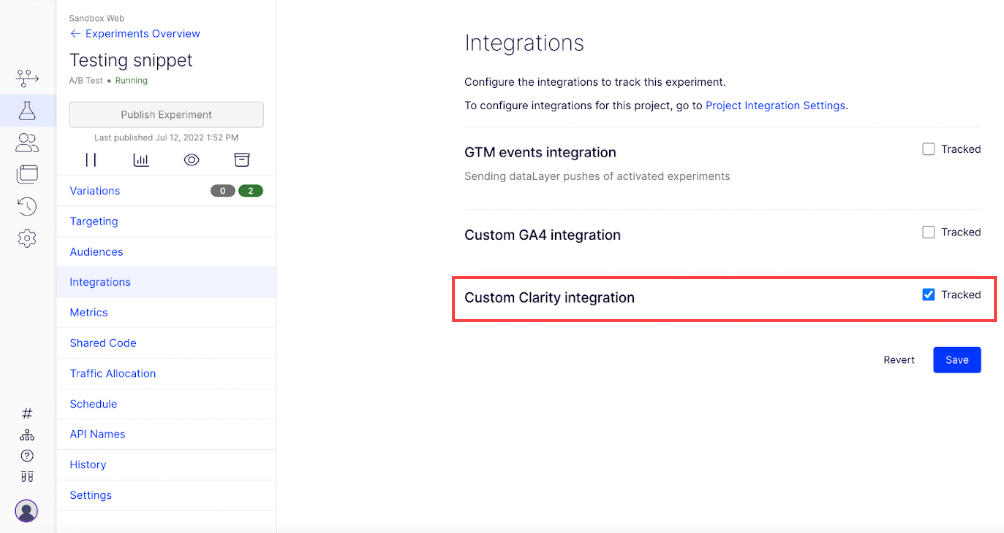
Add the app to an experiment
You can add the app to specific experiments, shown in the image below:

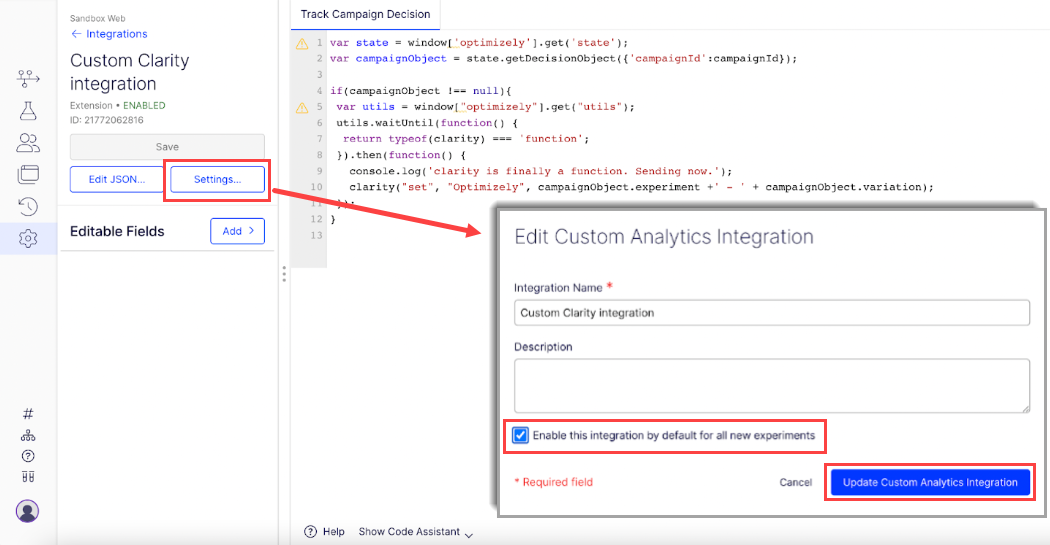
You can also have it automatically added to all new experiments by doing the following:
- Go to Settings > Integrations > Custom Clarity integration.
- Click Edit.
- Click Settings. The Edit Custom Analytics Integration window displays.
- Select Enable this integration by default for all new experiments.
- Click Update Custom Analytics Integration.

NoteThis turns the integration on for all newly created experiments going forward but not for those that you have already created.
Use the experiment data in Clarity
- Go to your Clarity dashboard and select the project/site in which you are interested.
- Go to Filters > Customized filters > Customized tags.
- Expand Select tag and select Optimizely.
- Select your desired experiment/variant.
- Click Apply. This gives you a dashboard overview of the information for that specific experiment/variant.
- Click Save as segment to save this custom filter as a segment.
NoteIf you do not see any names (only numbers), your Optimizely project is masking this information from third-party tools. You can disable this in your project settings.
Updated about 13 hours ago
