List attributes
How to create list attributes, which let you target users who are part of an audience you have already defined somewhere outside of Optimizely Web Experimentation.
With list attributes, you can target users who are part of an audience you have already defined somewhere outside of Optimizely Web Experimentation. To do this, you import custom lists of users and then create audience conditions based on those lists. Learn more about how to set up and use List Attributes.
To target an experiment with list attributes, you must,
- Create a list, indicating where user IDs are stored in your web environment.
- Upload data to populate the list.
- Create an audience that uses your list in a condition.
- Attach the audience to an experiment.
List attributes can be created through the Optimizely application or programmatically using the REST API.
Remember, your terms of service prohibit you from sending any personally identifiable information (PII), such as names, Social Security numbers, email addresses, or any similar data) to Optimizely's services or systems through List Attributes or any other feature.
Data upload
Once you have created a list, you need to upload data before you can target users with a matching ID. Files uploaded through Direct Upload or Amazon S3 must have the following format:
- CSV or TSV file.
- One ID per row.
- One column of data (the first column populated with IDs).
- No header row (for example, the first row should contain an ID).
A properly formatted CSV file containing UUID-style IDs would look something like the following if viewed in a spreadsheet:

Uploading fresh data to an existing list overwrites the previous data contained in the list.
You have many options for uploading list data.
Direct upload
You can upload small list files (less than 5 MB) directly through the Web Experimentation interface. This is a good option when you want to test out the feature or build a one-off list that does not need to be updated frequently in the future. See Configure list attributes.
Amazon S3
Optimizely provisions an Amazon S3 folder for each list attribute you configure in the Web Experimentation app. After you upload a file, Optimizely parses it and populates your list with its data. Files uploaded through S3 have no size limit.
You can upload your files in several ways. The simplest approach is to use an S3 client application such as Cyberduck.
Upload with Cyberduck
After you have downloaded and installed Cyberduck, follow these steps to upload a file:
- Retrieve the list's
AWS Access Key,AWS Secret Key, andS3 Import Pathfrom the Web Experimentation interface (Audiences > Attributes > Your List > More Actions > Data Upload). - Launch Cyberduck and create a new Bookmark (Bookmark menu > New Bookmark).
- Enter a descriptive name for the list and your
AWS Access Key. - Click More Options to enter the
S3 Import Path.

NoteCyberduck requires the full S3 import path, including both the
optimizely-importbucket and the givens3_path. For example, ifdcp/567/678was thes3_path, you would need to use/optimizely-import/dcp/567/678.
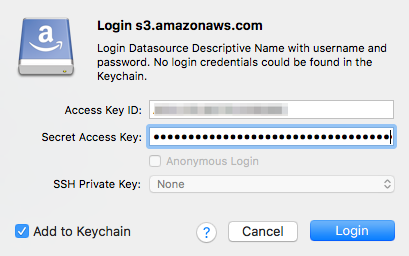
- View your bookmarks and double-click to connect to the S3 bucket. Cyberduck prompts you to enter the
AWS Secret Keyfrom Step 1.
You are now connected to your list's S3 bucket.
- Drag and drop the files to be uploaded using the Cyberduck interface.
This process may change in future versions of Cyberduck. See the official Cyberduck website for current documentation.
Upload programmatically
You can also upload files programmatically using the Amazon Web Services (AWS) Command Line Interface, an available AWS SDK, or an available library.
Retrieve the AWS credentials and S3 path from the list attribute endpoint.
After uploading a file to S3, check the Upload History to confirm that your file has been processed. If you need to upload an updated version of your file, make sure that any files with the same name have already been processed. Unprocessed files with the same name in the same S3 path might be processed out of order, which would prevent your updates from being detected.
REST API
You can upload list data by making a PATCH request to the list attributes endpoint. To do this, format your list as a comma-separated string and pass it as the value of the optional list_content key.
Updated 20 days ago