Create custom integration for GA4
Create a custom integration with Google Analytics 4 (GA4) to capture and analyze traffic data across your websites and applications.
NoteThis is a third-party integration and is not an Optimizely subprocessor. See Optimizely's Third-Party Add-Ons & Platform Integration Terms.
ImportantStarting July 1, 2023, GA4 will replace standard Google Universal Analytics (UA), which will no longer process data. For more information, see Introducing Google Analytics 4 (GA4).
NoteThis article describes a custom GA4 integration option. For our built-in GA4 integration, see Integrate Google Analytics (GA4).
If you use Google Analytics to monitor your project’s traffic, you can view the results of your Optimizely experiments alongside the rest of the data that Google Analytics collects.
You can set up the custom integration between Optimizely Web Experimentation and Google Analytics 4 (GA4) without Google Tag Manager (GTM). Optimizely does not support this method for Optimizely Performance Edge.
To set up the custom GA4 integration using GTM for Optimizely Web Experimentation or Optimizely Performance Edge, see this article.
Configure GA4 in Optimizely Web Experimentation
Step 1. Add script in Optimizely Web Experimentation
- Go to Settings > Integrations.
- Expand the Create Analytics Integration drop-down list and select Using JSON.

- Copy the following code and paste it in the JSON Code field:
{ "plugin_type": "analytics_integration", "name": "Custom GA4 integration", "form_schema": [], "description": "", "options": { "track_layer_decision": "var state = window['optimizely'].get('state');var campaignObject = state.getDecisionObject({'campaignId':campaignId});if(campaignObject !== null){var utils = window['optimizely'].get('utils'); utils.waitUntil(function() {return typeof(gtag) === 'function';}).then(function() {console.log('gtag is finally a function. Sending now.');gtag('event', 'optimizely_decision_web', {optimizely_experiment: campaignObject.experiment,optimizely_variant: campaignObject.variation});});}" } } - Click Create Extension.
NoteThe code above contains a console log that will write the following in the console of a browser: "gtag is finally a function. Sending now." Once you verify that this displays, you can remove this line of code or comment it out. To edit the code, go to Settings > Integrations > Custom GA4 integration > Edit.
Step 2. Install GA4 on your website
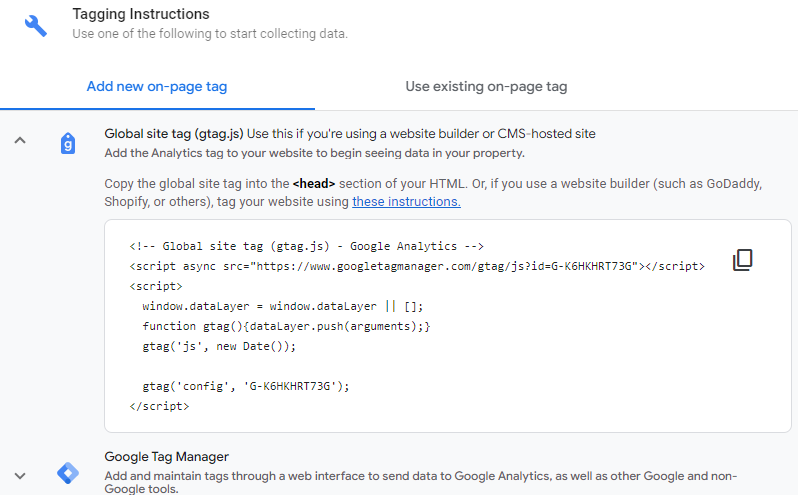
Install Google Analytics 4 (GA4) directly on your website. For help with this, complete the following steps in Google Analytics to find their data tagging instructions:
- Open Google Analytics
- Go to Admin > Data Streams and open your website’s Web stream details page.
- Go to Tagging Instructions > Global site tag (gtag.js) to find the instructions for adding GA4 to your website.

Your Optimizely Web Experimentation data immediately starts syncing to GA4 (no further steps required).
Updated about 1 month ago