
Manage data syncs
Sync the data you imported to Optimizely Connect Platform (OCP) with other Optimizely products.
Beta
Optimizely Connect Platform (OCP) is in beta and currently only works with Optimizely Graph in Optimizely Content Management System (CMS) (SaaS) and CMS (PaaS).
After you import data into the Optimizely Connect Platform (OCP) database, a non-technical user can use the Sync Manager in the OCP user interface (UI) to map data from the OCP database to Optimizely products and initiate an automated data sync that runs until paused or deleted.
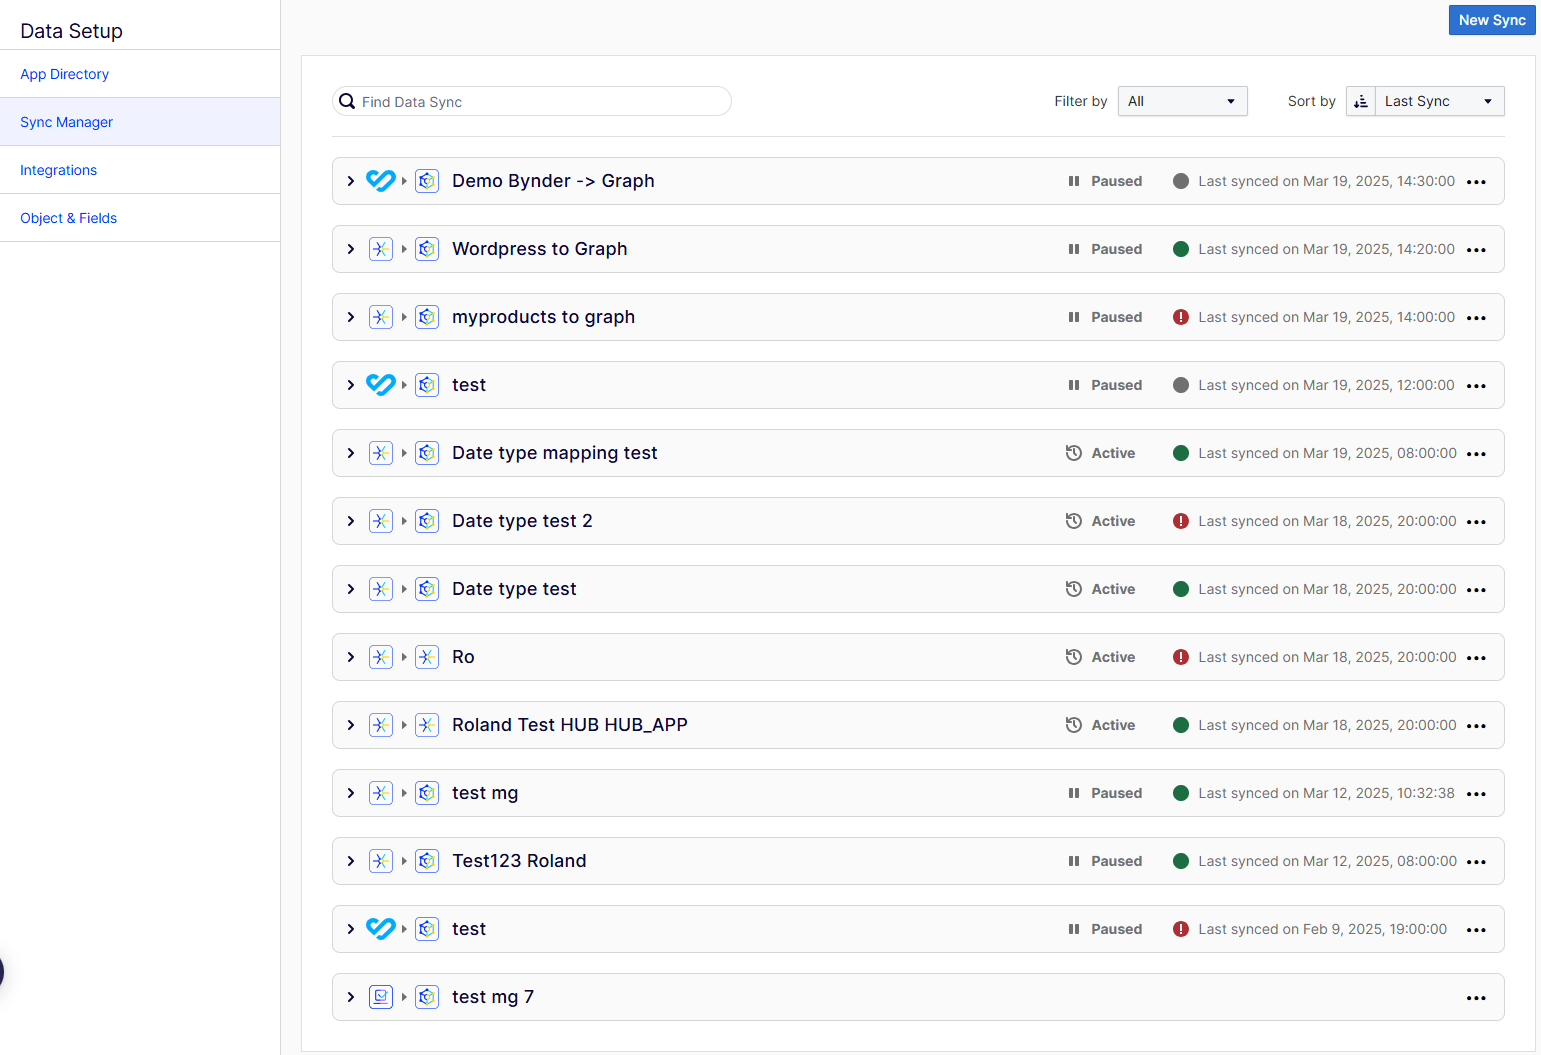
You can have many active data syncs moving data between systems and keeping data up-to-date and actionable. Use the Sync Manager to create data syncs, view existing data syncs and their state of activity (active, paused, completed, error), view error details, make changes to existing data syncs, and view key metrics like records synced and failed records.
Data sync options
Each data sync has the following options when you click More (...):
- Executions – View all the sync details, including the date and time stamp of each individual sync, how long the sync took, and any error messages that occurred during a sync.
- Trigger now – Initiate an immediate data sync.
- Start – Only available for paused data syncs. Click Start to re-enable the data sync according to the existing sync settings.
- Edit – Make edits to a data sync, like changing the name, field mappings, sync schedule, and so on.
- Delete – Delete a data sync. This is permanent and cannot be undone.
Create a data sync
-
Go to Data Setup > Sync Manager in the OCP UI.
-
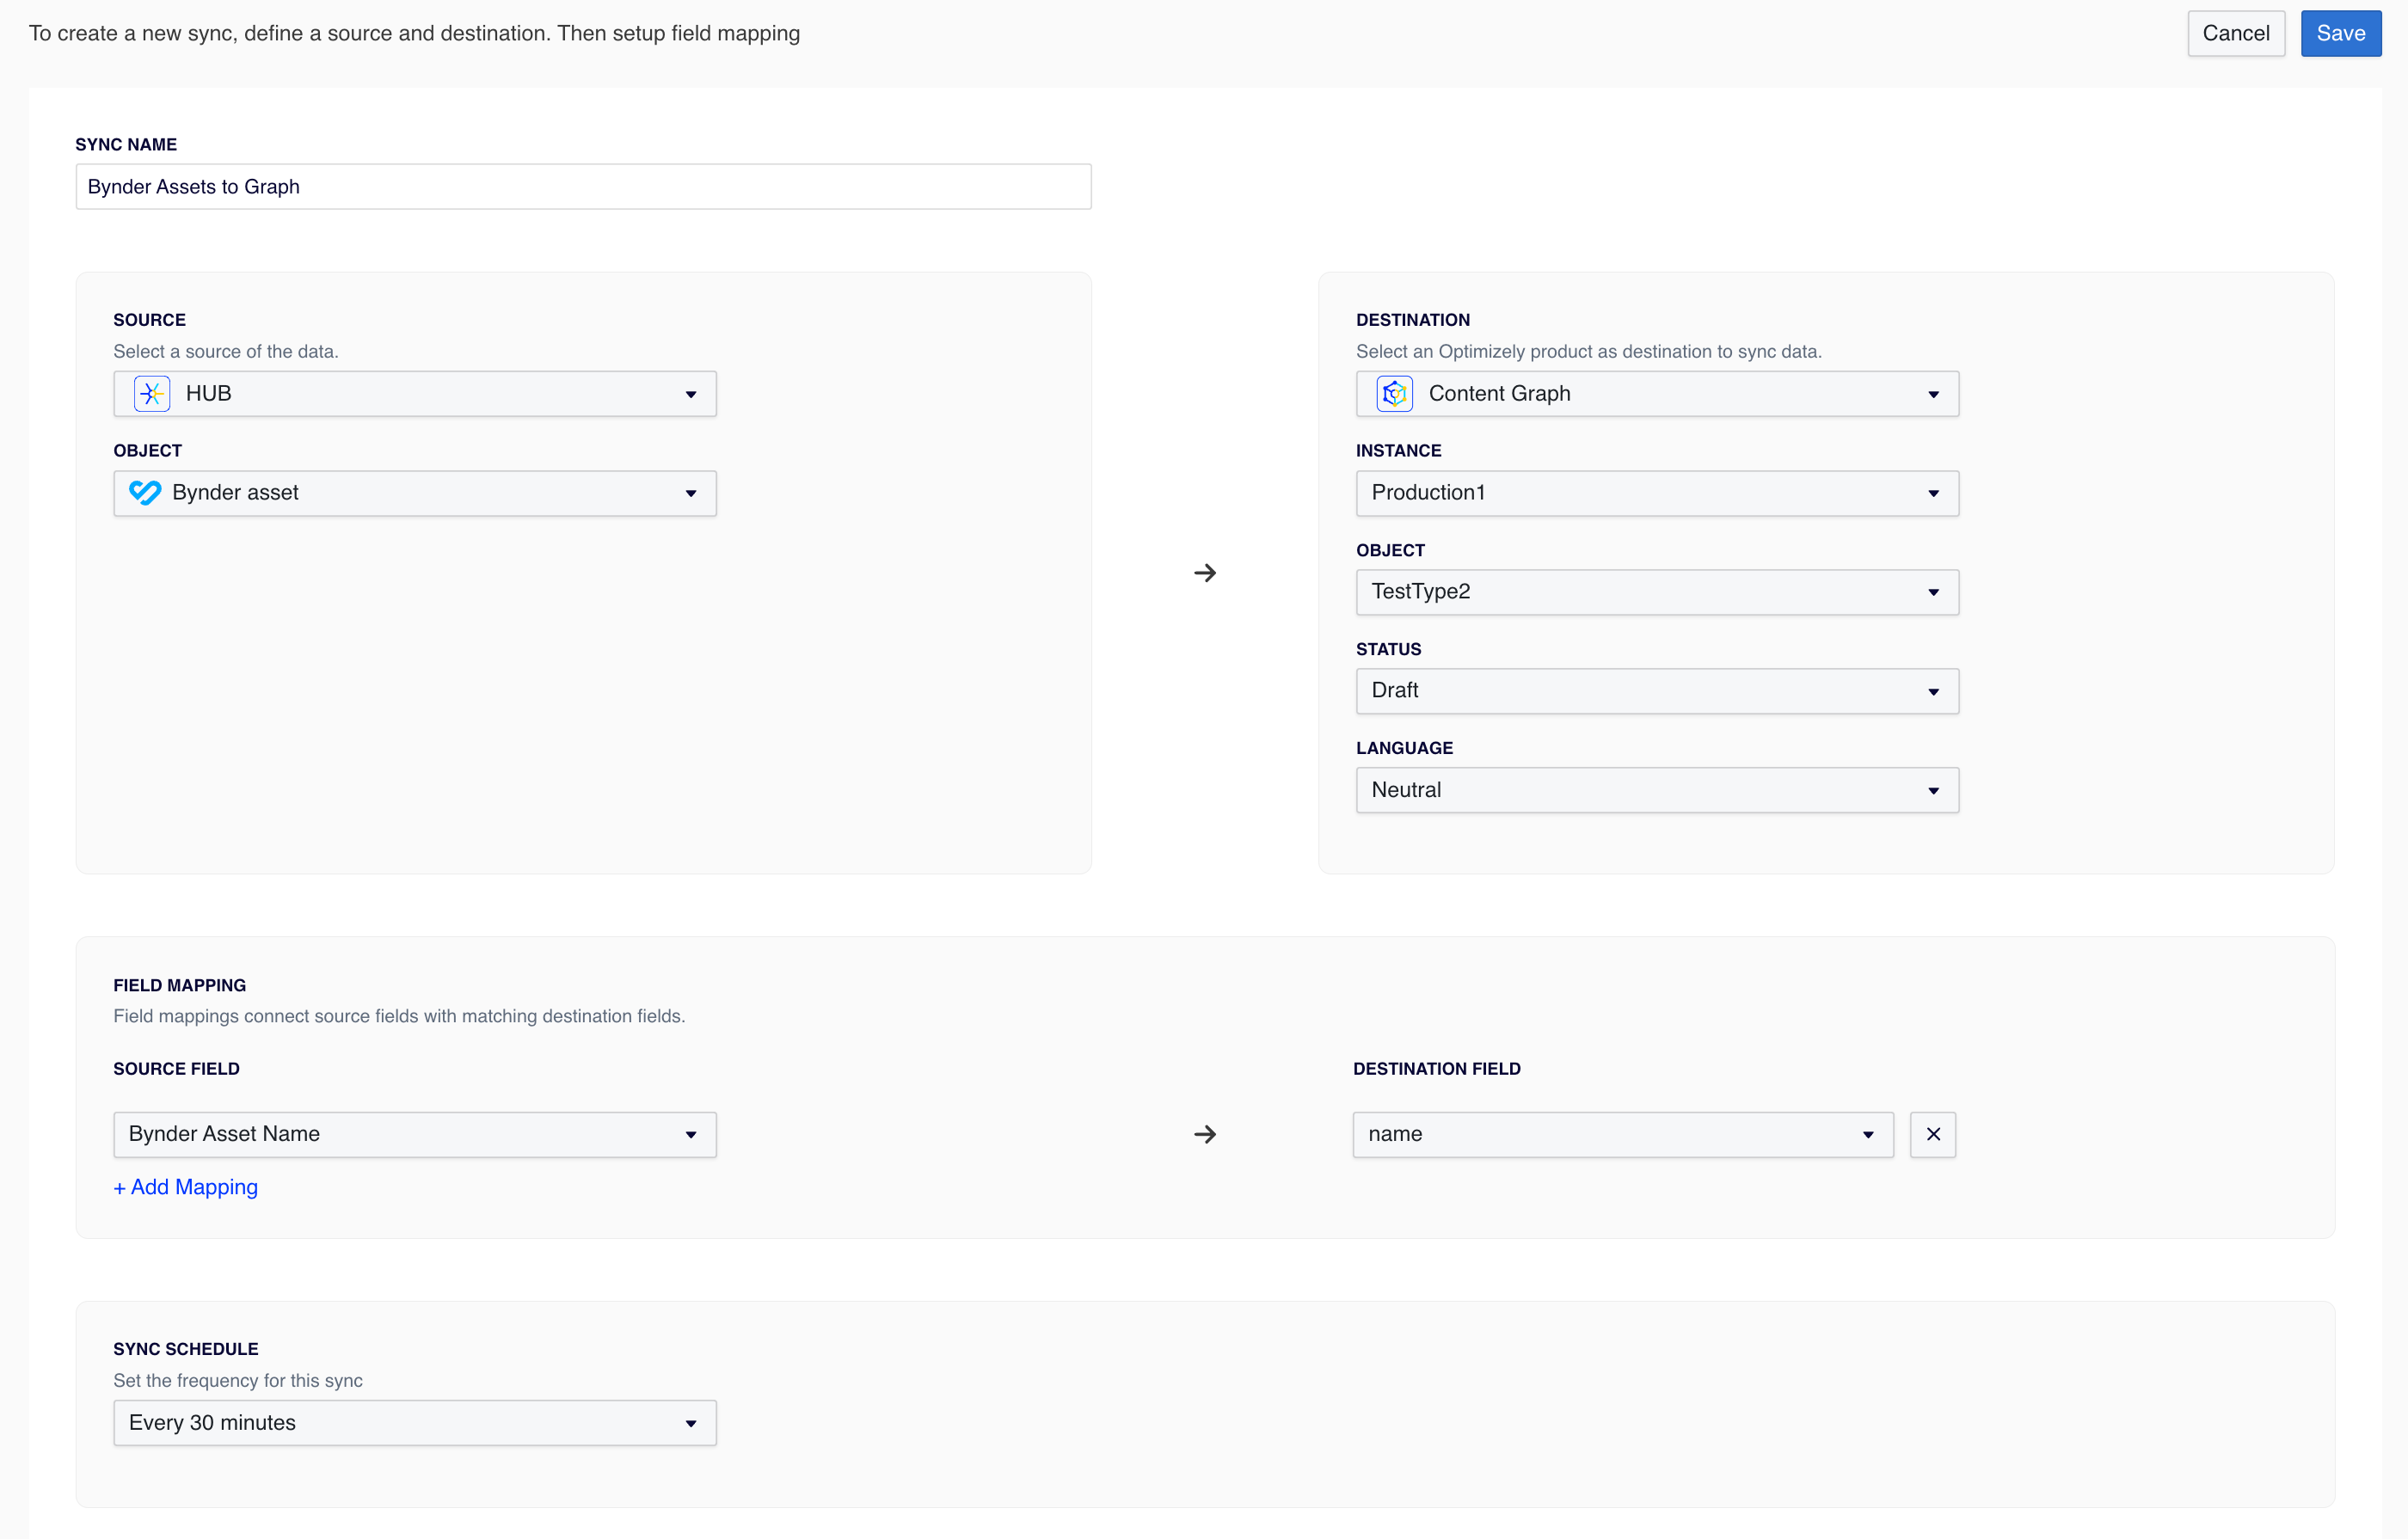
Click New Sync.
-
Complete the following:
- Sync Name – Enter a name for this data sync.
- Source – Select your data source, which is the product and object data that you want to send to another product.
- Destination – Select your destination, which is the product, instance, and object where you want to sync the data.
Note
You can build an app that creates custom data sync destinations.
- Field Mapping – Map each specific data field that you want to sync from your source product to your destination product.
- Sync Schedule – Select the time interval that you want the data to sync.
-
Click Save.
After you configure a data sync, the first sync automatically syncs all existing data for the selection in OCP, and subsequent syncs will sync records that were updated since the last sync.
Updated 16 days ago