
Configure the Custom Endpoints app
Create custom webhook endpoint URLs to import data into Optimizely Connect Platform (OCP) and sync it with other Optimizely products.
Beta
Optimizely Connect Platform (OCP) is in beta and currently only works with Optimizely Graph in Optimizely Content Management System (CMS) (SaaS) and CMS (PaaS).
Use the Optimizely Connect Platform (OCP) Custom Endpoints app to create webhook endpoint URLs that you can send data to for automatic ingestion into your OCP account. Then, you can sync the URLs to other Optimizely products.
This is a good option to get data into OCP without requiring developer resources.
Important
Before you import data through the Custom Endpoints app, you must create the target objects and fields in the OCP database first. See Add custom objects and fields.
Create custom webhook endpoint URLs
You can repeat these steps to create as many custom webhook endpoint URLs as needed to import data into OCP.
-
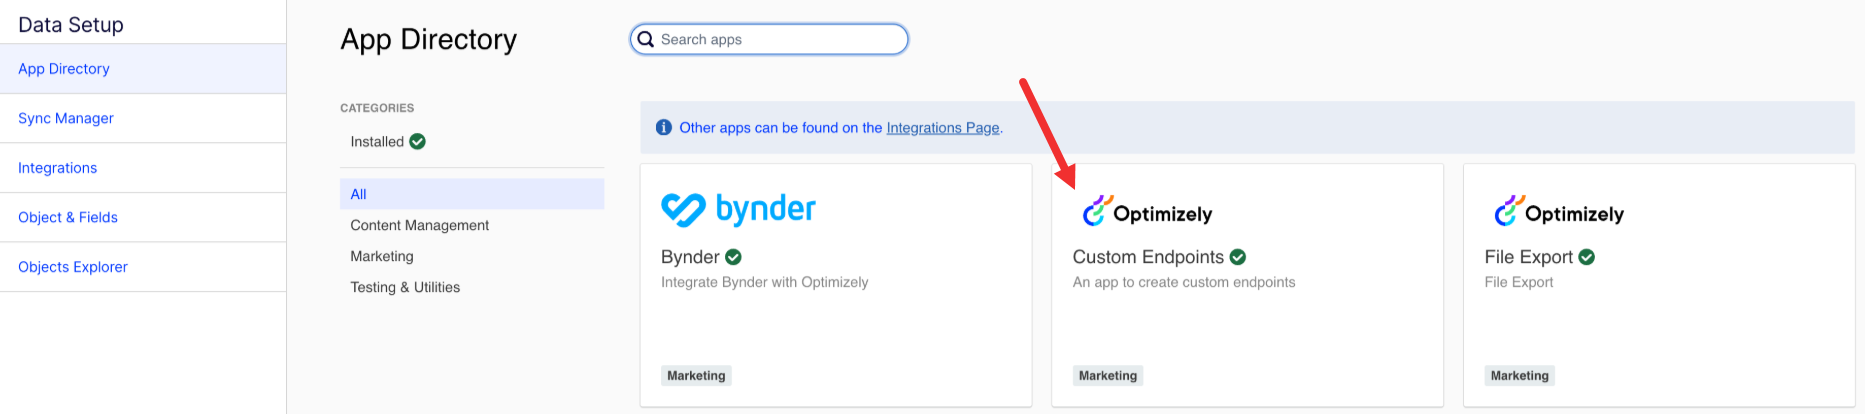
Go to Data Setup > App Directory.
-
Select the Custom Endpoints app.
-
Click Install App, then go to the Settings tab.
-
Click Create new webhook and complete the following:
- Name – Enter a name for the webhook that represents the data you plan to sync with the webhook.
- Object – Select the object (database table) where you want to sync the data.
-
Click Next.
-
Enter the JSON Payload you want to import and click Process JSON payload. This automatically creates the data fields included in the payload. If you do not have a JSON payload, you can manually create the data fields instead by defining the Field Name and Field Type for each field.

-
Click Next.
-
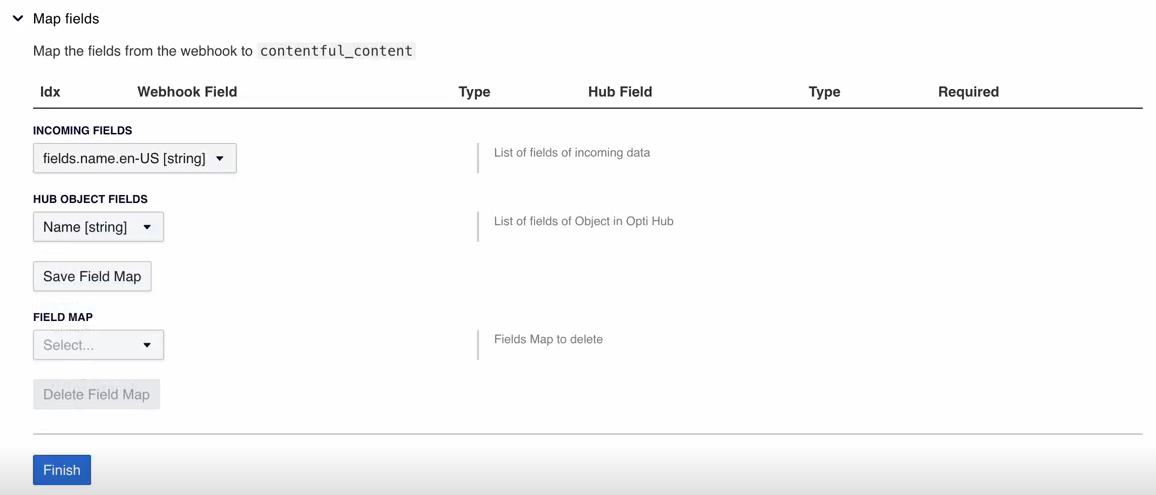
Map the fields you created in step six to your existing OCP fields that you created before configuring this integration.
-
Incoming Fields – Select one of the fields you created in step six.
-
Hub Object Fields – Select the OCP field to which you want to map the incoming field.
-
-
Click Save Field Map and repeat the process for each field you want to map. Each time you add a field mapping, it displays in the table in the Map fields section.

Note
You can also delete a field mapping at any point by selecting the Field Map and clicking Delete Field Map.
-
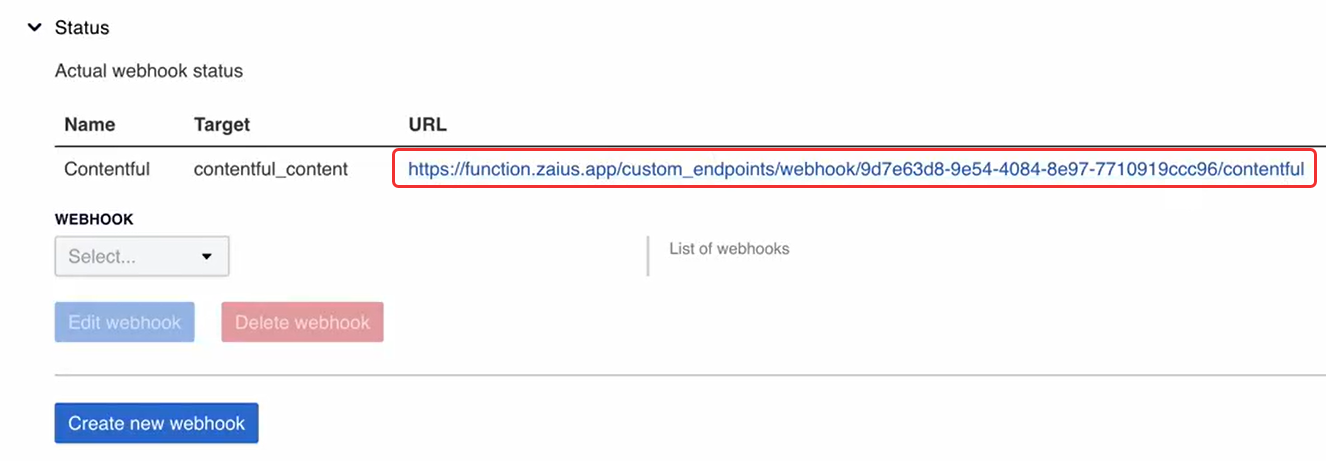
Click Finish. The custom webhook endpoint URL displays in the Status section.
-
Copy the webhook endpoint URL and use it to configure a webhook in the corresponding platform. In this example, you would use this URL to configure a webhook in Contentful. When you configure the webhook, you can only sync data for which you have already created objects and fields in OCP, and then configured in the Custom Endpoints app.
At this point, the data begins syncing automatically to OCP. Going forward, updates sync to OCP in real-time when you update connected data in the third-party platform (like Contentful).
If you try to sync data that you have not properly connected to OCP, it is ignored in the syncs or might return an error. You can check for errors in the OCP Settings > Activity Log.
Sync data to other Optimizely products
Now that you have data in OCP, you can sync it out of OCP to other Optimizely products using data syncs. See Manage data syncs.
Updated about 2 months ago