Create a starter project
Describes how to create an empty commerce project from which you can build your Optimizely Customized Commerce website.
For better control and understanding, you should start developing in an empty project. However, you can install a sample site like Foundation to explore and use for inspiration. The Optimizely project templates provide a preconfigured website with Optimizely Customized Commerce and a Visual Studio project for development.
Create the project
See Setting up a development environment to install the Optimizely templates and command line tool. When done, run the commands described in the following (check command line options for more configuration options).
dotnet new epi-commerce-empty --name ProjectName
cd projectname
dotnet-episerver create-cms-database ProjectName.csproj -S . -E
dotnet-episerver create-commerce-database ProjectName.csproj -S . -E --reuse-cms-user
dotnet-episerver add-admin-user ProjectName.csproj -u username -p password -e [email protected] -c EcfSqlConnection
The project structure
The project creation process completes these actions:
- Installs main components through NuGet packages (EPiServer.Commerce).
- Create the database.
- Updates configuration files, such as appSettings.json, with connection strings.
- Installs the Optimizely user interface components and places them under the URL /episerver.
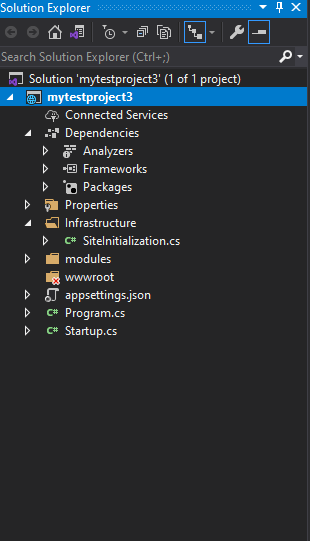
When finalized, you have a project folder structure containing:
- Properties. Launch settings for the development server.
- Infrastructure. Site components.
- modules. Package modules.
- wwwroot. Client resources.

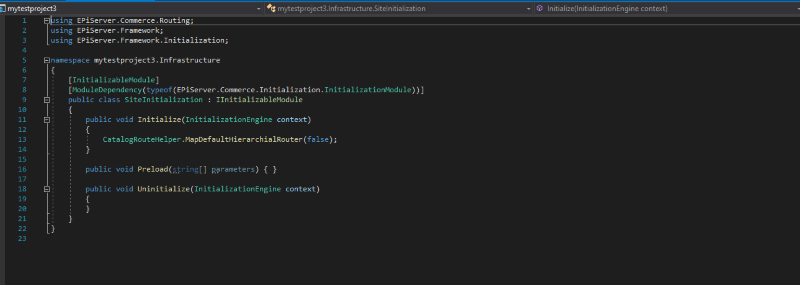
The initialization module ensures the catalog structure is added under the site's root level.

Update to the latest version
See Install Optimizely (.NET Core) to add the latest updates to a Customized Commerce site.
Updated about 1 year ago