Configure webhooks
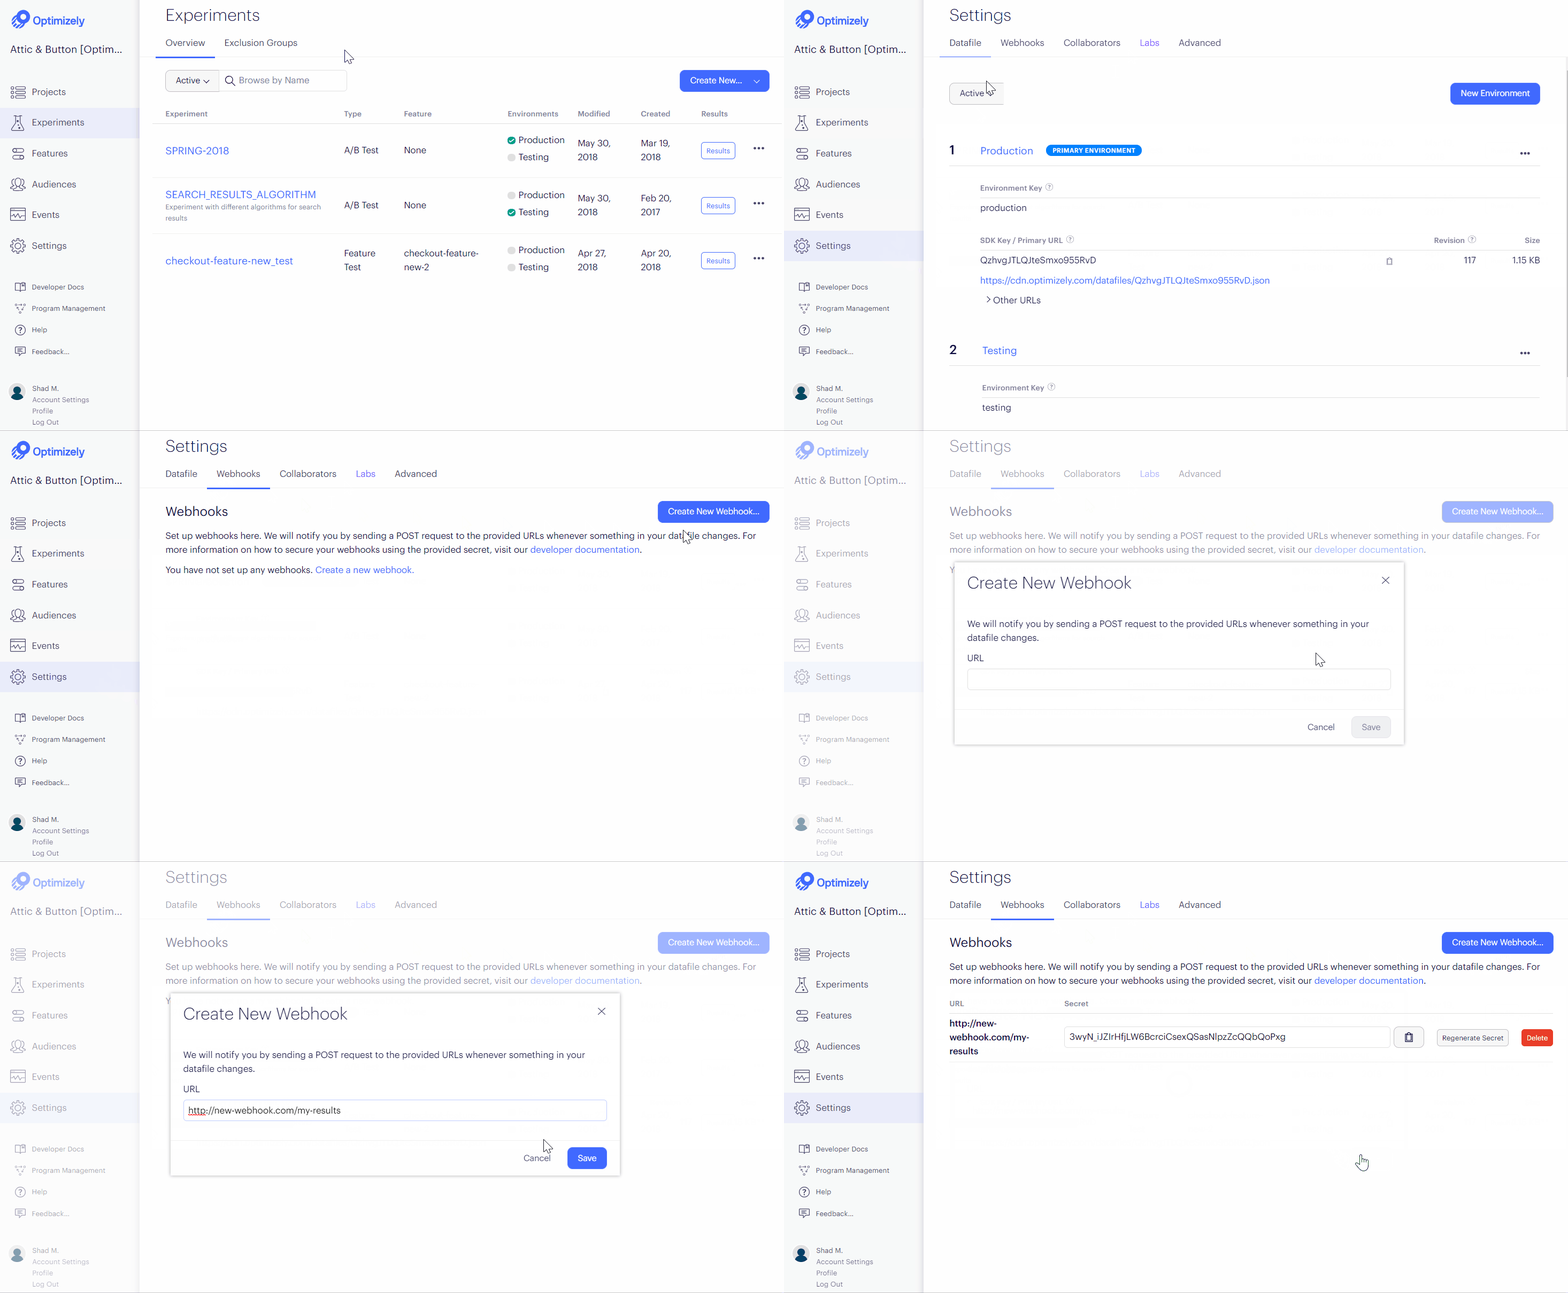
This page describes how to use webhooks to synchronize the primary environment's datafile.
If you are managing the datafile for the primary environment from a server-side application, we recommend configuring webhooks to maintain the most up-to-date version of the datafile. Anytime the datafile is updated, you must re-instantiate the Optimizely object in the SDK for the changes to take effect.
Note
Optimizely sends a POST request to your supplied endpoint only when the datafile for the primary environment changes.
You can set up a webhook in your project settings and add the URL the webhook service should ping. See also View the webhook payload.
Set up a webhook
To set up a webhook for a Full Stack project datafile:
- Navigate to Settings > Webhooks.
- Click Create New Webhook...
- Enter the URL where Optimizely will send datafile updates.
- Click Save.

Note
You can set up and use multiple webhooks in Optimizely.
Secure a webhook
When you create a webhook, Optimizely generates a secret token that is used to create a hash signature of webhook payloads. Webhook requests include this signature in a header X-Hub-Signature that can be used to verify the request originated from Optimizely.
You can only view a webhook's secret token once, immediately after its creation. If you forget a webhook's secret token, you must regenerate it on the Settings > Webhook page.
The X-Hub-Signature header contains a SHA1 HMAC hexdigest of the webhook payload, using the webhook's secret token as the key and prefixed with sha1=. The way you verify this signature varies, depending on the language of your codebase. Below is a Flask reference implementation:
from hashlib import sha1
import hmac
import os

from flask import Flask, request, abort

app = Flask(__name__)

@app.route('/webhooks/optimizely', methods=['POST'])
def index():
  request_signature = request.headers.get('X-Hub-Signature')
  computed_signature = 'sha1=' + hmac.new(os.environ['WEBHOOK_SECRET'], msg=request.data, digestmod=sha1).hexdigest()

  if not hmac.compare_digest(computed_signature, request_signature):
    abort(500)
Warning
Optimizely strongly recommends you use a constant time string comparison function such as Python's
hmac.compare_digestor Rack'ssecure_compareinstead of the==operator when verifying webhook signatures. This prevents timing analysis attacks.
View the webhook payload
The example below shows the webhook payload structure with the default Optimizely primary environment of "Production"—your environment value may be different. Currently, we support one event type: project.datafile_updated.
{
  "project_id": 1234,
  "timestamp": 1468447113,
  "event": "project.datafile_updated",
  "data": {
    "revision": 1,
    "origin_url": "https://optimizely.s3.amazonaws.com/json/1234.json",
    "cdn_url": "https://cdn.optimizely.com/json/1234.json",
    "environment": "Production"
  }
}
Updated over 1 year ago