PayPal
Describes how to install and use the PayPal payment provider, one of several payment solutions available for Optimizely Commerce Connect 13.
Install PayPal
Follow these steps to deploy the PayPal payment provider.
Build PayPal project
-
Download the PayPal payment provider file package, which provides an EPiServer.Business.Commerce.Payment.PayPal project.
-
Open the PayPal project and save the solution.
-
Install the PayPalMerchantSDK NuGet package by executing this command in Package Manager Console:
Install-Package PayPalMerchantSDK -version 2.12.117 -
Install the EPiServer.Commerce.Core package by executing this command in the Package Manager Console:
Install-Package EPiServer.Commerce.CoreNoteTo avoid assembly conflicts, install the Optimizely Commerce Connect Core version that your site is using. Also, do not apply database transforms. Skip step 5 if you are using Commerce Connect 11 or higher.
-
If you are using a workflow, edit PayPalPaymentGateway.cs and uncomment the following line:\
- payment.Properties["NextAction"] as Action).Invoke();
-
Rebuild the PayPal project. Now, you have the EPiServer.Business.Commerce.Payment.PayPal.dll and PayPal's assemblies (PayPalCoreSDK.dll, PayPalMerchantSDK.dll).
The project package contains these files.
File | Description |
|---|---|
PayPalPayment.cs | represents payment class for PayPal |
| represents a payment method for PayPal |
PayPalPaymentGateway.cs | main payment gateway business |
PayPalPaymentMetaClass.xml | contains payment meta class |
PayPalPaymentController.cs | the page controller |
XML files in lang folder | language files |
CanadianOrUSstates.txt, ISOCodes.txt | resource files |
ConfigurePayment.ascx, | Commerce Manager payment editor |
PaymentMethod.ascx | front-end webform view |
| front-end mvc view |
PayPalConfiguration.cs, | helper classes |
PayPalPage.cs | the page type |
PayPal-logo.jpg | logo, in images folder |
Commerce Manager
- Find the Commerce Manager Apps folder, located under the Optimizely Commerce Manager project folder.
- Deploy the ConfigurePayment.ascx file to the Apps\Order\Payments\Plugins\PayPal folder. If the PayPal folder does not exist, create it.
- Deploy the EditTab.ascx file to the Apps\Order\Payments\MetaData\PayPal folder. If the PayPal folder does not exist, create it.
- Deploy PayPalCoreSDK.dll, PayPalMerchantSDK.dll and EPiServer.Business.Commerce.Payment.PayPal.dll to the bin folder of your Commerce Manager site.
- In your solution's Commerce Manager project, add references to the deployed .dll's and rebuild.
Front-end site MVC (Quicksilver)
- Deploy PayPal-logo.jpg to your website's styles\images folder.
- Deploy all files in \lang folder to the Quicksilver site's \lang folder.
- Deploy PayPalCoreSDK.dll, PayPalMerchantSDK.dll, EPiServer.Business.Commerce.Payment.PayPal.dll to your Quicksilver site's bin folder.
- Deploy _PayPalConfirmation.cshtml,_PayPal.cshtml to your website's Views\Shared folder.
(Optional) The following steps allow the creation of a PayPalPage under the Checkout page.
- In your solution's front-end site project, add references to the deployed .dlls.
- In Features/Checkout/Pages, open the CheckoutPage page type.
- To the AvailableContentTypes attribute, add a PayPalPage type:\
- [AvailableContentTypes(Include = new [] { typeof(OrderConfirmationPage), typeof(MultiShipmentPage), typeof(PayPalPage) }, IncludeOn = new [] {typeof(StartPage)})]
- Rebuild the Quicksilver project.
Configure PayPal
Set up the PayPal payment provider in Commerce Manager
After deploying all necessary files, open the Optimizely Commerce Manager back-end site. Then, follow these steps.
-
Go to Administration > Order System > Payments > English (United States). The last option is the language in which you want to make the PayPal payment available.
-
Click New to create new payment method.
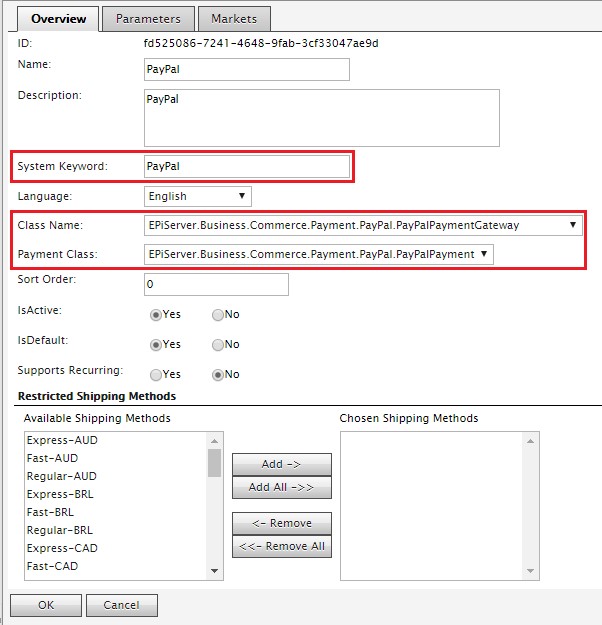
- For System keyword, select PayPal, the name of the folder created during deployment.
- For Class Name, select EPiServer.Business.Commerce.Payment.PayPal.PayPalPaymentGateway.
- For Payment Class, select EPiServer.Business.Commerce.Payment.PayPal.PayPalPayment.
-
Click OK to save the PayPal payment method.
-
Open the PayPal payment method for additional editing.
-
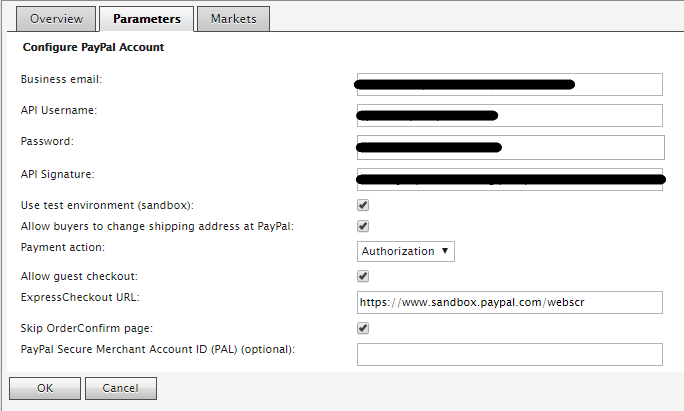
Go to the Parameters tab and enter the following:
- Business email – The main email that you registered with PayPal.
- API Username – The API user name PayPal provides when you register to use PayPal's API calls.
- Password – Your PayPal API user password.
- API Signature – Your PayPal's API signature.
- Use test environment (sandbox) – Enter true if this is a testing environment. Enter false if this is a live environment.
- Allow buyers to change shipping address at PayPal – Enter true to allow buyers to change their shipping address when reviewing their PayPal payment. To prevent that, enter false.
- Payment action – The payment action buyers will perform at PayPal. The default value is Authorization, whereby a payment is authorized only, not yet captured. If you specify Sale, the payment is immediately transferred from a buyer's account to the merchant's account.
- Allow guest checkout – Allows buyers who do not have a PayPal account to perform a payment. If true, buyers see a billing page from which they can pay via credit card without logging in to PayPal. If false, the buyer sees a login page when redirected to PayPal.
- ExpressCheckout URL – The URL to redirect a user to PayPal if the SetExpressCheckout API call is successful. Note that this URL should change according to the Use test environment option.
- Skip Order Confirm page – Enter true to allow buyers to go directly to PayPal after selecting PayPal as a payment method. Enter false if you want buyers to see an order confirmation page before being redirected to PayPal. The default is true.
- PayPal Secure Merchant Account ID (PAL) (optional) - Used to create the dynamic PayPal mark image on the payment selection page. If nothing is entered here, an API call is made to PayPal to get it.
-
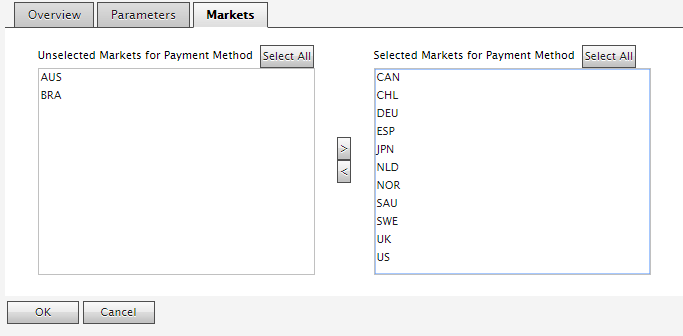
Open the Markets tab and add the expected markets for this payment.
-
In Commerce Manager, go to Administration > Order System > Meta Classes.
-
Click Import/Export, select Import MetaData.
-
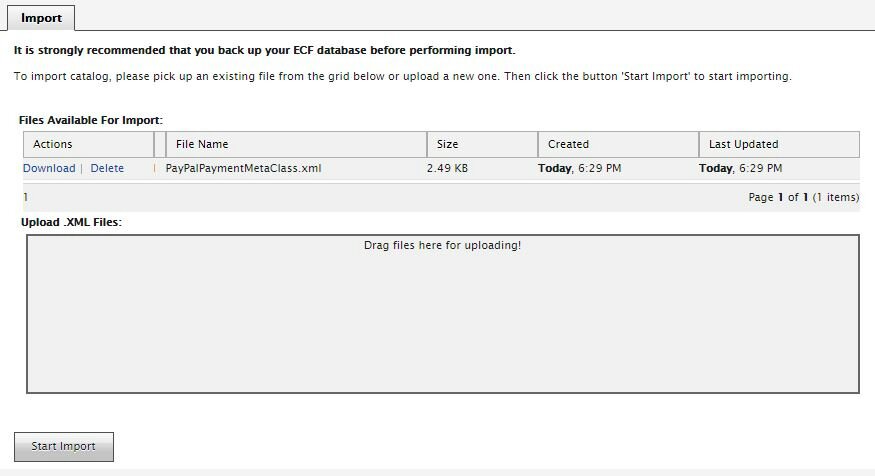
To populate the MetaData import screen, drag and drop the meta class file to upload, PayPal/PayPalPaymentMetaClass.xml.
-
Select the PayPal/PayPalPaymentMetaClass.xml in the MetaData import screen. Click Start Import.
Set up the PayPal payment provider in the front-end site
To set up the PayPal payment provider, browse the front-end site and follow these steps.
-
Go to the CMS > Admin > Content Type tab.
-
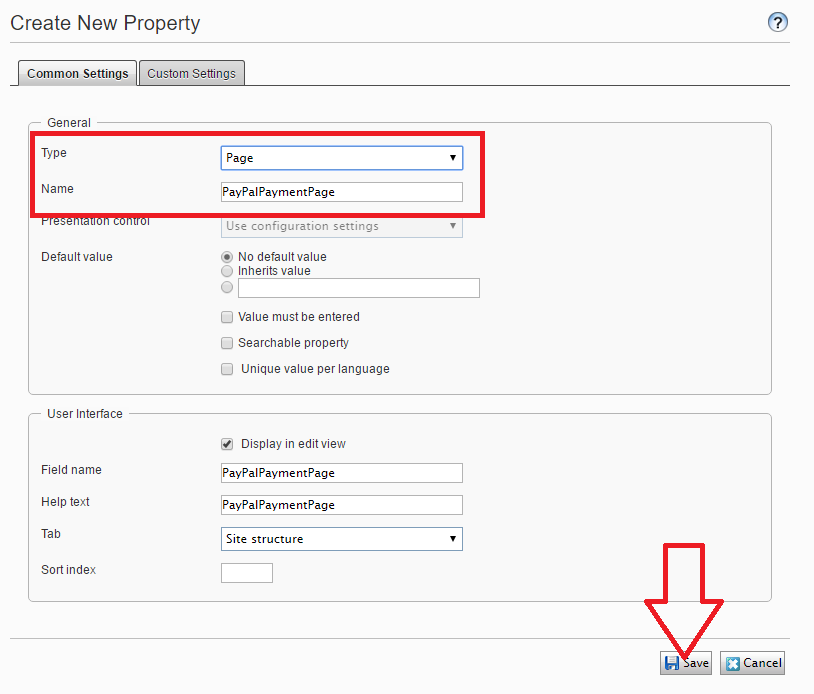
Add two properties, PayPalPaymentPage and PayPalPaymentLandingPage of the type Page, to the Start page (or Home page) page type.
-
Go to CMS > Edit.
-
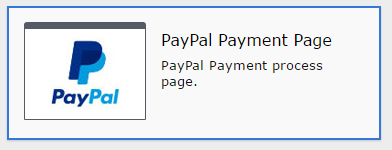
Create a page using a PayPal Payment Page under a Checkout page, then publish it.
-
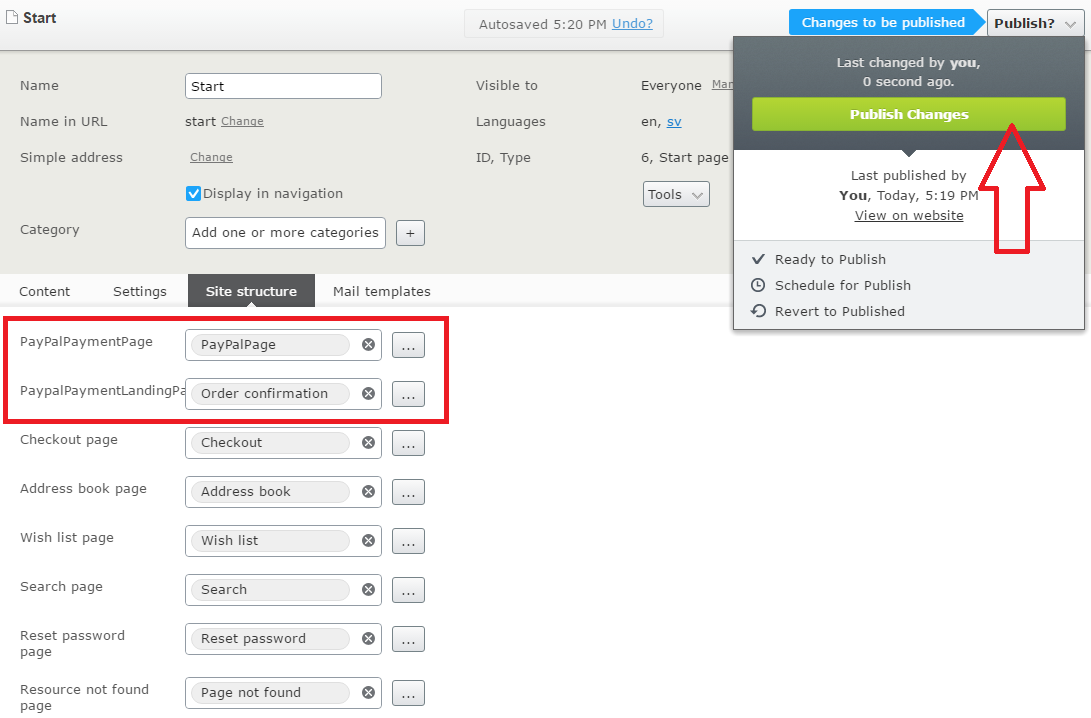
Open the site's home page, click the Site Structure tab and define two new properties:
- Set the PayPalPaymentPage property to the PayPal page that was just created.
- Set the PayPalPaymentLandingPage property to the Order confirmation page.
Configure the PayPal HashKey (optional)
PayPal uses a private hash key to ensure security in communications. This private hash key is used to create secure hash keys, which are appended to an accept URL and a cancel URL.
The information about accept URL and cancel URL is sent to PayPal using HTTPS, so these keys are not exposed. When PayPal redirects a user to those URLs, the keys verify that the request comes from PayPal only, since only PayPal knows about the keys. You can configure this hash key in the application settings configuration section under PayPalHashKey.

PayPal user experience
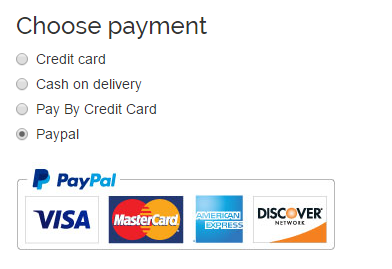
After you deploy the files and configure the PayPal Payment module on your Optimizely Commerce Connect website, a PayPal option should appear on your checkout page. This section explains how a user interacts with PayPal.
-
During checkout, on the checkout page, select PayPal as the payment method.
-
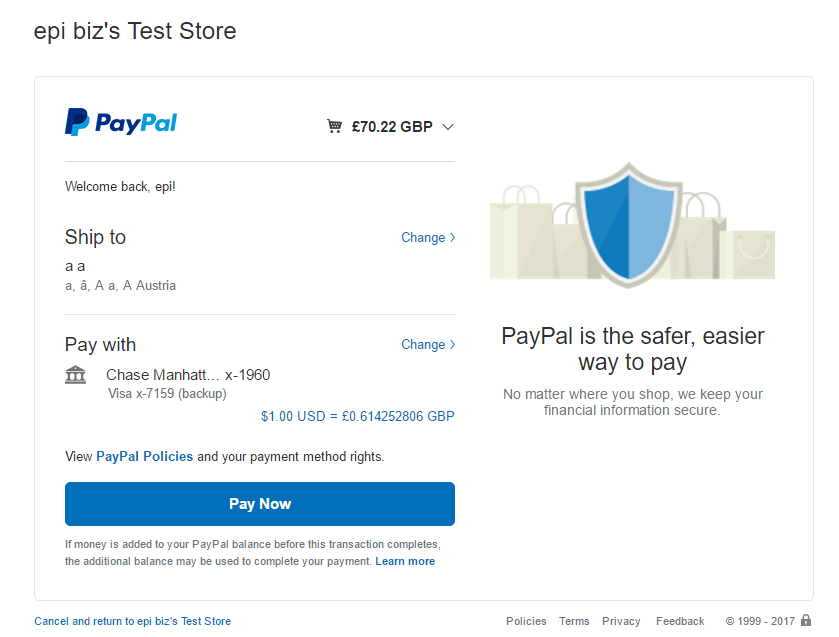
When you click Place order, you are redirected to PayPal.com to approve the payment.
-
You can see the shipping and billing addresses entered in the checkout procedure. During this time, you can change the addresses.
-
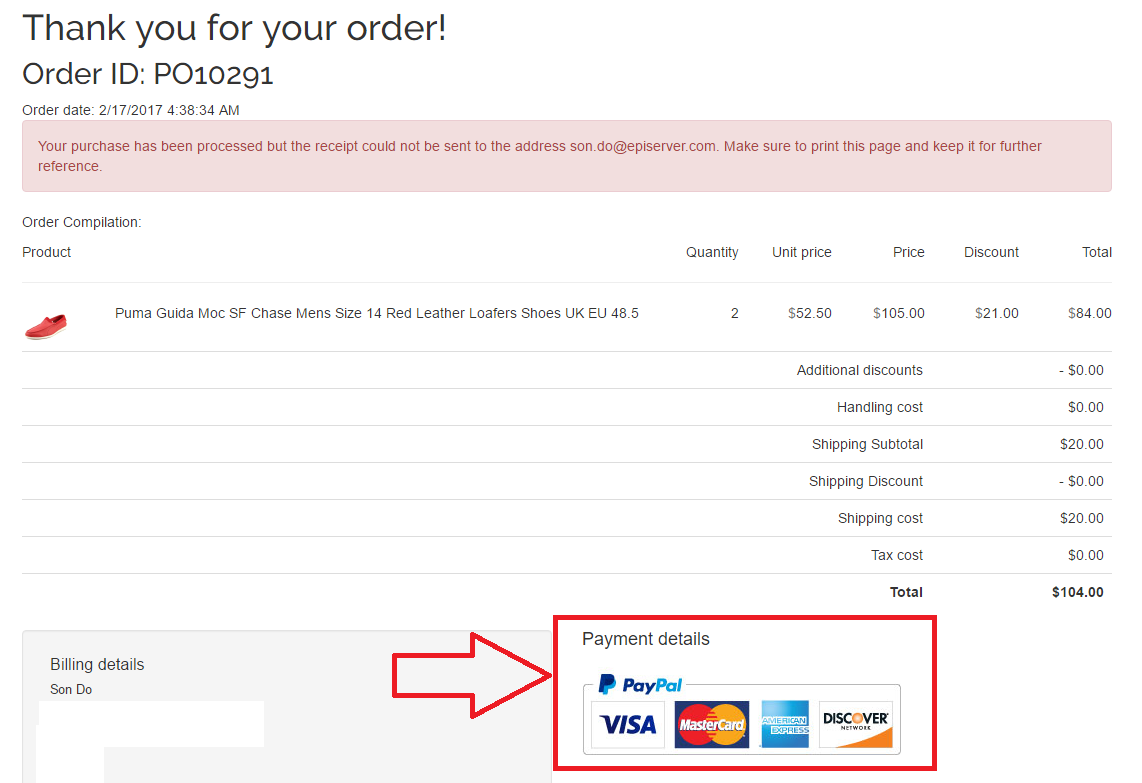
When you finalize the approval process, you are redirected to the Order confirmation page (previously configured).
NotePayPal.com checks billing and shipping addresses very carefully. If you test with a US address, use a correct and complete one with ZIP code, state, and city. Otherwise, the PayPal API precheck fails, and you cannot complete the payment.
Updated 6 months ago
