Remote fields
Integrate custom applications into Optimizely CMP as interactive fields using remote fields for enhanced content editing.
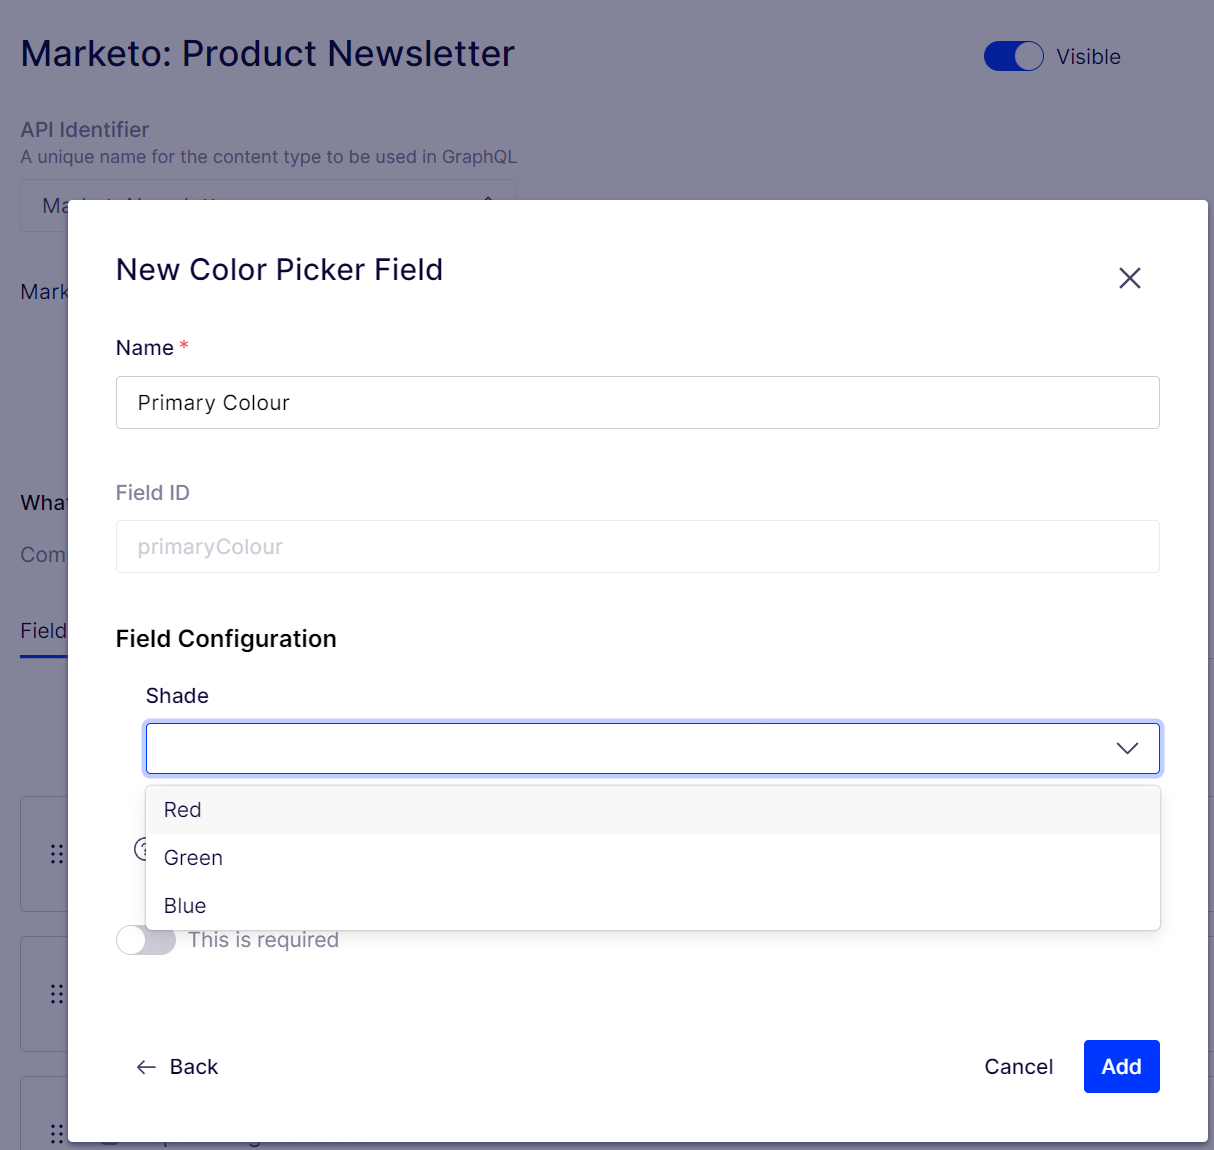
Remote fields let you create your applications and include them as fields for users to interact in the editor. You can give administrators configuration options to adjust when a remote field is used at the content type level. This lets an administrator use the app across all content types while establishing specific settings for its usage within particular content types. For instance, consider a remote field that offers the functionality of a color picker. Whenever an administrator adds the color picker field to a content type, they can define additional configurations, such as the default color or the available shades that users can choose from when authoring content with that content type.
Remote fields are mounted within the OCC editor as an iframe and communicate through the browser's native postMessage method. You must handle your field's edit and view states and define configuration options and validation rules for users' values.
Remote fields use the Service Provider's Interface (SPI) approach—a type of application programming interface (API) designed specifically to let third-party developers extend the functionality of an existing software framework or system—over HTTP to enable implementors to adhere to a specific interface to achieve the goal stated earlier.
Omnichannel content (OCC) lets you create and distribute content across channels in their respective ecosystems. For OCC conceptual types, see Get started with omnichannel content.
Interface endpoints
Remote fields use the following endpoints:
GET /_status– Health-checking endpoint. Must return HTTP 200 to indicate the remote field is ready.GET /component/edit– Return an editor component (the HTML+ other assets) that can be mounted inside the host content editor when the user needs to interact with your remote field.GET /component/view– Return a viewer component (the HTML + other assets) to view the content created in the editor when in the default state or after a user has selected it.POST /api/validate– Validate user input using this endpoint. The host will call it with the field value as the payload. The endpoint should return HTTP 200 if the payload is a valid field value; otherwise, it should throw HTTP 422.GET /api/config/schema– Return a schema for the configuration options you set within the remote field. You should provide configuration settings for your remote field that administrators can use, when applying to a content type or component. The options give the administrator greater control over the function of the field on a per-content type basis. For example, a color picker field could have pre-selected options such as available shades. See the Add Configurations section below.POST /api/config/validate– Validate user input of the configuration settings. The host will call this with the field value as the payload. The endpoint should return HTTP 200 if the payload is a valid field value; otherwise, it should throw HTTP 422.GET /api/***(Optional) – You can include custom API endpoints for the viewer or editor for your remote field. The generator can also make external API requests but restricts them to only allow-listed domains. If you want to use this capability, contact your Optimizely representative.
Editor component
The component generator returns a component that acts as the field editor. This editor component is mounted on the page as an iframe and communicates with the content editor through the browser's native postMessage method.
The supported messages are listed below:
receiveMessage("connected")– Host is ready to send or receive messages (triggered after the component is ready).receiveMessage("field-value")– Receive the current value of the field.receiveMessage("field-config")– Receive the current config of the field.receiveMessage("mode")– Receive the current state of the editor (view or edit).postMessage("connect")– Component is ready to send or receive messages and initiate the connection to the host. The component needs to let the Host know it is ready to process data from the Host because the Host has no alternative way to be informed.postMessage("get:field-value")– Requests the host to send the current field value.postMessage("set:field-value")– Updates the value of the field. If the component is currently in view mode, the host will ignore theset:field-valuecall.postMessage("get:field-config")– Requests the host to send the currentfield-config.postMessage("set:field-config")– Updates the value of thefield-config.postMessage("get:mode")– Requests the host to send the current editor state (view or edit).postMessage("set:mode")– Changes the editor state (view or edit).
In addition to handling these messages, the component can implement its state using any approved library, such as React, Angular, Vue, and so on.
For HTTP API calls, the component must call the generator through which it was generated. Any HTTP calls to any other external or internal domain are restricted.
In the example of the color picker, typical interaction steps with the host are:
- The remote field should send the connect event (this event is behind the
useHostChannel.tshook). - The host is sent a connected message. At this moment, both sides are ready, and the remote field can ask for data.
- The remote field should ask for
field-configandfield-valueat this point. - The host returns those, and the editor can use the configs and values and render itself accordingly.
- The user can now interact with the remote field. When the remote field wants to update the field values, it can call
set:field-valuewith the value as shown in here. - If remote fields decide to change their mode at any point from view or edit, it can call
set:modewith the desired mode value as shown in here.
NoteThe
field-configandfield-valuefields are not guaranteed to be returned in the same order as they were asked. Therefore you should not have your remote field depend on the order.
Deployment support
Your editor component code must follow the following rules to make the deployment successful:
- The repository root must have the docker file named
Dockerfile.production. - The docker file must not use any private base image.
- The container must serve requests from port 8000.
NoteThe deployment will run on multiple pods.
Add configurations
You should provide configuration settings for your remote field that administrators can use when applying to a content type or component. Providing settings gives the administrator greater control over the function of the field on a per per-contente basis. For example, a color picker field could have pre-selected options such as available shades.
When configuring the remote field when adding it to the content type, the component generator can provide a JSON output that will guide the UI rendered in the cmp for configurations. Current support for input fields is limited to text and dropdown fields.
The format for the settings API of an editor should be:
{
    "textFieldKey": {
        "type": "text",
        "label": "Label of the field",
        "required": false,
        "default": "A default value for the field",
        "maxLength": 30
    },
    "dropdownFieldKey": {
        "type": "dropdown",
        "label": "label of the drop down",
        "required": true,
        "default": "A default value",
        "options": [
            {
                "label": "An option",
                "value": "A default value"
            },
            {
                "label": "Another option",
                "value": "A value"
            }
        ]
    }
}
As an example, when you render the settings fields from above, if a user writes Text Field 1 into the textFieldKey and chooses an option with the value of option 2 for the dropdownFieldKey, the saved configuration displays as:
{
    "textFieldKey": "Some lorem ipsum",
    "dropdownFieldKey": "A value"
}
This value is sent to the component when the component calls get:field-config to the host.
Test your remote fields locally
To streamline the development process, you can test your code locally with the Optimizely sandbox (https://sandbox.editor-component.cmp.optimizely.com/) to check whether your remote field works as expected.
For example, if you have a remote field running in http://localhost:3006 and you want to test it, you can paste the URL http://localhost:3006 in the URL field above (the remote field's root URL), click Update.
You will see your remote field view component loading on the right side of the page. By default, if you keep the Value and Config fields empty, the remote field loads in an empty state.
If you need to see how the component loads given a Value or Config, you can provide a Config or Value in the JSON format and click Update again.
For example, providing Config for the color picker:
{"shade": "red"}The color picker will use this Configand load as shown below:
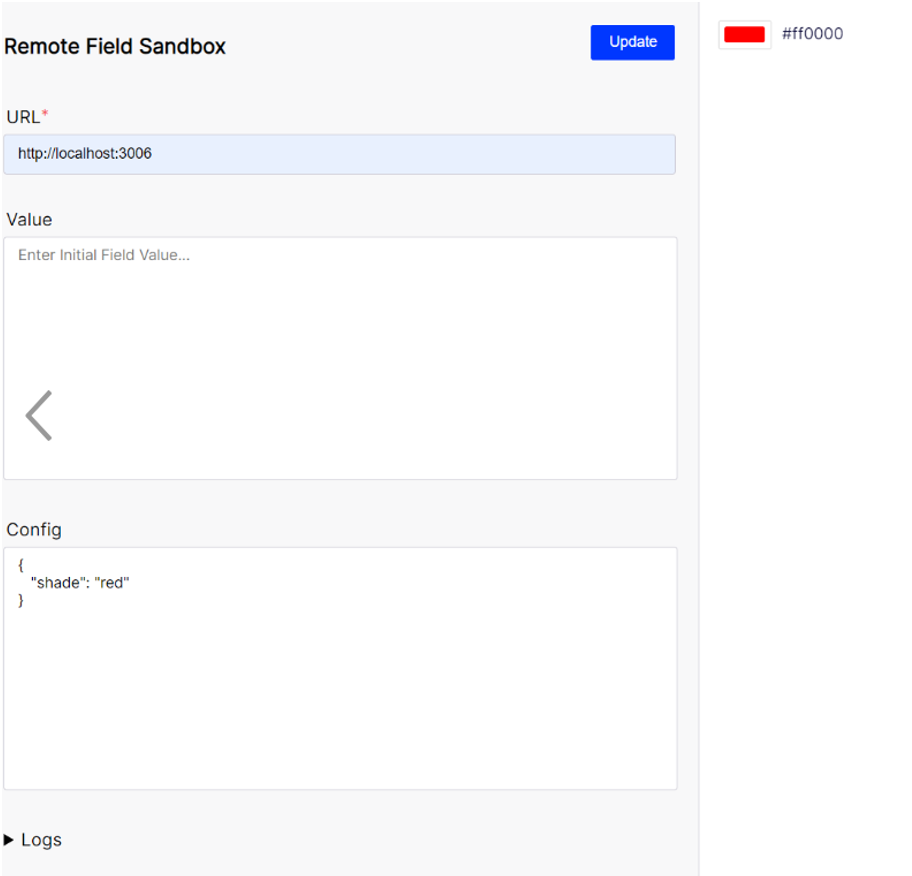
Similarly, you can also provide Values in your testing.
To see the events passing from or to the remote fields for debugging, open the Logs section.
Create a remote field
This section covers the steps required to create and submit your remote field in CMP.
Add your SSH key
Before building a remote field in the platform, you must supply your public SSH key.
-
Go to Settings > Organization > SSH Keys tab.
NoteYou can include up to five SSH keys.
-
Add your public SSH key. You must encode the public SSH key in SSH-RSA format or PEM format. The minimum bit length of the public key is 2048 bits.
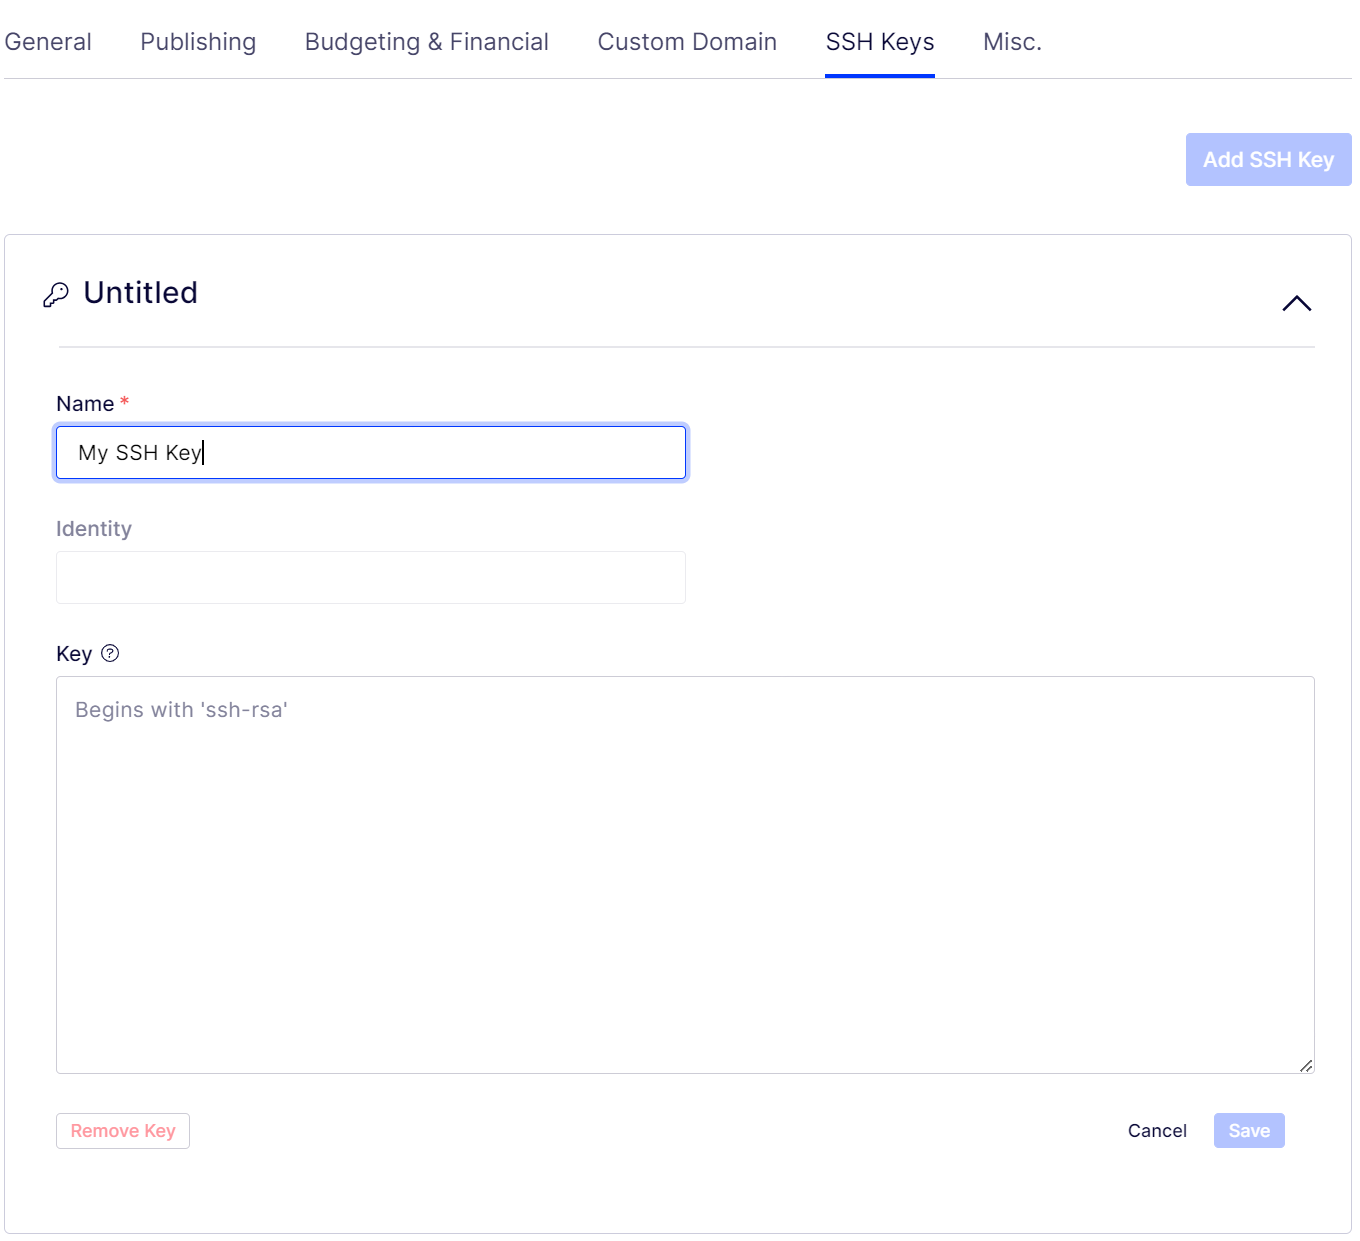
-
After you complete the SSH key upload, you get an Identity for that SSH key. Copy and save this SSH-Key-ID.
-
On your local machine, use a text editor to create a file named config file in the
~/.sshdirectory (if it does not exist already), and then add the following lines at the end of the file:Host git-codecommit.*.amazonaws.com User <Your SSH Key ID> ## such as APKAEIBAERJR2EXAMPLE IdentityFile <Your Private Key File> ## such as \~/.ssh/codecommit_rsa or \~/.ssh/id_rsa -
From the terminal, run the following command to change the permissions for the config file:
chmod 600 ~/.ssh/config -
Run the following command to test your SSH configuration:
ssh git-codecommit.us-east-2.amazonaws.com
You can now push the code to the code commit repository.
Create the field
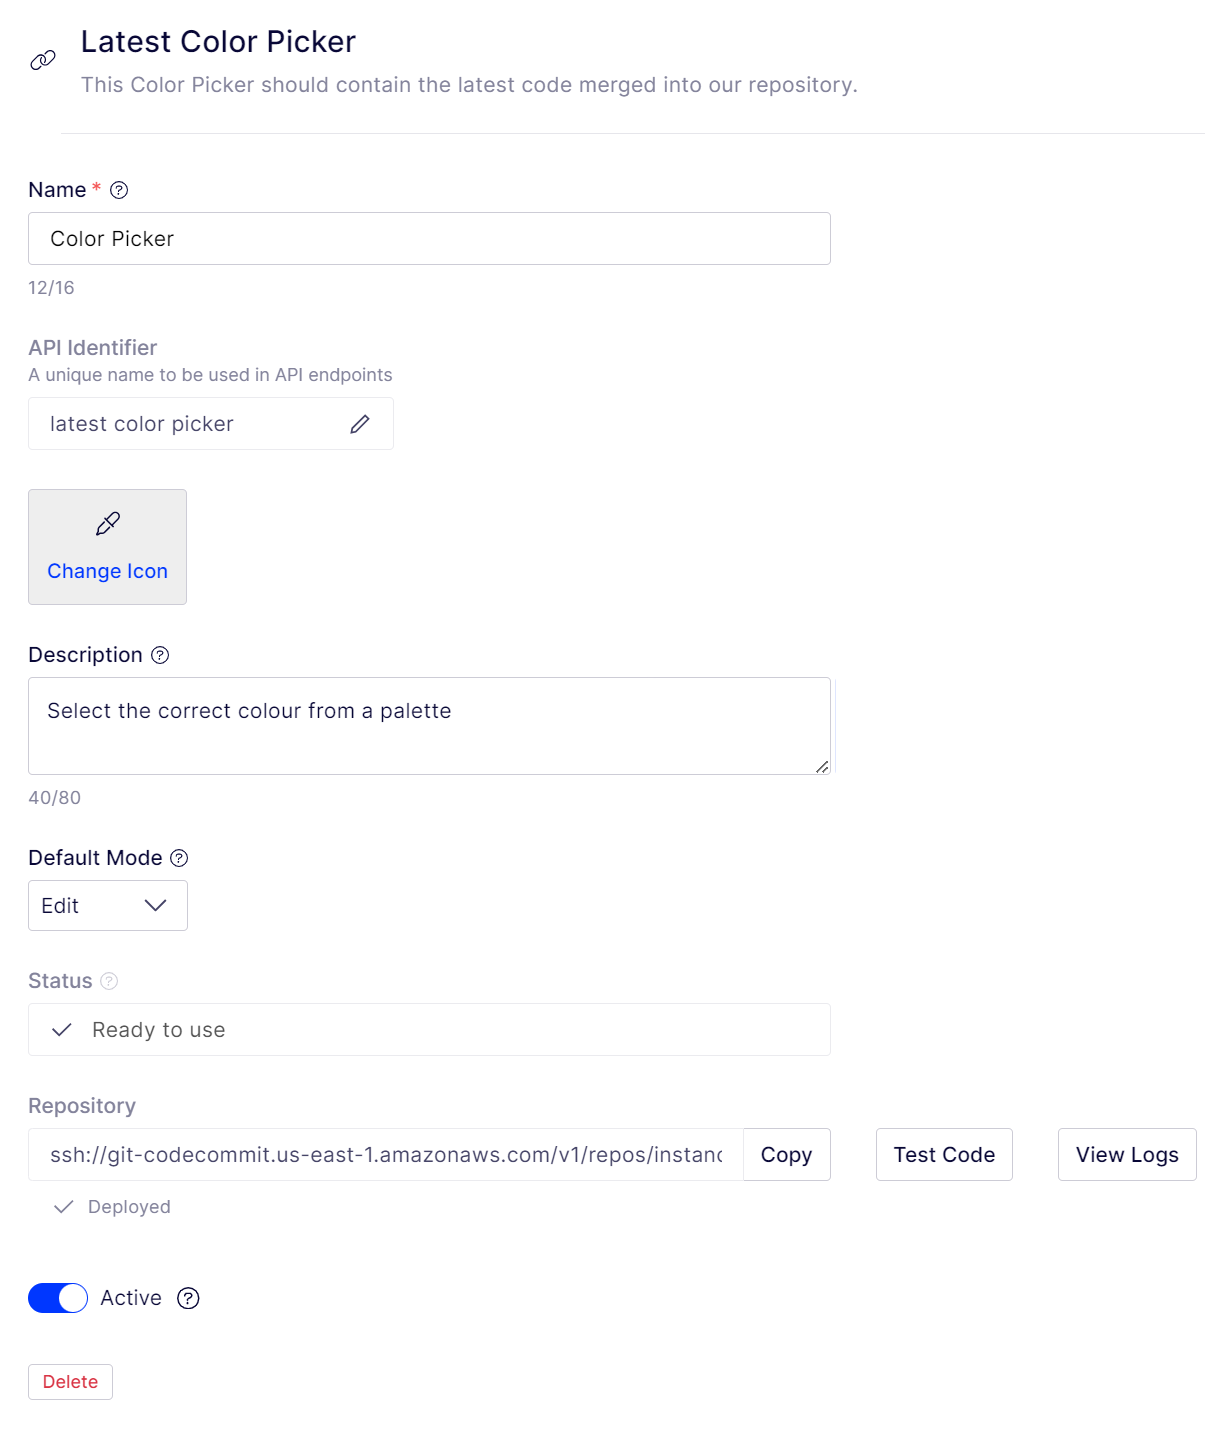
- Go to Settings > Templates > Content Model > Remote Fields.
- Click Add. The New Remote Field form displays.

-
Name– The name that your field will be known as to administrators. -
Icon– You may choose from a selection of icons that administrators will see as they build content types for marketers. -
Description– A description of your field, visible to Administrators with a maximum character count of 80 -
Active– Set this to active when you are ready to make your field available.
- Click Save.
Several actions take place to provision a repository for you to push your code, which s may take a few minutes. The status changes to Ready to build and you are provided with the repository URL to use when pushing your code.
Publish your code
After provisioning your remote field repository, you get the URL to push your code. (You will need to have a local git repository.)
- In your git repository, add the URL that you obtained as a remote.
git remote add <remote-name> <your-repo-url> # <remote-name> can be any name that isn't already used for another remote - Push changes to the master branch.
git push <remote-name> <your-branch>:master # push from branch named <your-branch> to the remote's masterNoteYou will have permission to push your code to the master branch of the CodeCommit repository only.
After pushing the changes in the UI, the repository status will move through the following states:
- Ready to build
- Building
- Deployed or Build Failed (depending on build success or failure respectively)
The Status field will transition from
- No deployment available
- Waiting for checks to pass...
- Ready to use
After the status is Ready to use you can use this remote field within your content type.
Use a remote field
You can select and configure remote fields created by your developers from the platform as you create and edit content types. Go to Templates > Content Model > Add New. Your remote fields are available as you add fields to your component or content type.
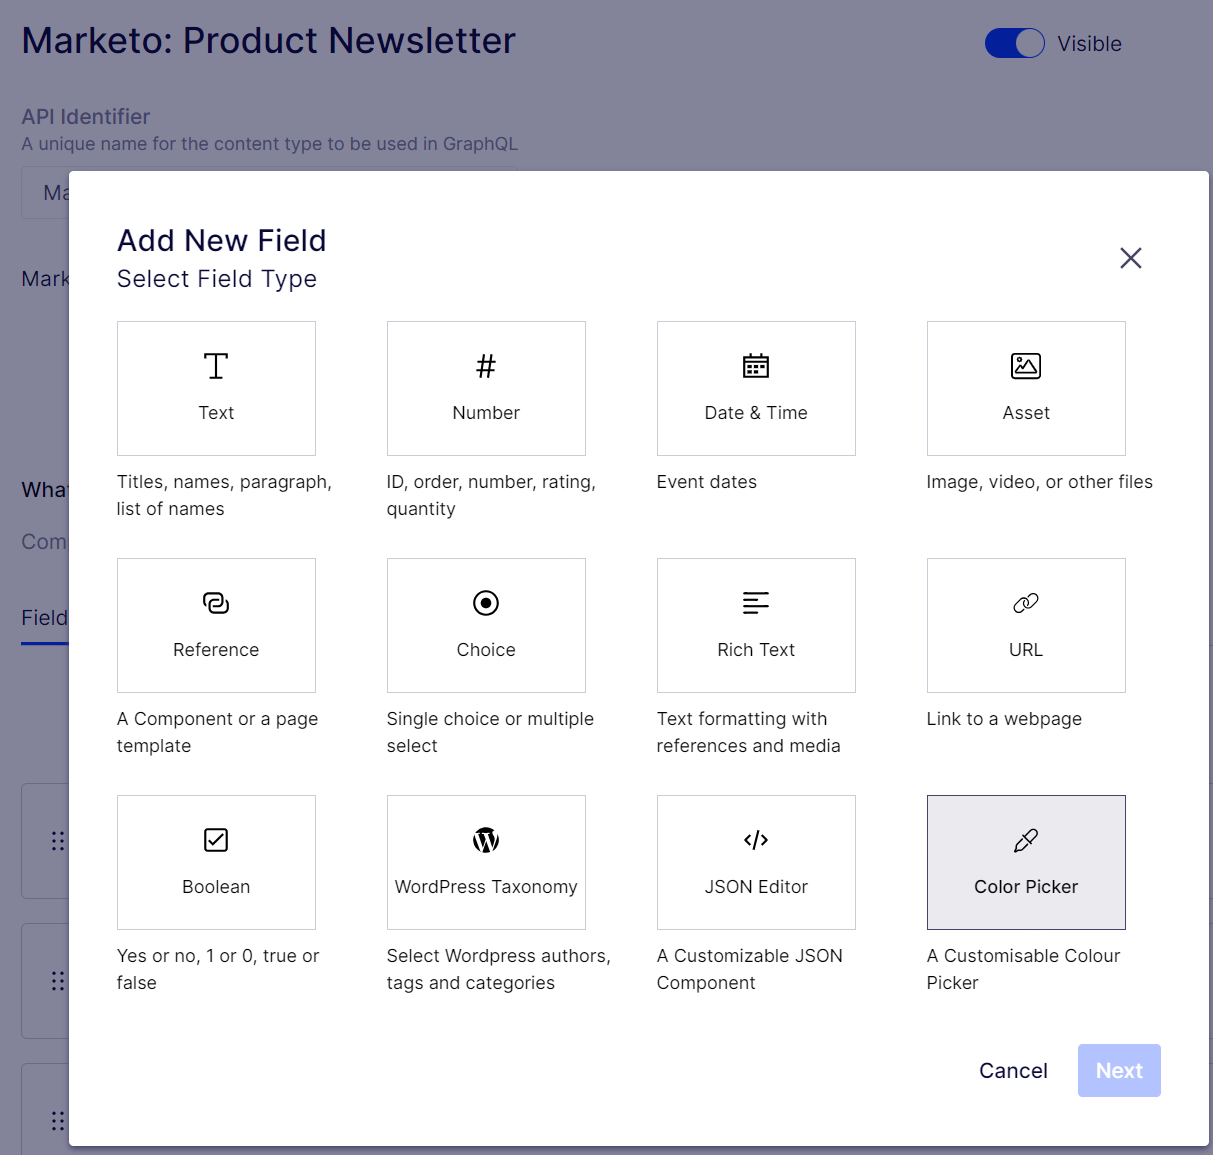
Any configuration options the developer provided are relevant to the specific content type you are currently using.
Updated 9 months ago