Install JavaScript snippet
Learn how to install the Optimizely CMP JavaScript snippet on your website for seamless analytics tracking.
Analytics in Optimizely Content Marketing Platform (CMP) are content-centric, which means that they can provide granular, meaningful insights from your content in a way that typical site analytics cannot, offering more visibility and better data so you can make the best decisions for your content marketing strategy. See also Analytics overview in the CMP user guide.
Add a small script to the header of your article pages. Optimizely tracks engagement for each page containing content, including any format.
Install CMP's JavaScript snippet
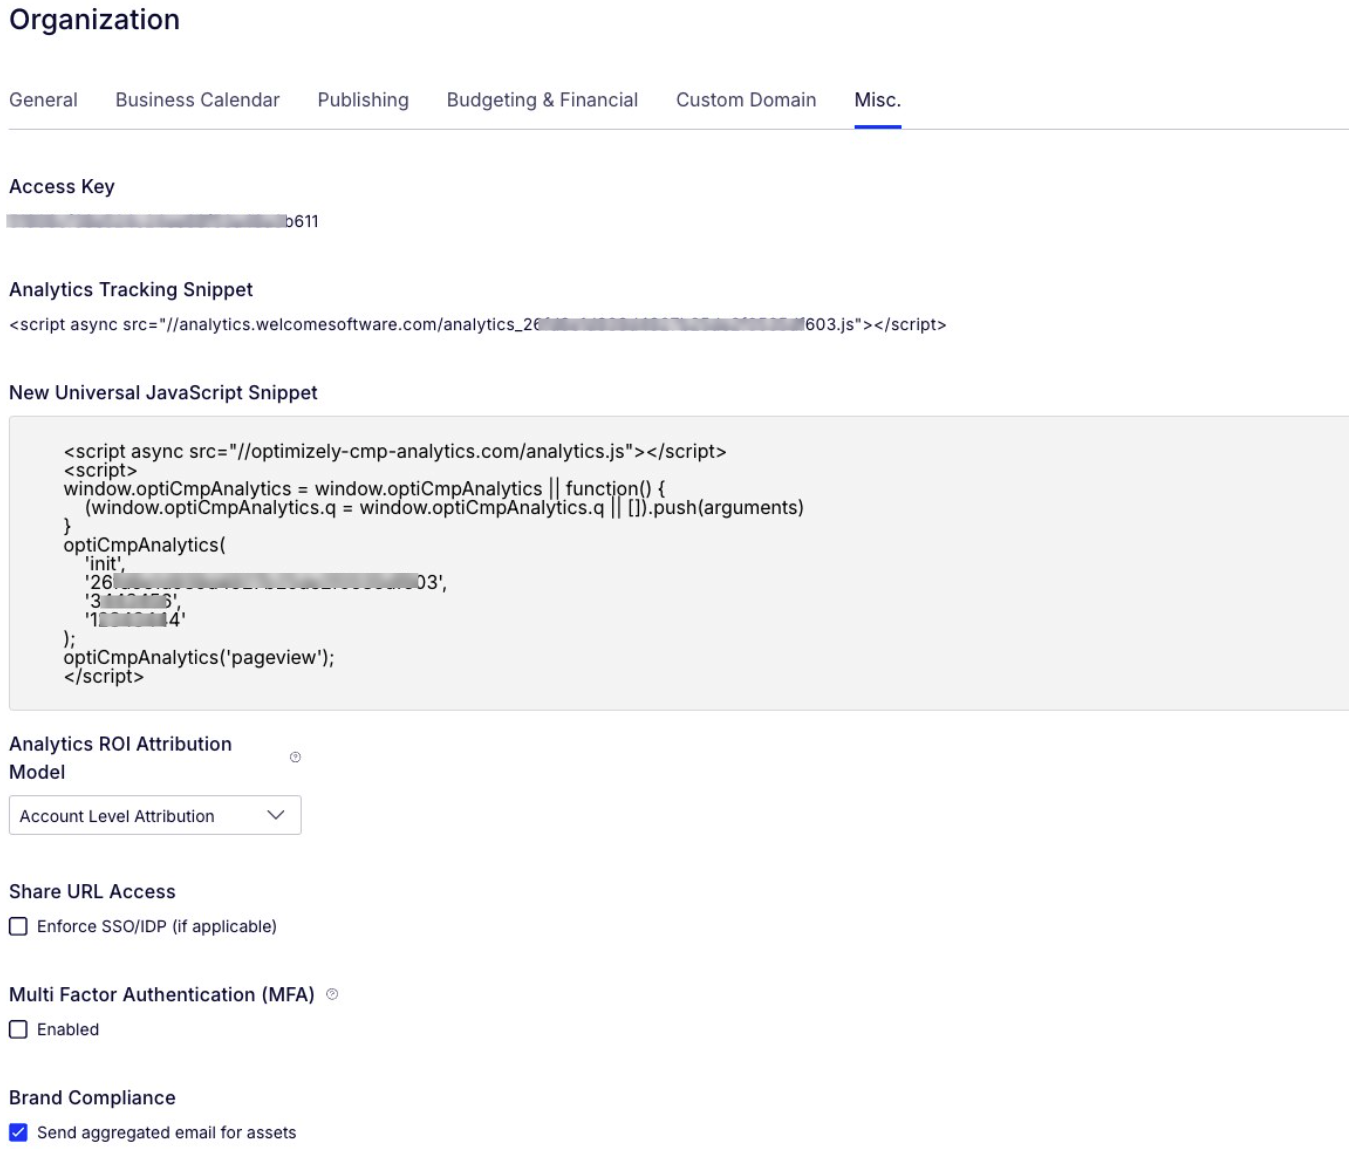
Your JavaScript snippet is at your avatar > Organization > Misc. tab > Analytics Tracking Snippet section.
Copy the snippet and install it to your site in one of the following ways:
Add the snippet to CMS
Log into your CMS and access your site's HTML code. Paste your snippet (unaltered and in its entirety) into the site header immediately before the closing </head> tag.
Some CMSs have a separate section where you can add a tracking code. Contact your web production or development team if unsure of your site's specific configuration. Contact Optimizely Support if you have any questions or require additional assistance.
Add the snippet to WordPress
There are two easy ways to add the tracking code to WordPress:
- Plug-ins (Recommended) – Various plug-ins are available to add custom header and footer codes to your site. A simple, lightweight plug-in that you should use is Insert Headers and Footers. Paste your tracking code snippet into the header on the plug-in's settings page.
- Paste directly into the header – Open up the editor for the
header.phpfile. Paste the snippet right before the closing</head>tag.
Add the snippet to Google Tag Manager
Follow these instructions only if your website has a working Google Tag Manager (GTM) configuration. Copy and paste your GTM's code snippets into your website as instructed in the Install Tag Manager dialog box. For instructions on other methods, see Google's Support site.
-
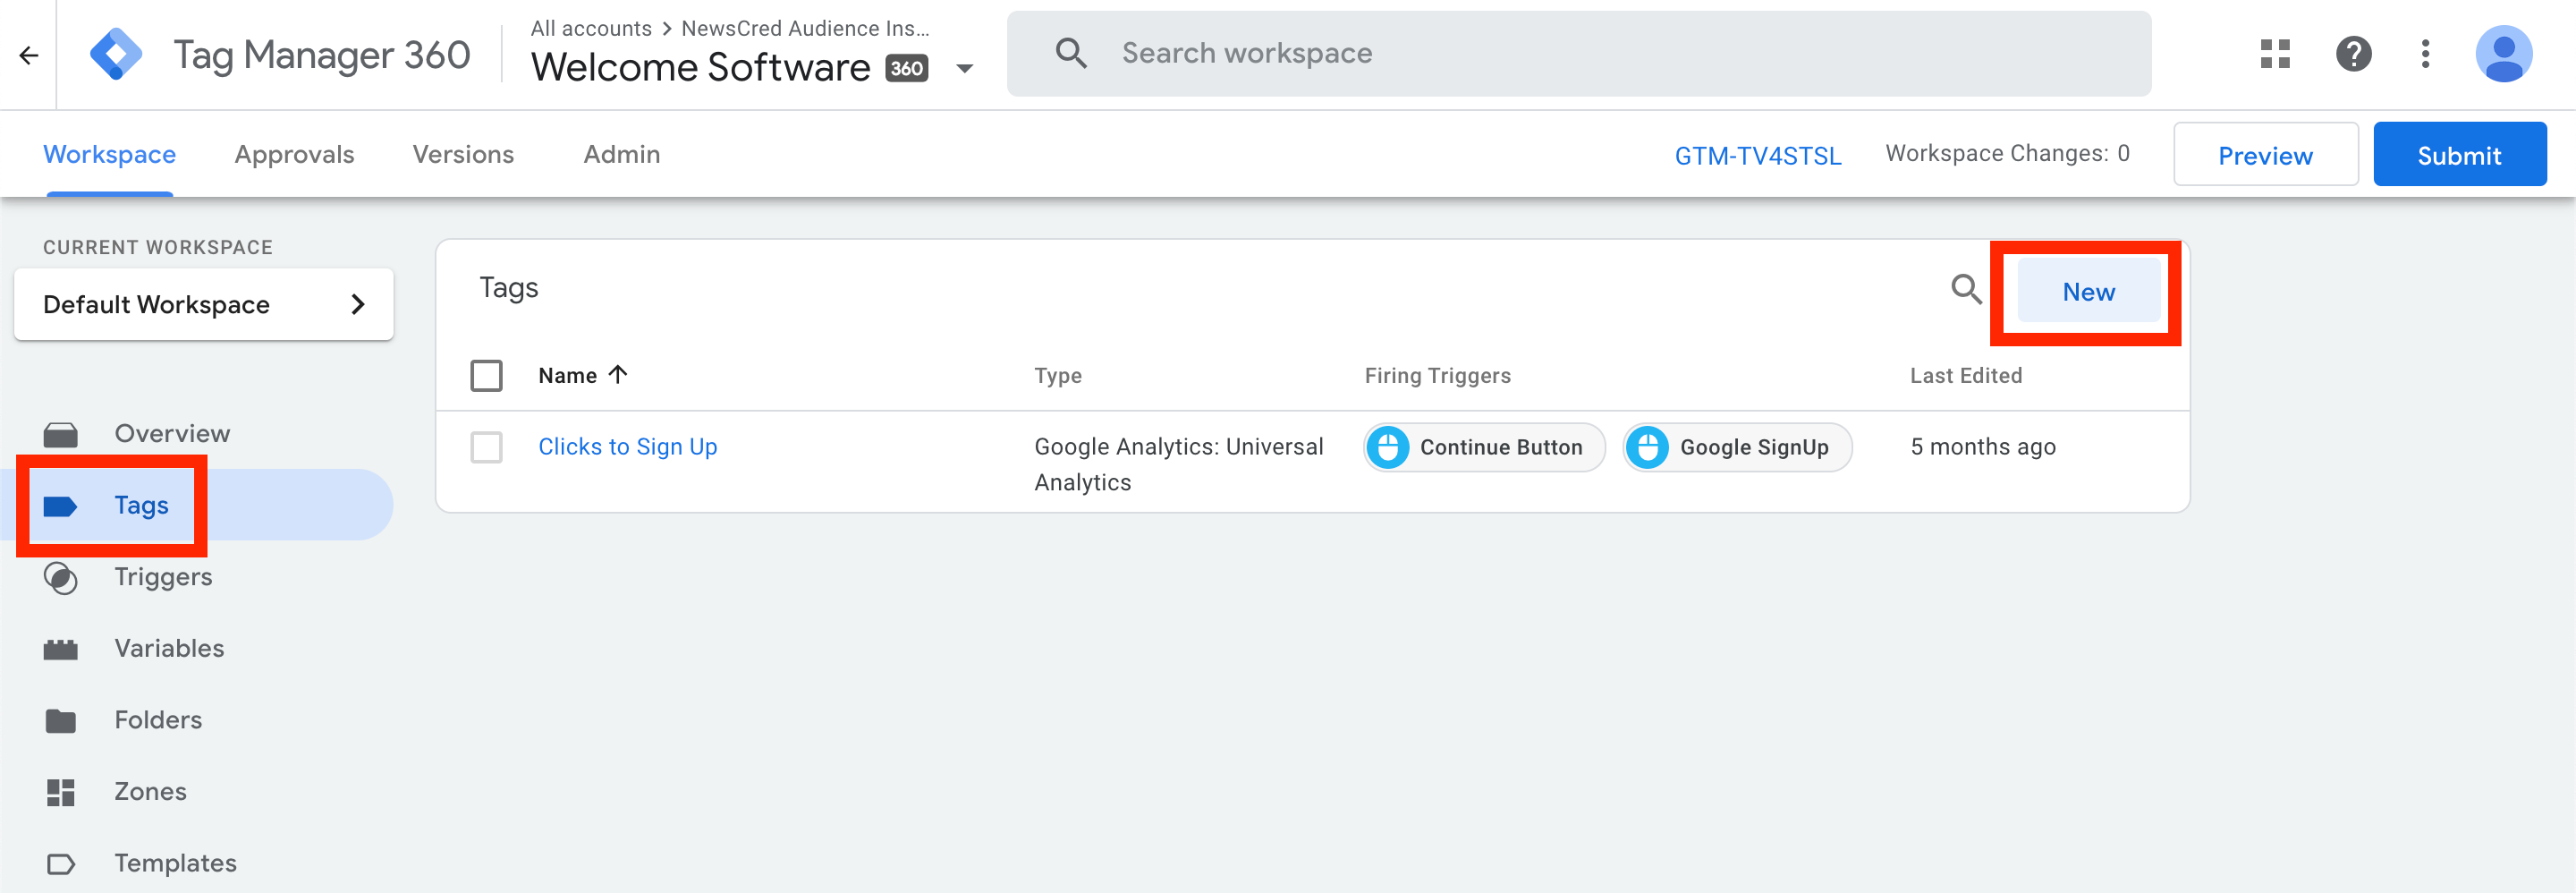
From your GTM container, click New.
-
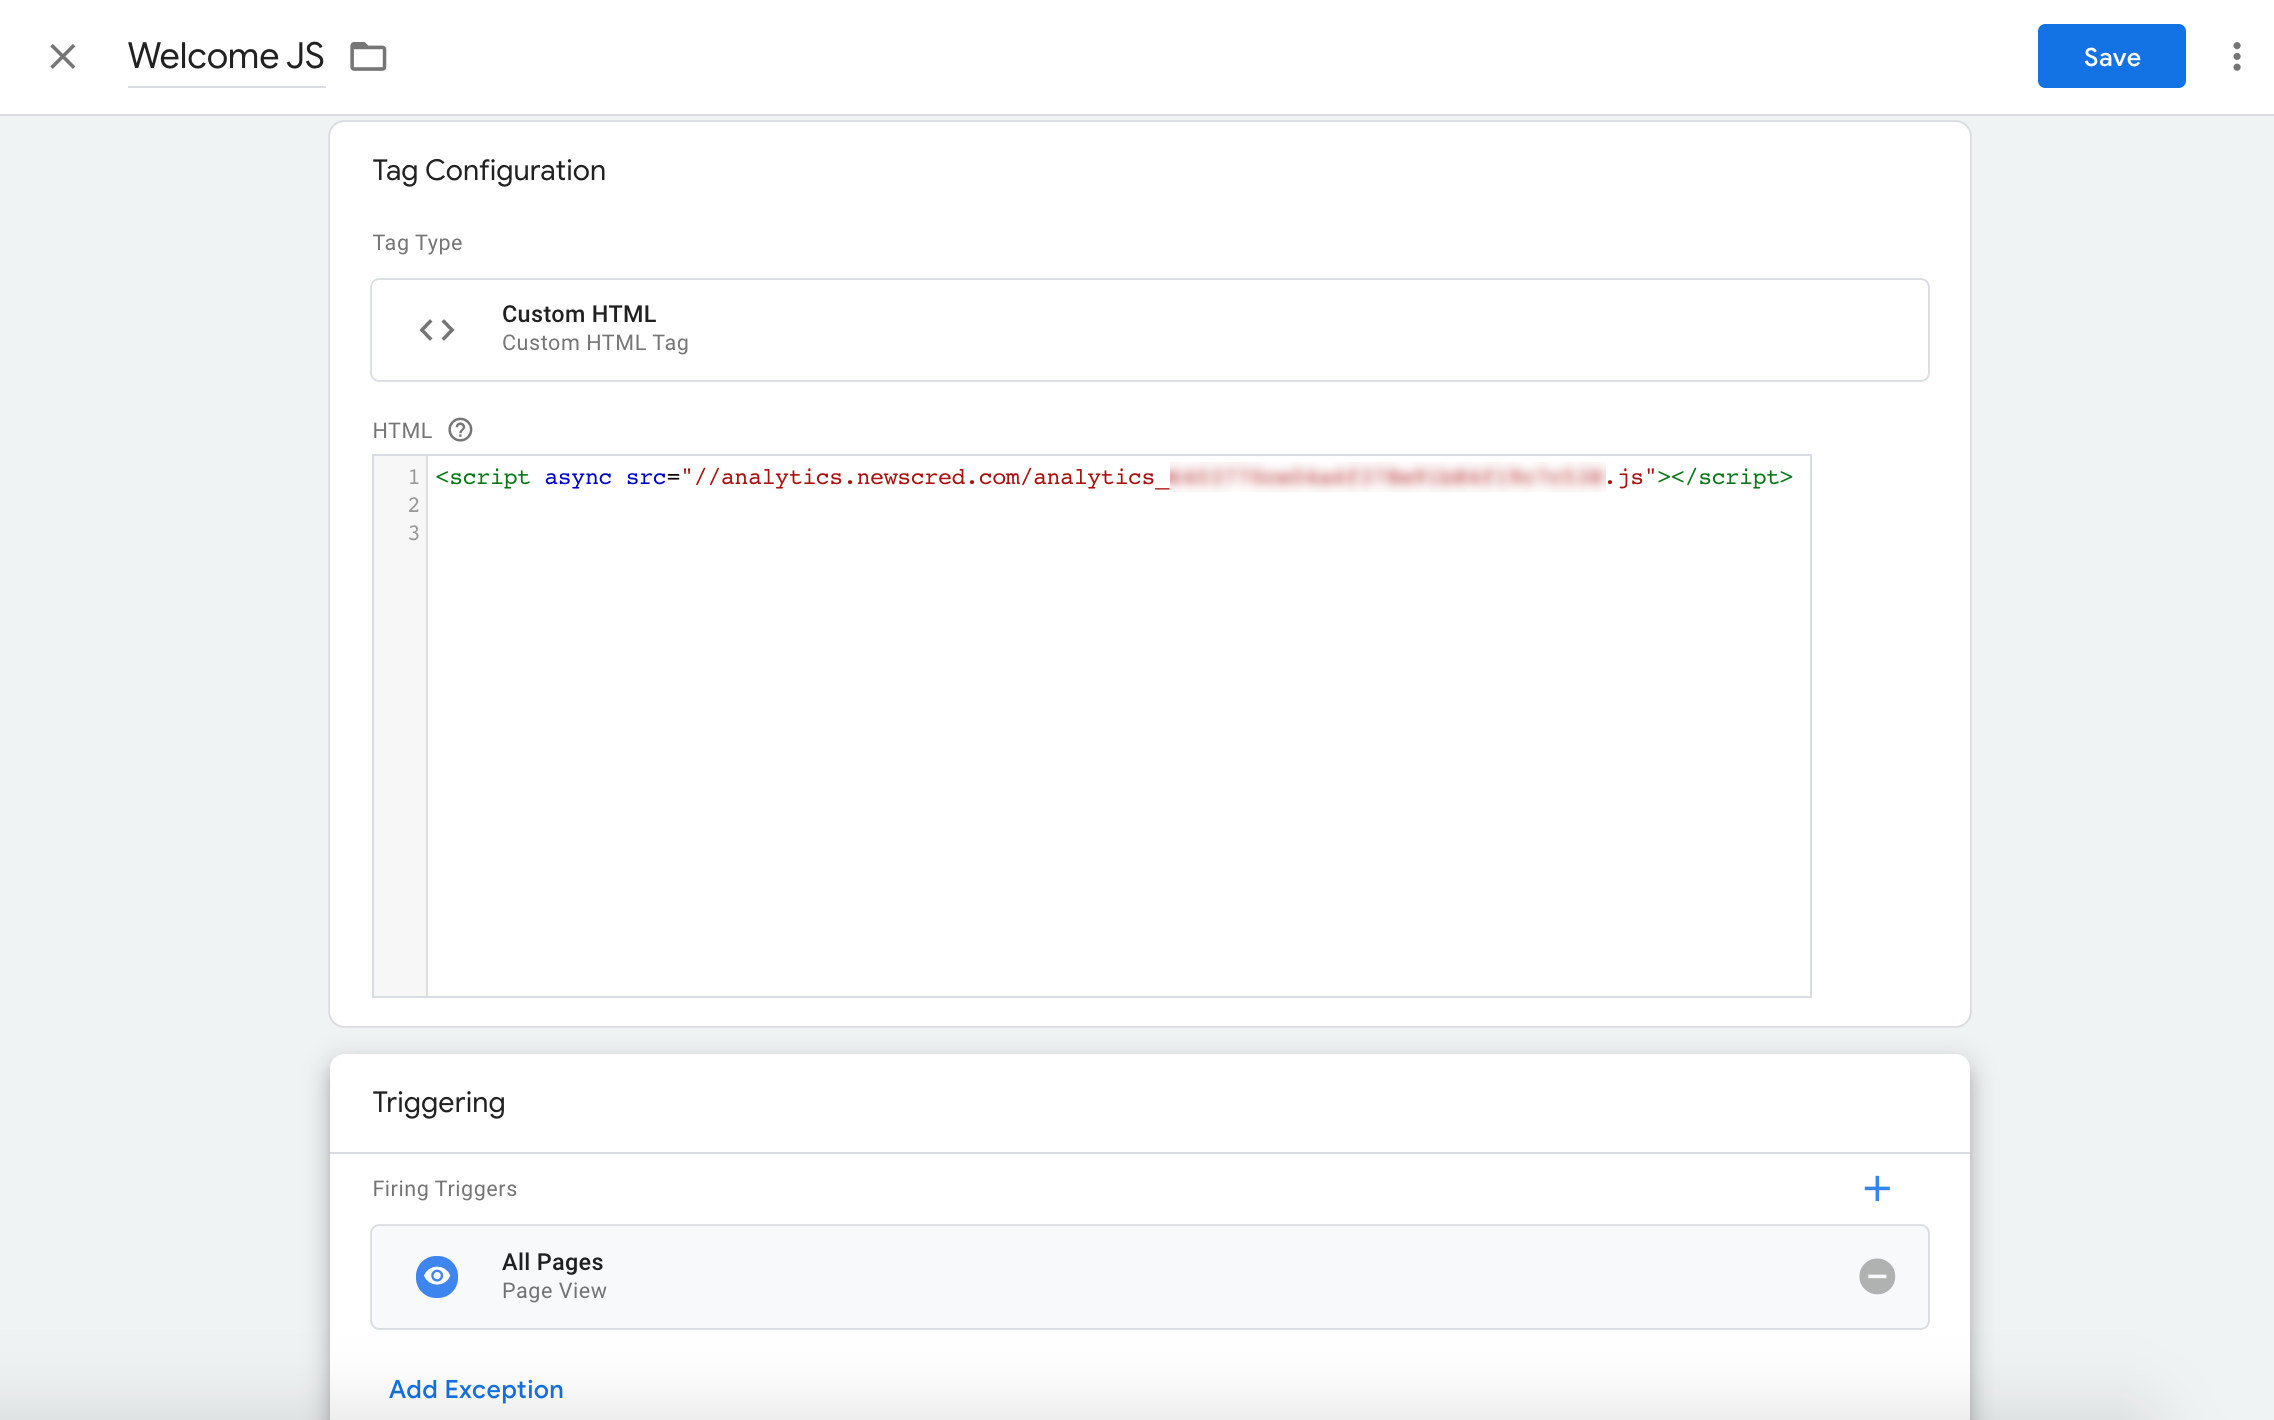
Give your tag a name and set the Tag Type to Custom HTML.
-
Paste your unique analytics snippet in the HTML field (including the opening and closing
<script>tags). -
In the Triggering section at the bottom, add a Firing Trigger for All Pages.
-
Click Save.
-
Click Submit on the main workspace page to push the tag (Welcome JS).
-
Include the Version Name and Description.
-
Click Publish to complete.
Answers to CMP JavaScript questions
Is CMP JavaScript safe to install?
CMP's JavaScript is SOC2-compliant and works with some of the world's largest and most highly regulated companies. In conjunction with the embedded pixel, CMP's JavaScript tracks unique IP addresses and cookie IDs of visitors to your website. CMP gleans content-centric performance metrics, such as engagement, scroll length, time on site, and so on, and encrypts this data and stores it securely. CMP is GDPR-compliant and Privacy Shield certified.
Will this impact the performance of my site?
The JavaScript script loads from a CDN and is only 7.5KB. It also loads asynchronously, so placing the script in the header should not impact page load speeds. However, if your team has multiple scripts in the header, you can also place the script in the footer with little to no impact on load time or tracking.
Does the JavaScript interfere with my other analytics tools?
Embedding JavaScript does not conflict with Google Analytics or Adobe Analytics. The JavaScript uses a unique Google Analytics tracker name, so it cannot conflict with another Google Analytics tracker on the page. Google Analytics or Adobe Analytics and CMP's analytics complement each other. In any decision-making process, the more data you gather, the better.
How should I deploy JavaScript in a cookie consent setup?
If you use the cookie consent plug-in, it is best to load the Analytics JavaScript only after the user confirms that they consent to use cookies. The exact configuration varies depending on your cookie consent tool. Contact Optimizely Support if you have any questions or require assistance.
What is a tracking pixel?
A tracking pixel is a code that uses a single pixel to track different user engagements through an HTML img tag. CMP inserts the code into the pages of third-party websites right below the article's description. The pixel activates a request when a visitor loads the page and logs the request as a page view.
Why does CMP use tracking pixels?
The tracking pixel collects data by activating when the page loads. It can count page views and unique visitors. The following example shows the tracking pixel:
<img src="https://pixel.welcomesoftware.com/px.gif?key=xxxxxxxxxxxxxxxxxxxxxxxxxxxxxxxxxxxxxxxxxxxxxxxxxxxxxx=="
     alt=""
     height="1"
     width="1"
     class="nc_pixel"/>
Tracking pixels vary by URL. You can see them from any tasks opened in the Tasks section.
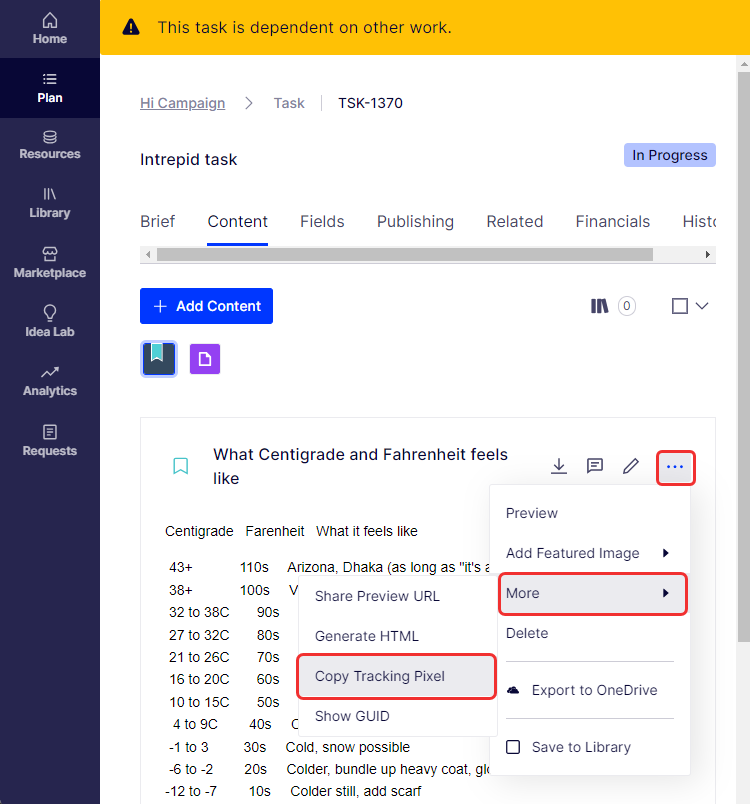
Go to any of your tasks, open the options menu (...) > More > Copy Tracking Pixel to copy it onto your clipboard.
CMP embeds the tracking pixel into your site on pages where articles from CMP are published. To verify, include the tracking pixel at the end of the page's content. JavaScript searches for the unique pixel on the page to tag the data it collects with the content's unique ID. It also uses the pixel's position to identify where the content ends so you can measure the visitor's scroll depth.
How do I know if the tracking pixel is working?
If the tracker is working, it shows a 200 status. To find this, go to your website's article page (it must be published through the CMP), right-click your mouse, and inspect the page in developer mode. It will look similar to the following image.
After opening the developer's tool, reload the page by pressing F5. As you can see in the image above, open the Network tab and search for pixel. The tracking code works correctly if you see 200 in the Status column. If you want more details, search for tracker and click on it.
Updated 5 months ago