Data sync destination
Develop an Optimizely Connect Platform (OCP) app to enable custom data destinations for users within the OCP Sync Manager.
You can add a custom destination to your Optimizely Connect Platform (OCP) app by completing the following steps:
- Declare destinations in the app manifest file (
app.yml). - Declare the following schema for your destinations. You can declare only one schema per destination.
src/destinations/schema/*.ymlorsrc/destinations/{SchemaFunction}.ts
- Implement the logic for the destinations.
Prerequisite
To add a custom destination, register and scaffold your app.
Declare destinations in the app manifest file
You can define multiple destinations in a single app. You must declare every destination in the destinations section of the app manifest file (app.yml). Each destination must have its own schema and logic.
Required properties
The following properties are required for declaring destinations in the app manifest file:
schema– A string referencing a static schema name, corresponding to the schema name defined insrc/destinations/schemas/, or an object withentry_pointfor dynamic schemas.entry_point– Name of the class implementing the sync logic.
Optional properties
description– A human-readable explanation of the sync's purpose.
See the following example:
destinations:
  bynder_asset_sync:
    entry_point: BynderAssetSync
    description: Sync Assets to Bynder
    schema: asset
Support delete operations
To enable your destination to receive and process delete events from data syncs, add supports_delete: true to the destination configuration:
destinations:
  my_destination:
    entry_point: MyDestination
    description: Sync data to external service
    schema: my_schema
    supports_delete: true  # Enable delete support
When supports_delete is enabled, the following occurs:
- Your destination receives delete events from sources.
- Delete events include only the primary key and
_isDeletedflag. - Delete events do not include other mapped fields.
- Your
deliver()method must handle delete events appropriately.
When supports_delete is not enabled, or is set to false, the following occurs:
- The app runtime automatically discards all delete requests.
- Your destination does not receive delete events.
- Your destination receives only create or update events.
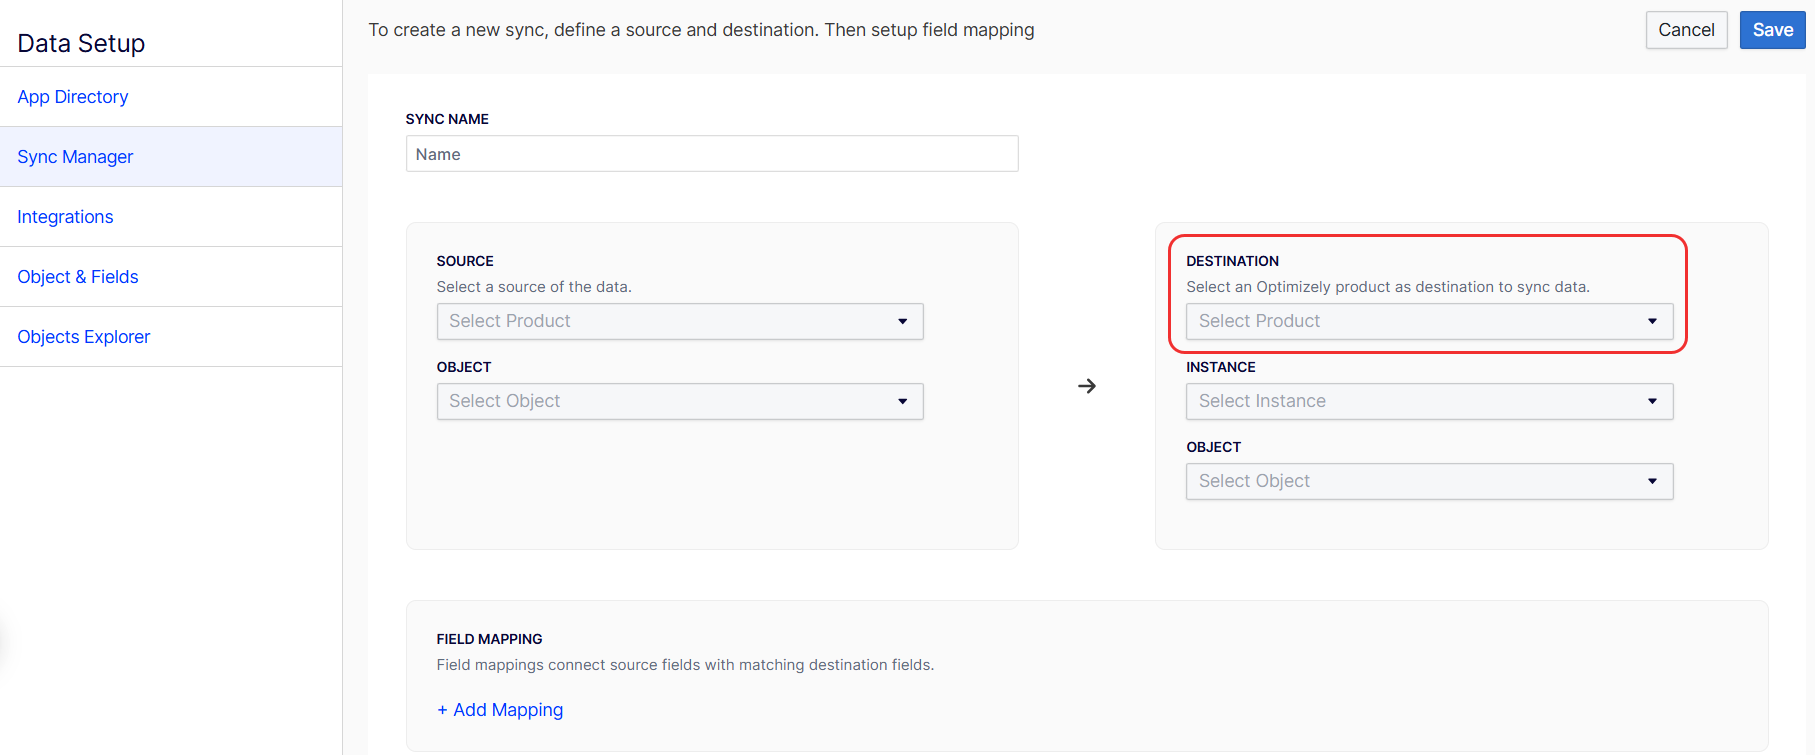
To view the defined destinations when creating a new data sync, complete the following steps after installing the OCP app:
- Log in to the app.
- Go to Data Setup > Sync Manager.
- Click New Sync.
- Expand the Destination drop-down list.
Declare the schema
Schema is where you define which properties your destinations accept. OCP displays these destinations as options in the data sync field mappings. OCP uses the properties defined in your schema when calling your destination class method.
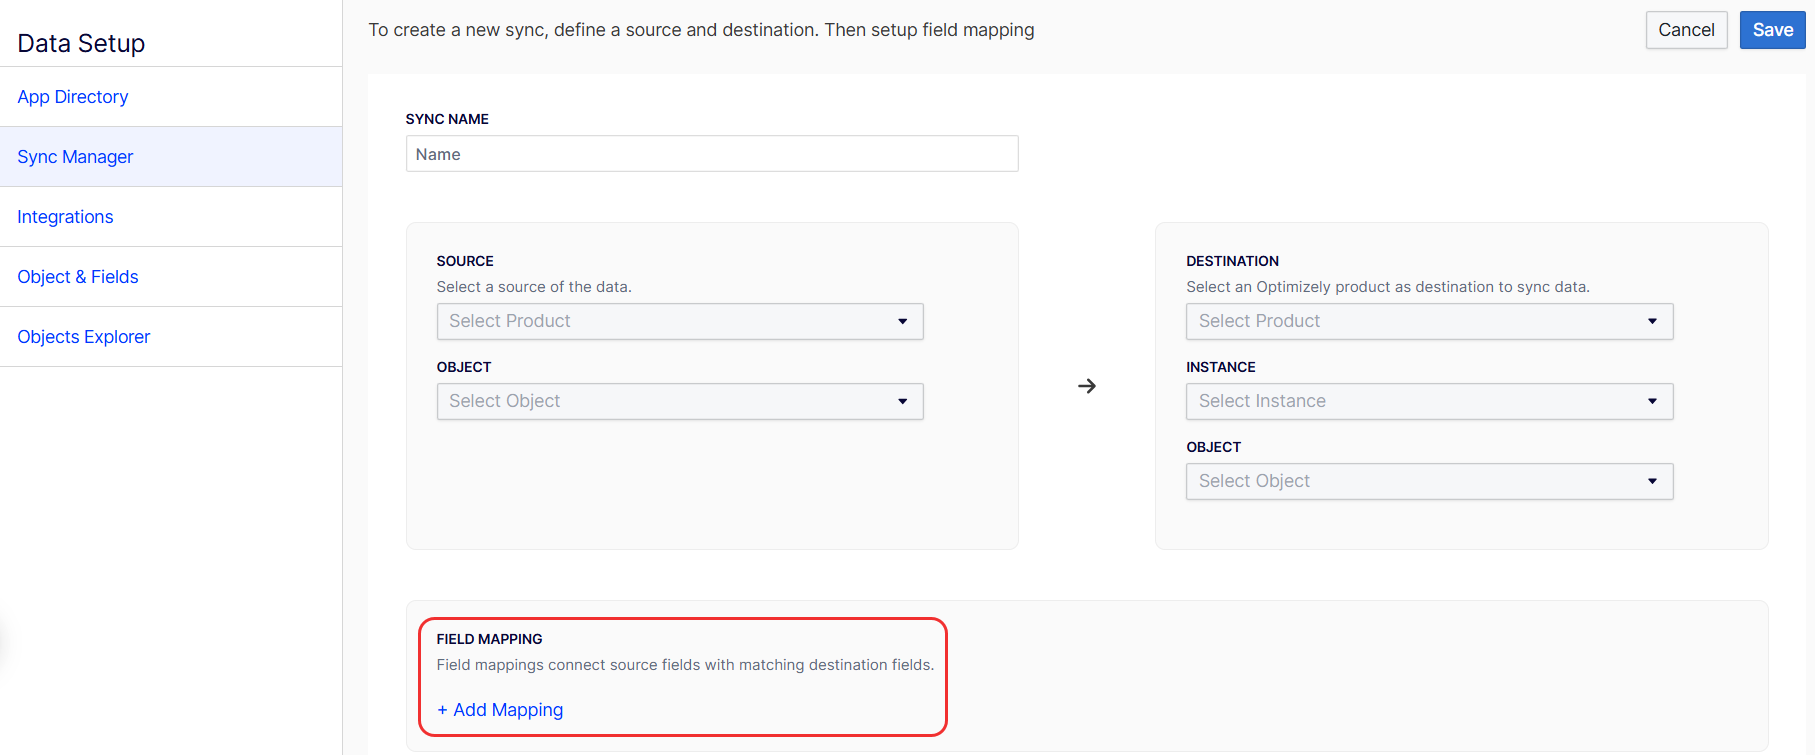
To map fields, complete the following:
- Log in to the app.
- Go to Data Setup > Sync Manager.
- Click New Sync.
- Click Field Mapping > Add Mapping to connect source fields with matching destination fields.
You can choose between a static or dynamic schema based on your data's characteristics:
- Static schema – Use a static schema when your data structure is fixed and known in advance, all destinations of a particular type share an identical structure, and you want to define the schema declaratively without code.
- Dynamic schema – Use a dynamic schema when you need to retrieve schema information from external systems or when different instances of the same destination have different fields
Declare static schema
You must create a corresponding .yml file in src/destinations/schema for each schema field you defined in the app.yml file. Use the following properties:
name– The unique identifier corresponding to theschemavalue in the manifestdisplay_name– The user-friendly name for the schemadescription– A brief explanation of the field's purposefields– An array containing data structure and validation rulestype– The field's data type. OCP supports the following:stringbooleanintfloatlong
primary– Designates the unique identifier field for the object.
See the following example of an asset.yml schema:
name: asset
display_name: Asset
fields:
  - name: bynder_id
    type: string
    display_name: Bynder Id
    description: Primary Id in Bynder
    primary: true
  - name: bynder_asset_name
    type: string
    display_name: Bynder Asset Name
    description: The name of the Asset
Declare dynamic schema
You must create and export a class in src/destinations/ that extends DestinationSchemaFunction. The class name must correspond to the schema entry_point in the app manifest. Implement the getDestinationsSchema() method, which returns a DestinationSchema object.
See the following example of the app manifest:
destinations:
  bynder_asset_sync:
    ...
    schema:
      entry_point: BynderAssetSchema
    ...
See the following example implementation:
import * as App from '@zaiusinc/app-sdk';
import { Bynder } from '../lib/Bynder';

const convertType = (type: string): string | undefined => {
  switch (type) {
    case 'string':
      return 'string';
    case 'boolean':
      return 'boolean';
    case 'int':
      return 'int';
    case 'float':
      return 'float';
    case 'long':
      return 'long';
    default:
      return undefined;
  }
};

export class BynderAssetSchema extends App.DestinationSchemaFunction {
  public async getDestinationsSchema(): Promise<App.DestinationSchema> {
    const bynder = await Bynder.init();
    const rawFields = await bynder.getFullFieldList();

    const fields: App.DestinationSchemaField[] = rawFields.reduce((acc, field) => {
      const type = convertType(field.type);
      if (!type) return acc; // Skip fields with unknown type
      acc.push({
        name: field.id,
        display_name: field.name,
        description: field.name,
        type,
        primary: field.id === 'id'
      });
      return acc;
    }, [] as any[]);

    return {
      name: 'bynder_asset',
      description: 'Bynder Asset',
      display_name: 'Bynder Asset',
      fields: fields.sort((a, b) => a.display_name.localeCompare(b.display_name)),
    };
  }
}
Implement the logic
To define your destination logic, extend the Destination<T> abstract class. OCP invokes methods within your destination class. The primary method is deliver, which receives a list of items and sends them to your destination service. The property names of these items correspond to the fields defined in your schema, which OCP displays as options in Data Setup > Sync Manager > New Sync > Field Mapping.
Class structure
Extend Destination<T> in the src/destinations directory. Match the class name with entry_point in the app manifest file, for example, BynderAssetSync.
Implementation methods
For ready(), complete the following:
- Check credentials and configuration validity.
- Return
DestinationReadyResultwithready: booleanand errormessage, if applicable.
For deliver(batch: DestinationBatch<T>), complete the following:
- Process
DestinationBatch<T>with the following properties:items[]– List of items to be processed.attempt– The current count of delivery attempts for the batch.sync– An object containing theidandnameof the associated data sync.
- Return
DestinationDeliverResultwith the following properties:success– A boolean indicating the completion status of the batch.retryable– A flag determining if the batch is eligible for retry upon failure.failureReason– (Optional) A description of the internal error if the batch failed.
See the following example of an implementation:
import * as App from '@zaiusinc/app-sdk';
export interface BynderAsset {
  id: string;
  name: string;
}
export class BynderAssetSync extends App.Destination<BynderAsset> {
  public async ready(): Promise<App.DestinationReadyResult> {
    return { ready: true };
  }
  public async deliver(batch: App.DestinationBatch<BynderAsset>): Promise<App.DestinationDeliverResult> {
    return { success: true, retryable: false };
  }
}
Handle delete operations
Destinations receive and process delete events from data syncs to remove records from external systems. When configured with supports_delete: true, your destination receives delete events in the deliver() method.
Detect delete events
You can identify delete events by the following properties:
- The primary key field.
_isDeleted: trueflag.- No other fields, as the data sync service sends only the primary key and the delete flag for these events.
See the following example of a TypeScript interface:
export interface MyDestinationData {
  id: string;           // Primary key
  name?: string;        // Only present for create/update
  _isDeleted?: boolean; // Only present for delete events
}
Process delete events
Check for the _isDeleted flag in your deliver() method to identify if you must delete an item.
import * as App from '@zaiusinc/app-sdk';
import { logger } from '@zaiusinc/app-sdk';

export interface AssetData {
  asset_id: string;
  asset_name?: string;
  _isDeleted?: boolean;
}

export class MyDestination extends App.Destination<AssetData> {
  public async ready(): Promise<App.DestinationReadyResult> {
    // Check credentials and configuration
    return { ready: true };
  }

  public async deliver(batch: App.DestinationBatch<AssetData>): Promise<App.DestinationDeliverResult> {
    try {
      for (const item of batch.items) {
        if (item._isDeleted) {
          // Handle delete operation
          // Only item.asset_id and item._isDeleted are present
          await this.deleteAsset(item.asset_id);
          logger.info(`Deleted asset: ${item.asset_id}`);
        } else {
          // Handle create/update operation
          // All mapped fields are present
          await this.upsertAsset({
            id: item.asset_id,
            name: item.asset_name
          });
          logger.info(`Upserted asset: ${item.asset_id}`);
        }
      }

      return { success: true, retriable: false };
    } catch (error) {
      logger.error('Failed to process batch', error);
      return {
        success: false,
        retriable: true,
        failureReason: error.message
      };
    }
  }

  private async deleteAsset(id: string): Promise<void> {
    // Call external API to delete the asset
    await fetch(`${this.config.apiUrl}/assets/${id}`, {
      method: 'DELETE',
      headers: {
        'Authorization': `Bearer ${this.config.apiToken}`
      }
    });
  }

  private async upsertAsset(asset: { id: string; name: string }): Promise<void> {
    // Call external API to create/update the asset
    await fetch(`${this.config.apiUrl}/assets`, {
      method: 'POST',
      headers: {
        'Authorization': `Bearer ${this.config.apiToken}`,
        'Content-Type': 'application/json'
      },
      body: JSON.stringify(asset)
    });
  }
}
Mixed batches
A single batch can contain both delete events and regular create or update events.
public async deliver(batch: App.DestinationBatch<AssetData>): Promise<App.DestinationDeliverResult> {
  const itemsToDelete: string[] = [];
  const itemsToUpsert: AssetData[] = [];

  // Separate deletes from creates/updates
  for (const item of batch.items) {
    if (item._isDeleted) {
      itemsToDelete.push(item.asset_id);
    } else {
      itemsToUpsert.push(item);
    }
  }

  // Process deletes
  if (itemsToDelete.length > 0) {
    await this.bulkDelete(itemsToDelete);
  }

  // Process creates/updates
  if (itemsToUpsert.length > 0) {
    await this.bulkUpsert(itemsToUpsert);
  }

  return { success: true, retriable: false };
}
Best practices
Consider the following best practices when handling delete operations:
- Primary key only – Delete events include only the primary key field and
_isDeletedflag. Do not expect other fields. - Idempotency – Ensure your delete operations are idempotent. Your destination might receive the same delete event multiple times due to retries.
- Missing records – If your external system returns not found when deleting, consider this a success rather than an error, as you achieved the desired end state (record does not exist).
Handle errors and retries
Consider the following when handling errors and retries in the deliver method:
- Use
retriable: truefor transient errors, like network issues. OCP retries a batch up to three times. - Set
retriable: falsefor non-recoverable errors, like invalid credentials.
Directory structure
The standard directory structure includes the following:
- Destination classes –
src/destinations/{EntryPointClassName}.ts - Schemas –
src/destinations/schema/*.yml
See the following example:
// successfully processed, no retry
return { success: true, retriable: false };

// unsuccesfully processed, no retry
return { success: false, retriable: false };

// unsuccessfully processed, retry
return { success: false, retriable: true };
Complete and publish your app
Updated 7 days ago