Create your project
Create a CMS sample website, add and configure the CMS integration for Optimizely Search & Navigation, and index the initial content.
If you already have a website to which you want to add Optimizely Search & Navigation, skip the website creation step. After completing this step, you are ready to start developing.
Note
Optimizely Search & Navigation was formerly known as Episerver Find.
Create the website
Follow Install CMS 11 and Commerce 13 for Optimizely Content Management System (CMS). Select Alloy (MVC) to create a sample website based on MVC. Let the installation finalize, and open the website in a browser to ensure it works properly.
CMS 12 and Commerce 14
For Optimizely Content Management System (CMS 12) and Optimizely Customized Commerce version 14, see Install Optimizely (ASP.NET Core).
Add Optimizely Search & Navigation to the website
Add the Optimizely NuGet feed as a package source for the website for which you want to add Optimizely Search & Navigation. The CMS sample site automatically adds the NuGet feed.
CMS 11 and Commerce 13
If you selected the Episerver Find when you installed CMS 11 and Commerce 13, you can skip this step.
- In Visual Studio, use Solution Explorer to open the website.
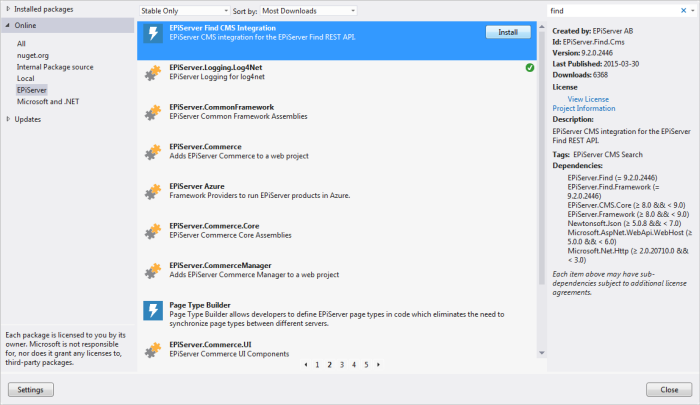
- Right-click on References, and select Manage NuGet Packages, Online and EPiServer.
- Locate the
EPiServer.Find.Cmspackage and click Install.

- Verify that Search & Navigation components are added under your project References.
Configure Optimizely Search & Navigation for the website
- Log in to your account on the Search & Navigation site, go to My Services, and click index Details.
- Copy the configuration code snippet displayed for the
web.configfile. - Go to your solution in Visual Studio, open the
appsettings.jsonfile, and paste the configuration code into the relevant sections. The code to paste looks something like this:
{
  "EPiServer": {
    "Find": {
      "ServiceUrl": "https://demo01.find.episerver.net/RXQGZ5QpXU9cuRSN2181hqA77ZFrUq2e/",
            "DefaultIndex": "yourname_indexname"
    }
  }
}
Also, enter AddFind() Startup.cs. You can also configure the index using FindOptions from code.
services.Configure<EPiServer.Find.FindOptions>(options => {
  options.DefaultIndex = "INDEX";
  options.ServiceUrl = "URL";
});
services.AddCms();
services.AddFind();
- Rebuild the project and verify that the site is running properly.
Note
To ensure maximum availability and scaling flexibility, Search & Navigation uses dynamic IP ranges. For example, if you require whitelisting of IP addresses in the firewall, make sure that your firewall supports domain-based whitelisting.
Index the website
- Log in to the site.
- Go to the CMS admin view.
- Select Find Indexing Job and click Start Manually. This action indexes the site content. You do not need to set up the Scheduled job for indexing to run automatically because content changes are instantly indexed.
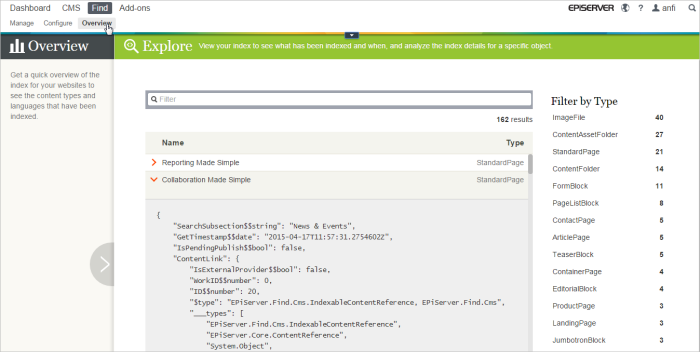
- Log in to the CMS edit view, go to Find > Overview > Explore to view the index. For the sample site, you see something like this:

Note
If multiple sites are associated with the index, objects from other sites may appear. See Index integrated solution for information about how indexing works.
Updated 3 months ago