
Create a demo site using CMS (SaaS) and Netlify
Steps to create content hosted in CMS (SaaS) and deliver it to Netlify.
Prerequisites
- Ability to create a GitHub repository.
- Netlify account.
Optimizely CMS (SaaS) offers a sample website using Next.js, a minimalistic framework for server-rendered React applications. This demo uses Netlify to provide seamless deployment and hosting. The demo includes everything you need to configure a website, including the styling and configuration. For more details, see the cms-saas-netlify-demo GitHub repository.
GitHub repository configuration
- Download the sample code from cms-saas-netlify-demo GitHub repository. See Downloading source code archives on GitHub.com for instructions.
- Create a repository in your personal organization.
- Enter optimizely-cms-saas-netlify-demo as the repository name.
- Choose Public or Private.
- Click Create repository.
- Clone the repository locally. See the GitHub documentation for information.
- Unzip the
cms-saas-netlify-demorepository zip you downloaded in step 1. - Copy and paste the files and folders inside the
cms-saas-netlify-demofolder to your local repository. - Open the yarnrc.yml file Add the following:
See nodeLinker: node-modules.nodeLinker: node-modules - Commit the files and push your local changes to your GitHub repository. See About commits and Pushing commits to a remote repository in the GitHub documentation.
CMS (SaaS) content
To retrieve content from CMS (SaaS), you first need to create it. You can:
- Manually create content types and content – Follow the instructions to create content types and content in the Get started developer documentation. See additional information on Content and Content types.
- Use sample content (Recommended) – Download the example .episerver data and follow the import Episerver Data package section to import the data through the UI or API to your CMS (SaaS) instance. The
.episerver datacontains sample content for a fictitious online bank, called MoseyBank.
After adding content, go to Scheduled Jobs and click Start for the Optimizely Graph Full Synchronization. This prepares the content and makes it available through Optimizely Graph, which is how Netlify (the head hosting platform) communicates with CMS (SaaS).
CMS (SaaS) UI configuration
After adding or importing the content to your CMS (SaaS) instance,
-
Go to Settings > Applications.
-
Click Create Website Application.
-
Enter moseybank for the Application Name.
-
Select From Existing for Choose Start Page.
-
Select Mosey Bank.
-
Click Create Website.
-
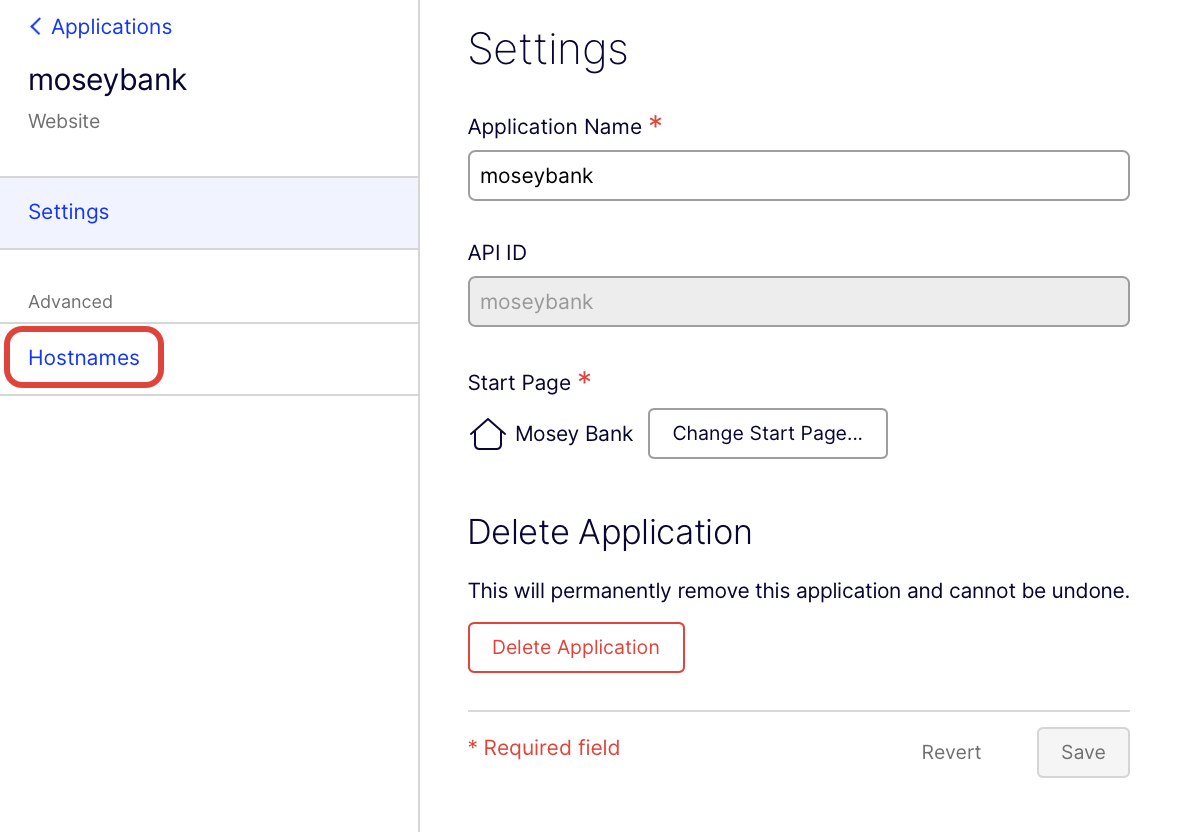
Select moseybank from the list of Applications.

-
Click Hostnames.
-
Click Add Hostname
-
Enter optimizely-saas-cms.netlify.app for the Hostname field.
-
Click Add.
Go to Settings > Scheduled Jobs and click Start for the Optimizely Graph Full Synchronization.
Netlify configuration
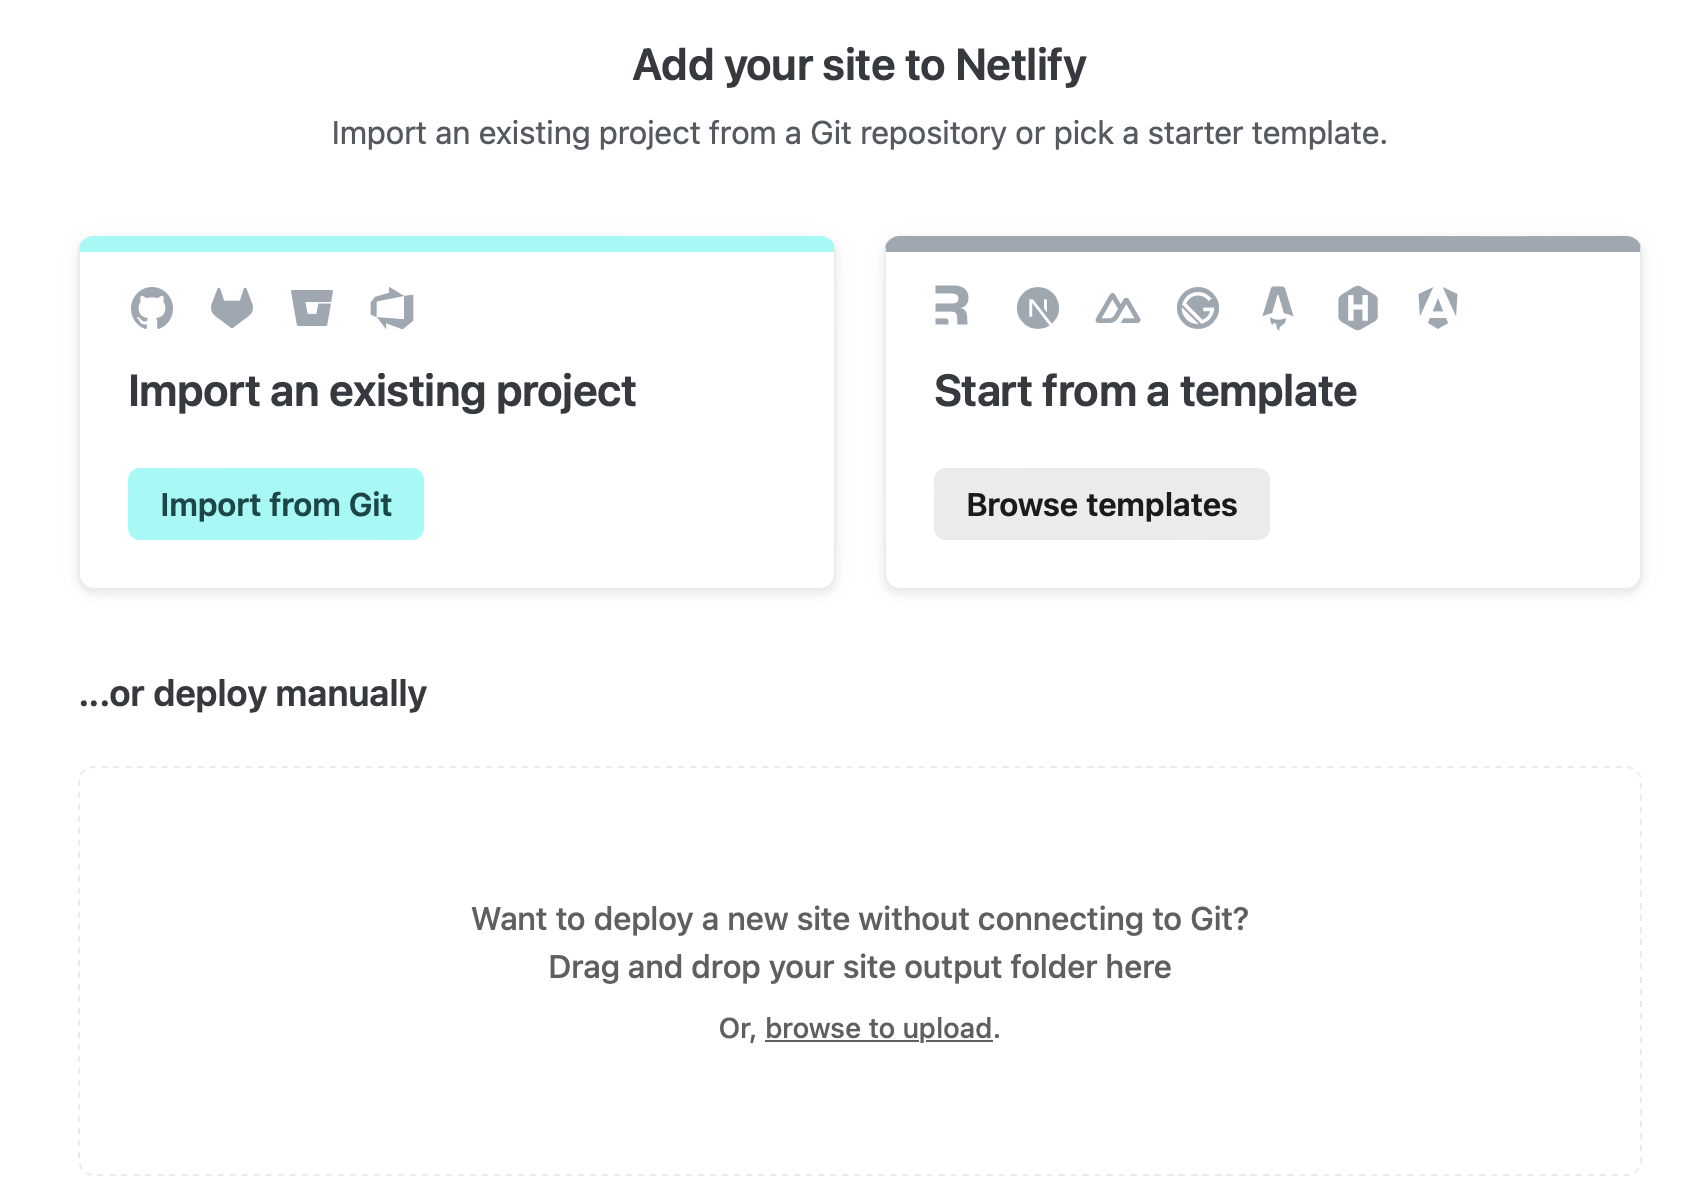
In Netlify, create a new site by importing from the GitHub repository you made in the GitHub repository configuration section.
-
Select Import from Git > GitHub (sign in to your account if needed).
-
Enter a name for your site (this is your custom URL). And optionally configure your site.
-
Click Add environment variables. Enter the following keys and values.
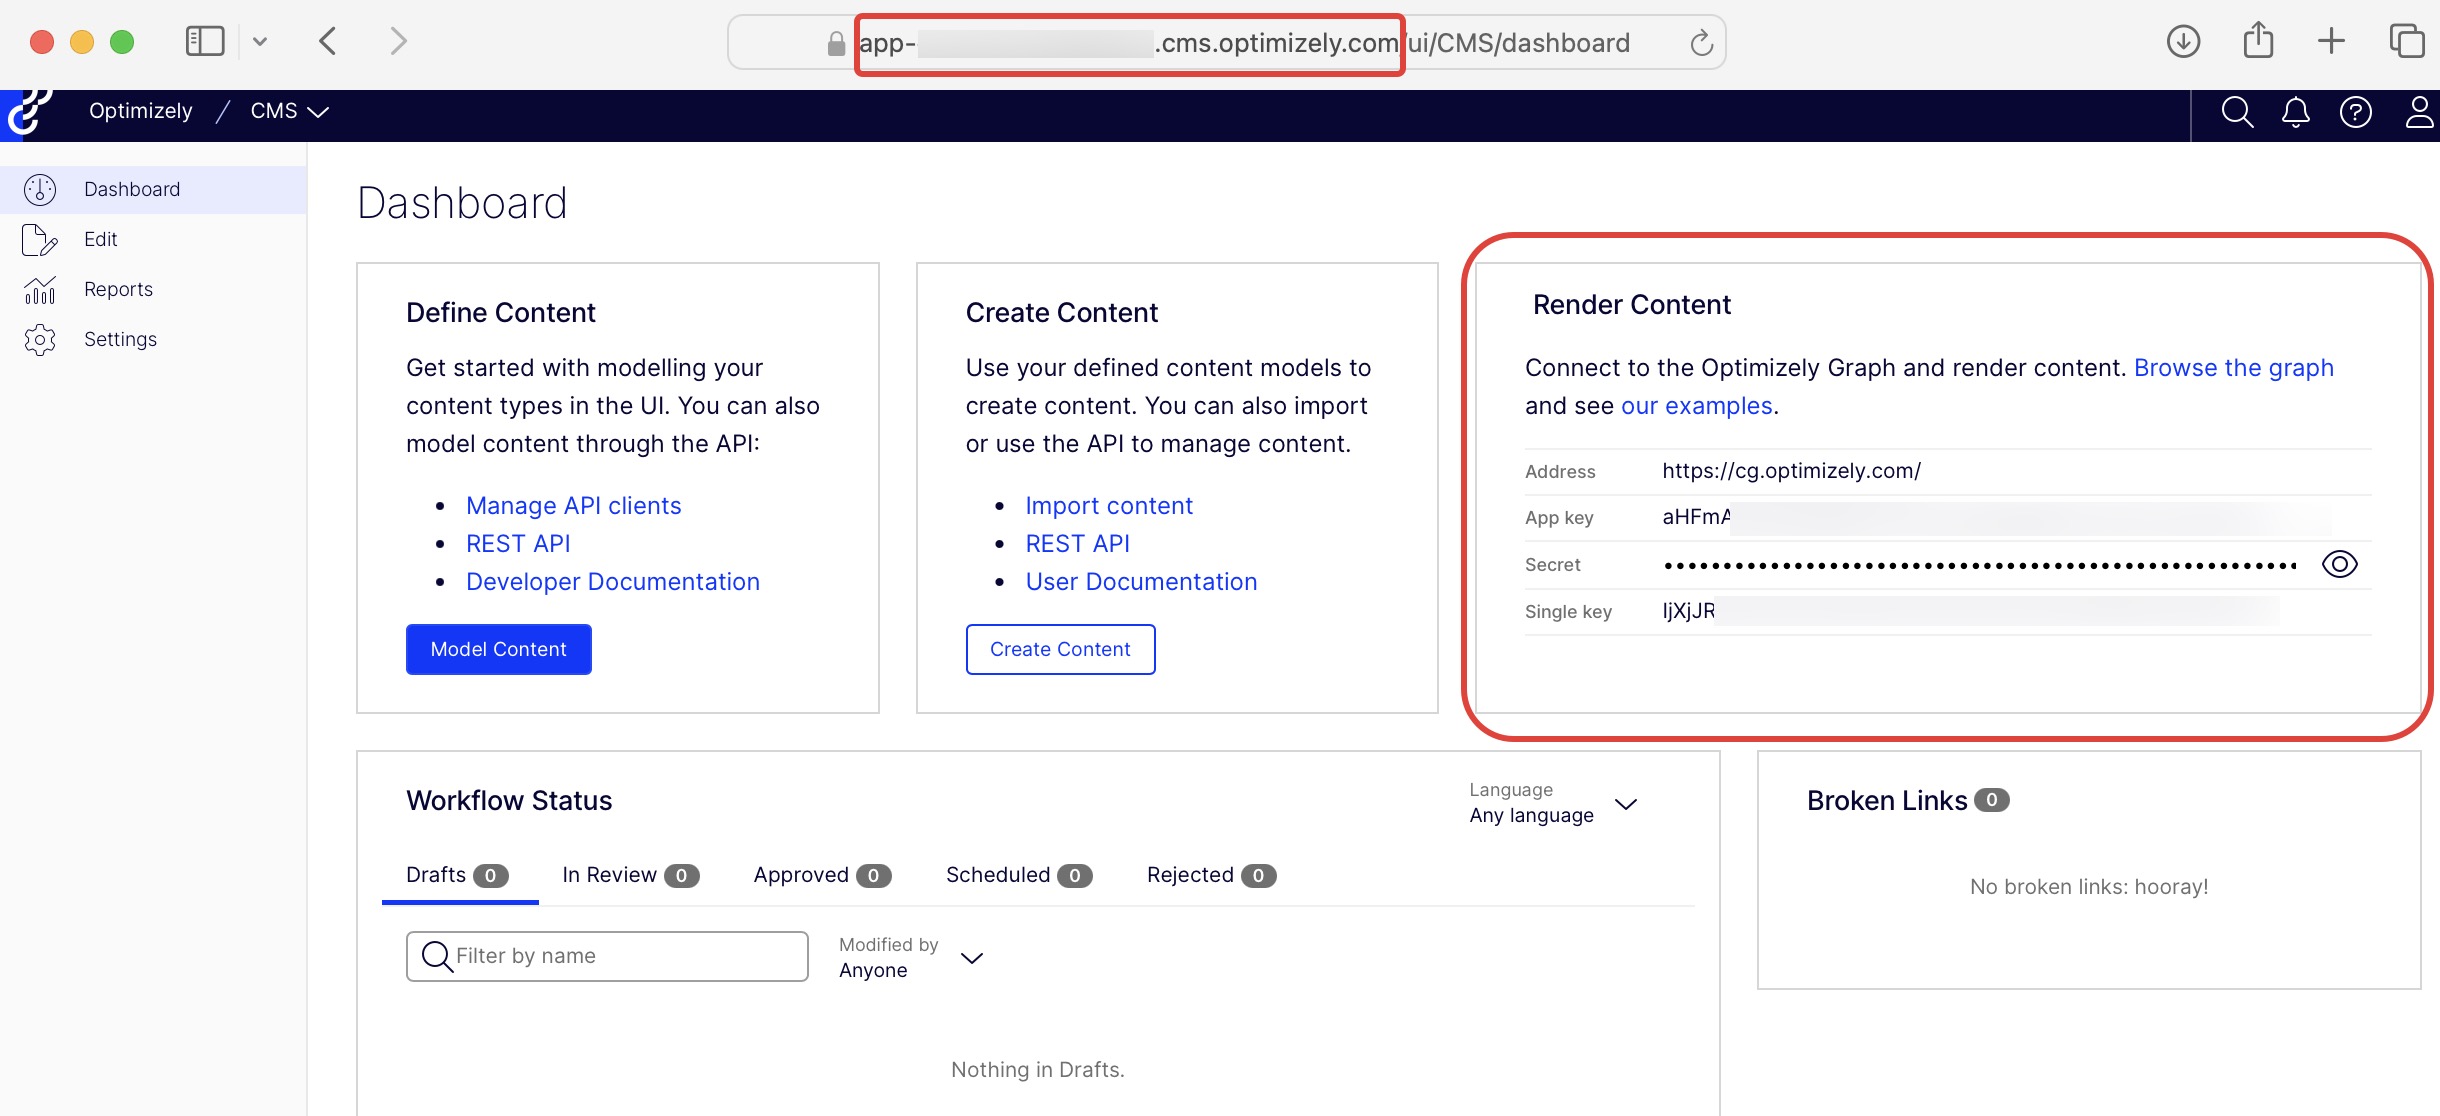
Key Value OPTIMIZELY_GRAPH_GATEWAY https://cg.optimizely.com/OPTIMIZELY_GRAPH_APP_KEY {YOUR_APP_KEY_FROM_CMS_DASHBOARD} OPTIMIZELY_GRAPH_SECRET {YOUR_SECRET_FROM_CMS_DASHBOARD} OPTIMIZELY_GRAPH_SINGLE_KEY {YOUR_SINGLE_KEY_FROM_CMS_DASHBOARD} OPTIMIZELY_CMS_URL https://app-{INSTANCE-ID}.cms.optimizely.com/The App key, Secret, and Single key display in the Render Content section of your CMS (SaaS) Dashboard. Your Instance IDcan be found in your URL.
-
Click Deploy {custom URL}.
The deployment should take about 2 minutes.
Final sync
After configuring Netlify, in CMS (SaaS), go to Scheduled Jobs and click Start for the Optimizely Graph Full Synchronization.
After the sync is completed, you should be able to see your site within the CMS (SaaS) Visual Builder and on the custom URL you created, such as https://optimizely-saas-cms.netlify.app/.
Updated 22 days ago