Create an experiment
Describes how to create an experiment in Optimizely Performance Edge.
Optimizely Performance Edge enables you to quickly make changes to your site using a Visual Editor, much like you do with Optimizely Web Experimentation. There are also important differences to note, which are highlighted in blue below.
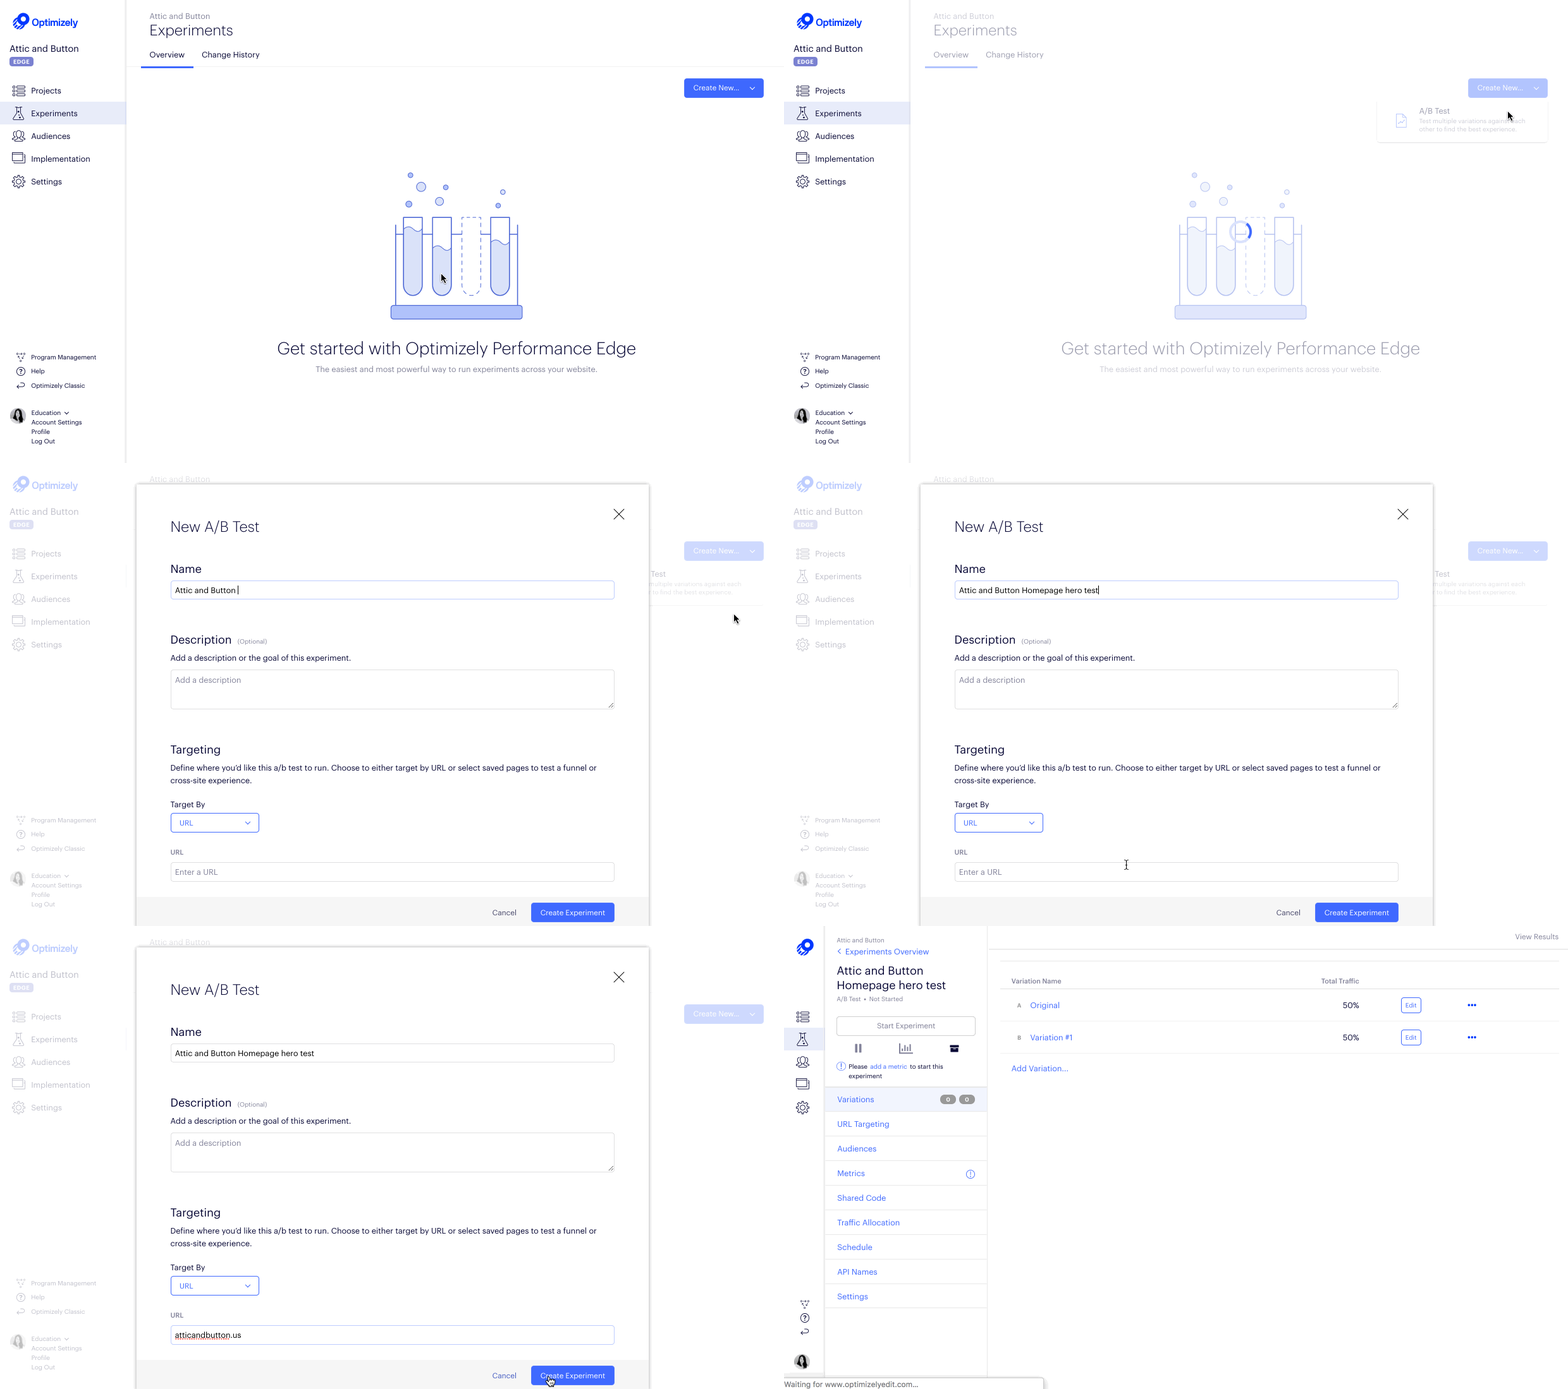
Click to enlarge
To get started:
- Go to the Experiments dashboard and click Create New.
- From the dropdown, select A/B Test.
- Name your experiment. Try a descriptive name like "Homepage hero test."
- Add the URL of the page where you'll run your experiment.
Below, we'll cover the six steps you'll use to build and publish an experiment.
1. Set up URL Targeting
We recommend using Saved Pages, instead of creating a new URL every time.
This will also save the step of creating a multi-page experiment.
Click to enlarge
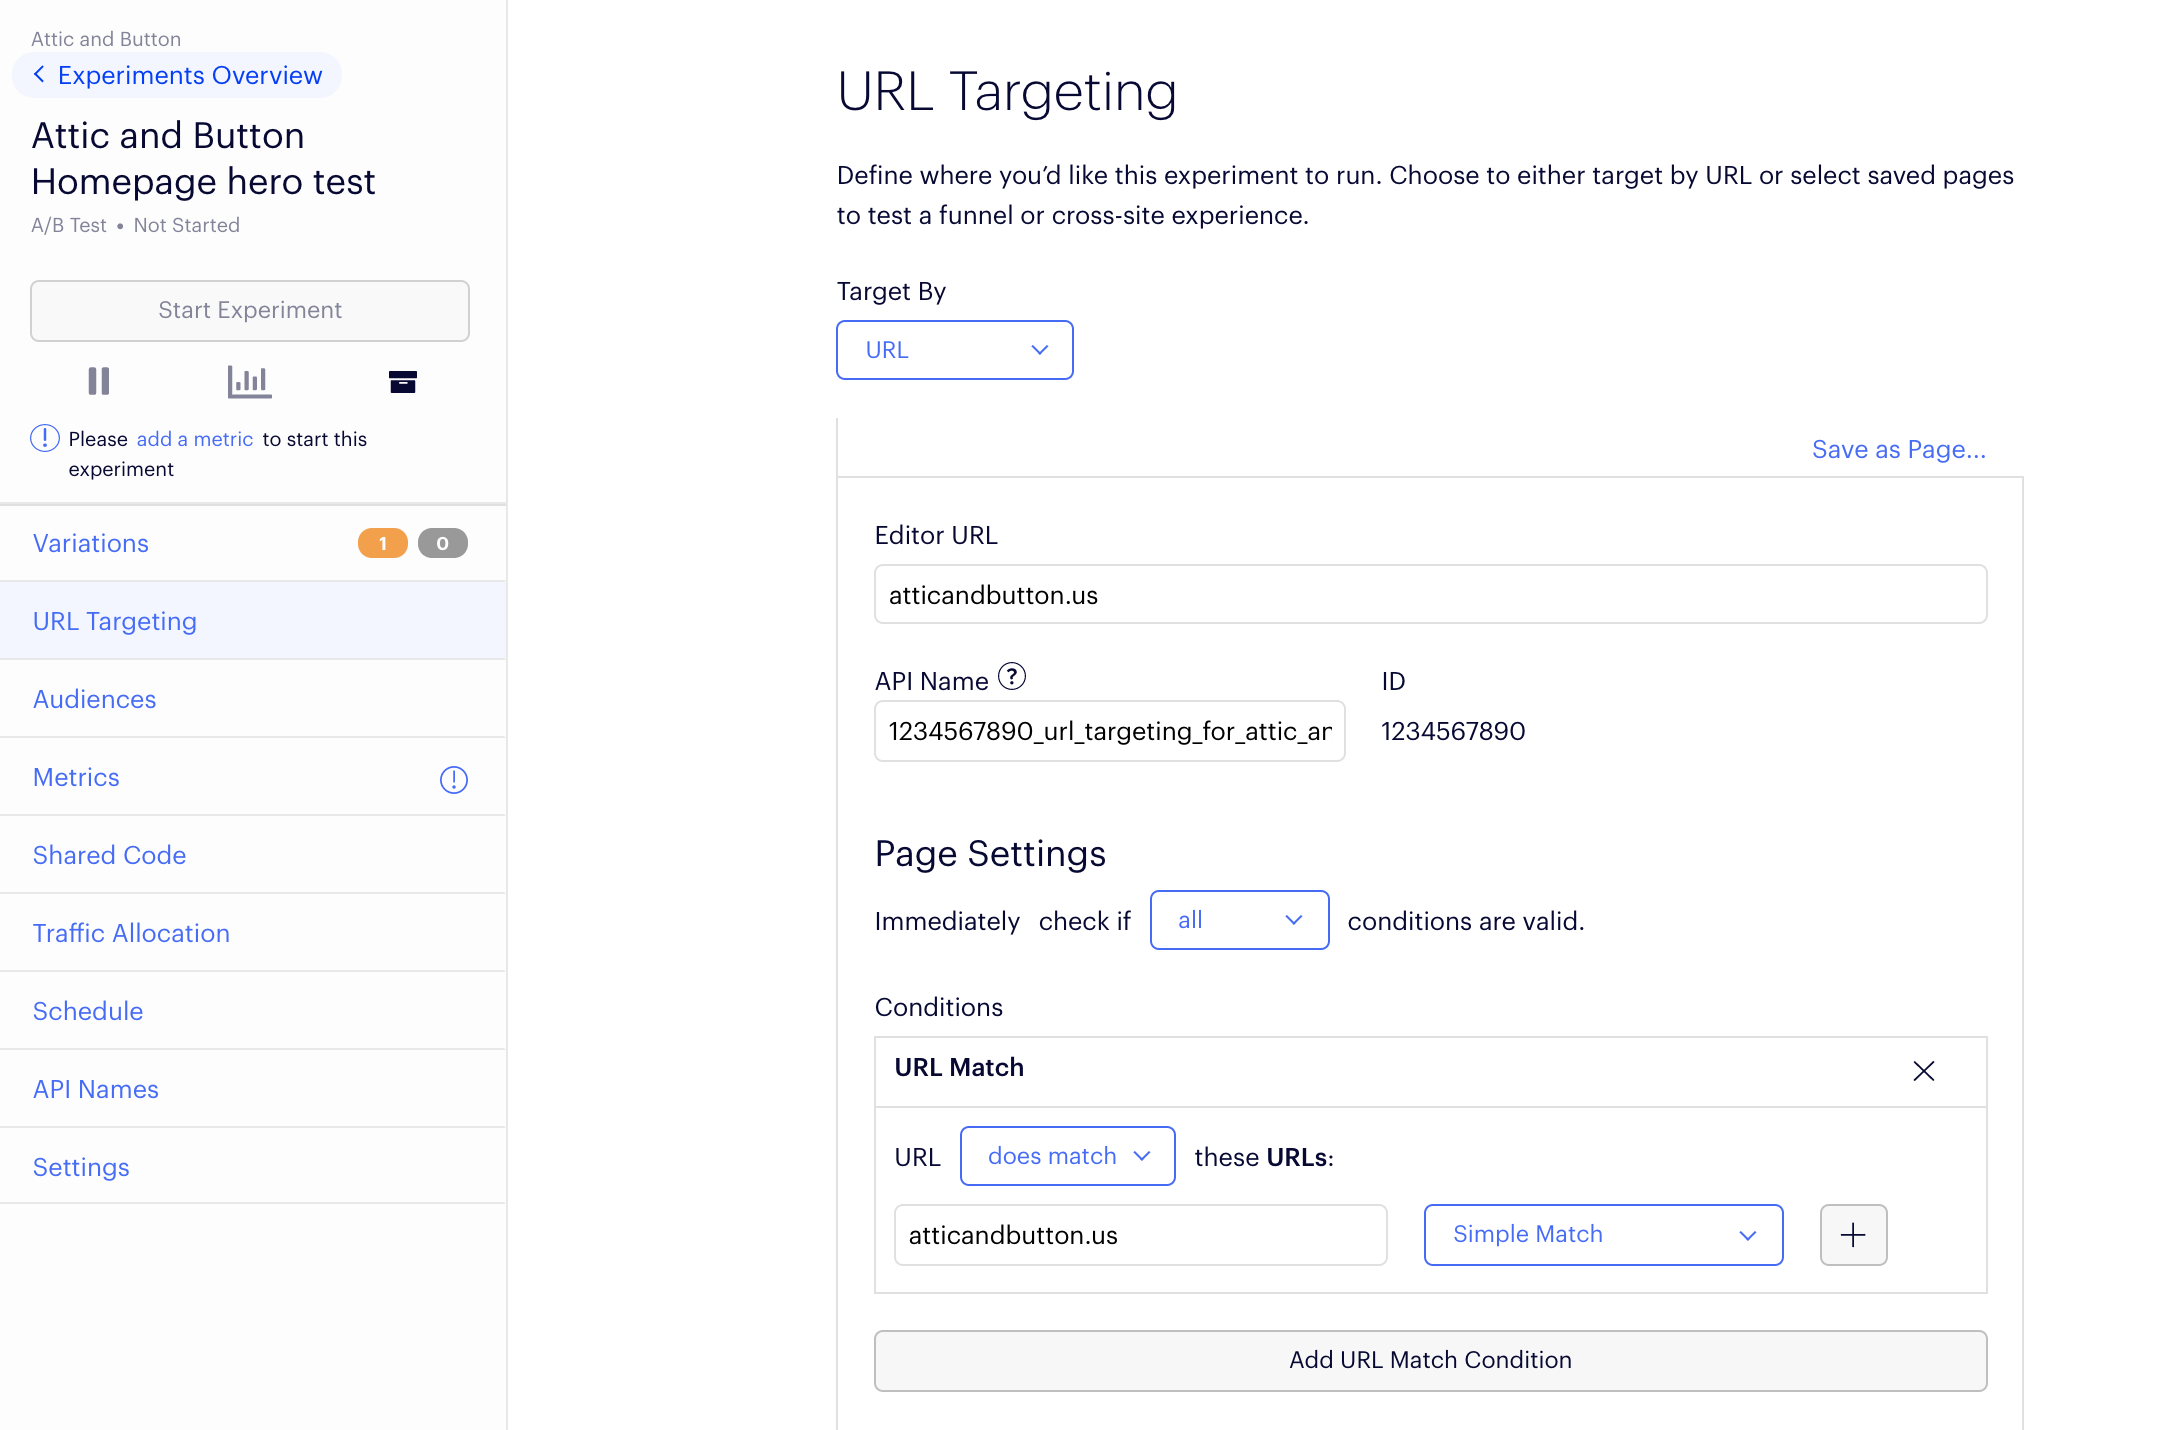
Use URL Targeting conditions to tell Optimizely Performance Edge where you would like your experiment to run.
You can set up URL Targeting for this experiment specifically, or create a page in Optimizely Performance Edge that acts as a template that can be reused in future experiments.
- Go to URL Targeting.
- In the Editor URL field, specify the URL that you want to load in the Visual Editor.
- Use URL match to define a pattern of URLs where your experiment will run. This can be a single URL, a pattern of URLs, or a global URL.
- Optional. In the upper right, select Save as Page to make this reusable.
- Save your targeting conditions.
NoteIn Optimizely Web Experimentation experiments, you can use a combination of page triggers and conditions to tell Optimizely Performance Edge when to activate a page. These options are useful for single-page applications (SPAs). In Optimizely Performance Edge experiments, pages always activate immediately.
Hashes not supportedHashes (#) are not supported in URL match targeting in Optimizely Performance Edge. Hash parameters in URLs are not sent to the Edge Decider, which means it will not be able to properly evaluate URL match targeting that requires matching or excluding hashes.
2. Create a variation
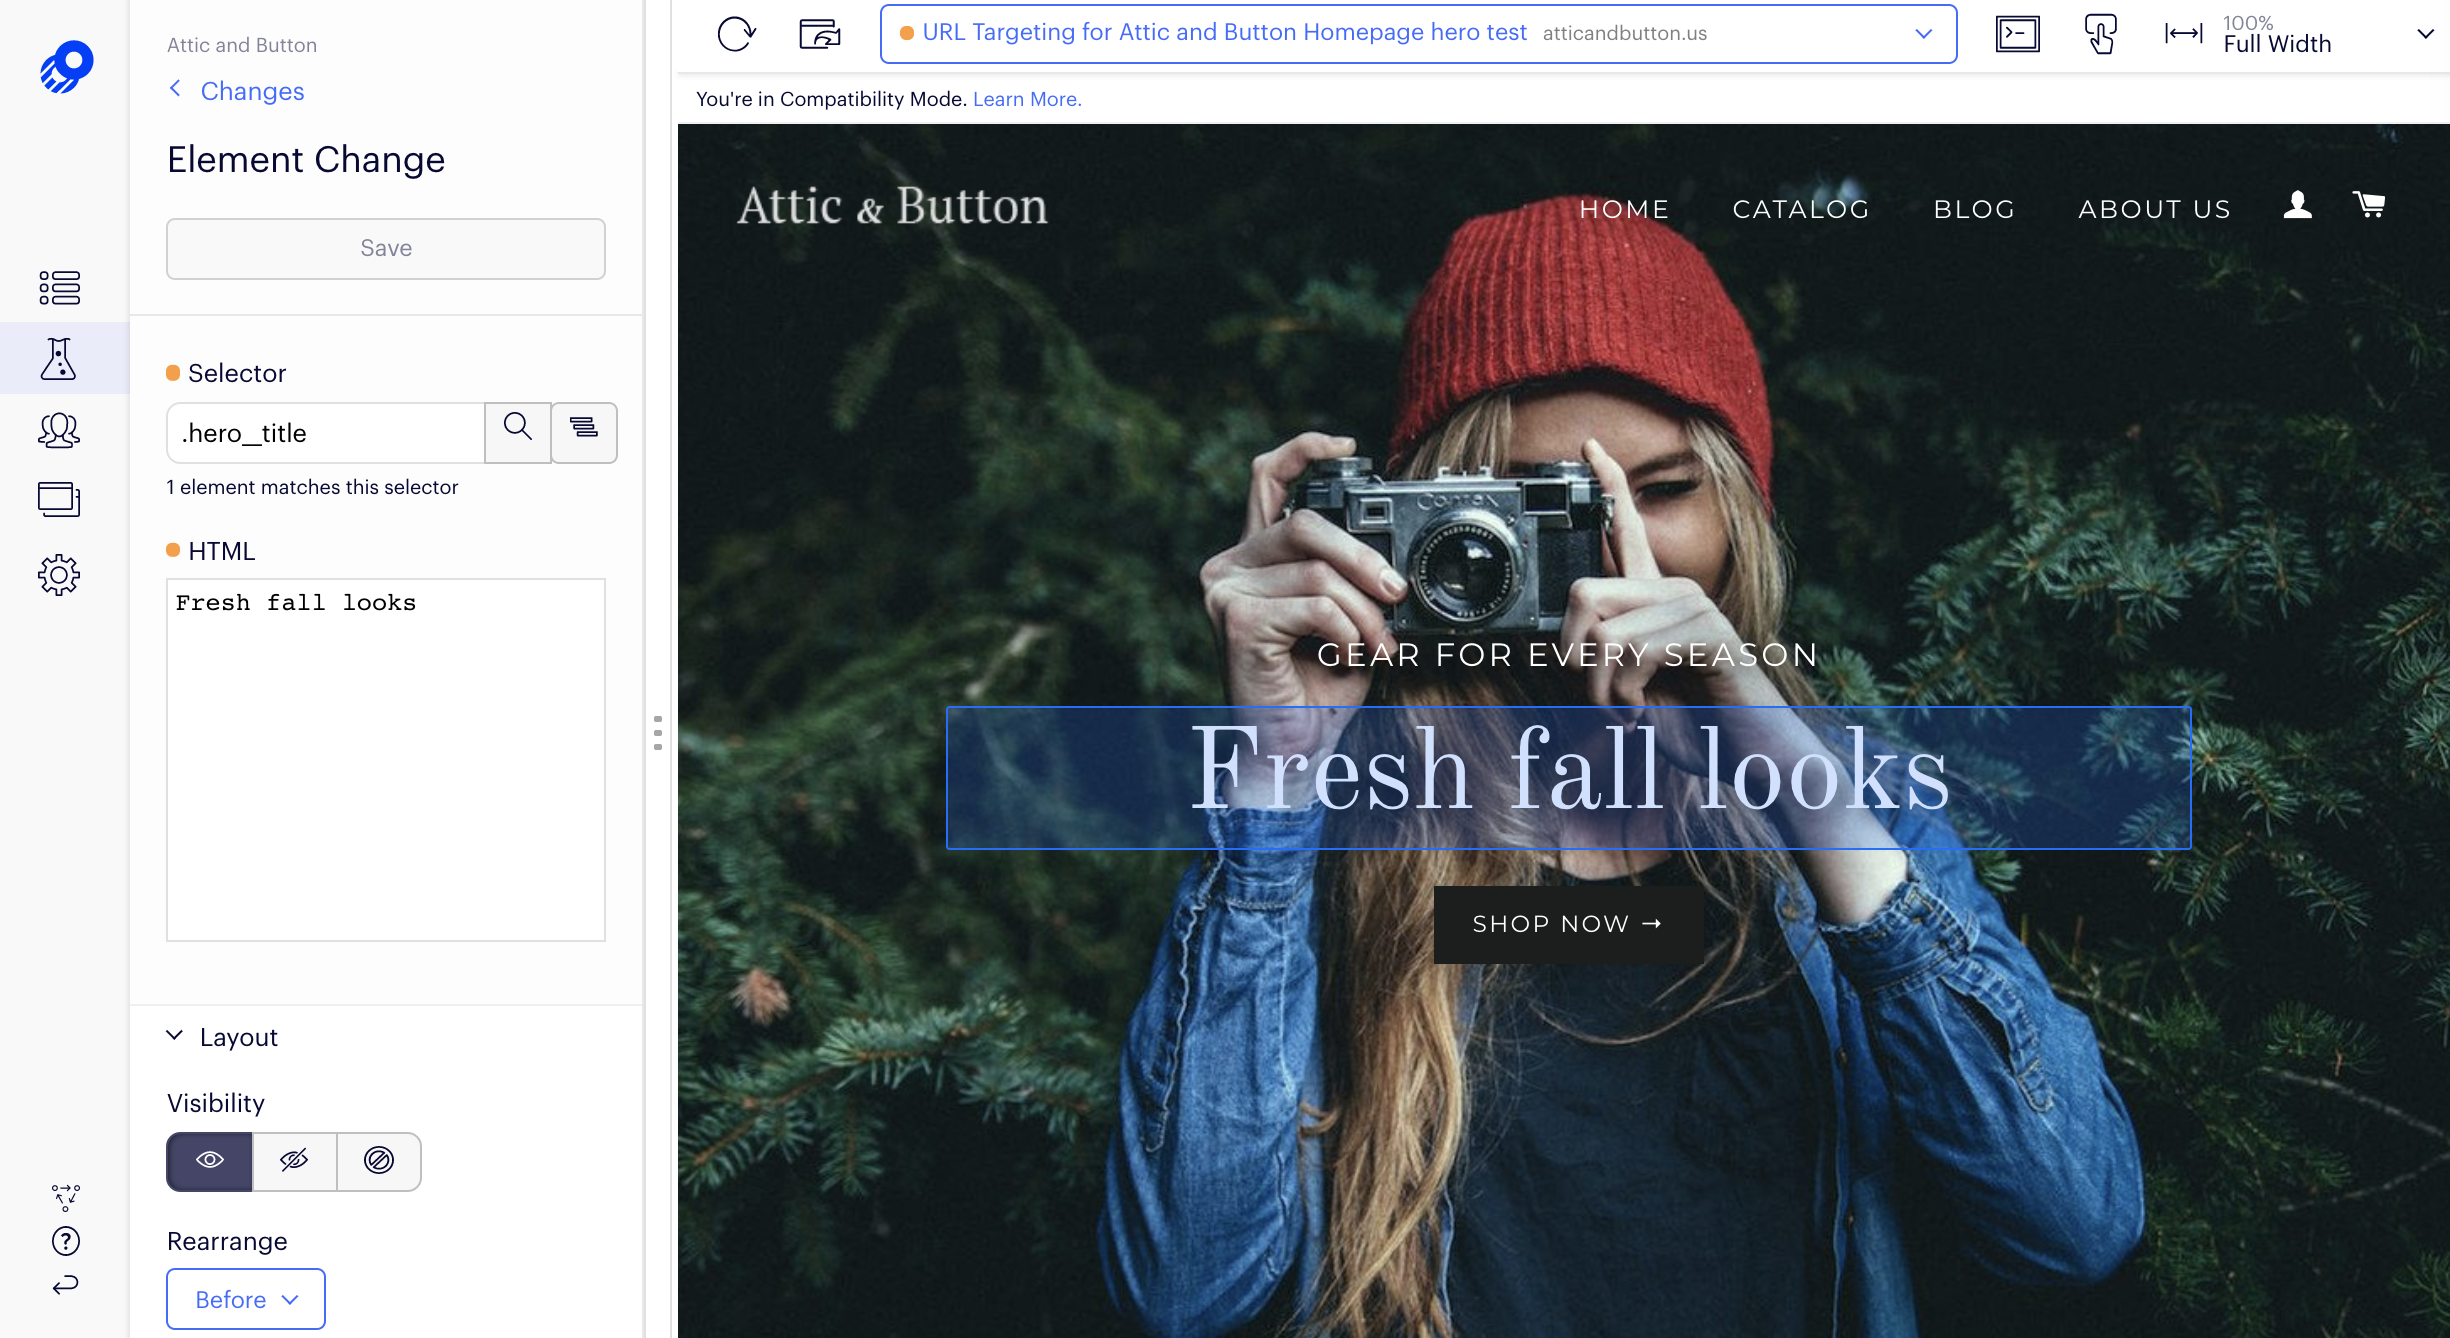
Optimizely's Visual Editor is a WYSIWYG editor that loads your website and enables you to easily make visual and text changes to the page.
Click to enlarge
- Select a variation that you want to edit.
- Click Create Change.
Using the Visual Editor:
-
Element Change: You can make changes to existing elements on the page, much like you would with Web experiments.
-
Edit text and HTML
-
Rearrange the layout of elements
-
Change the background
-
Change the border
-
Edit styling and add CSS
-
Track clicks to specific elements
-
Insert HTML – You can add a new element, such as text on the page, by inserting HTML.
-
Code Editor – You can also make custom code changes using custom JavaScript and custom CSS.
Save the changes to your variation. They won't be visible to visitors until you publish the experiment.
3. Target an audience (optional)
Audiences allow you to decide who is eligible to see your experiment.
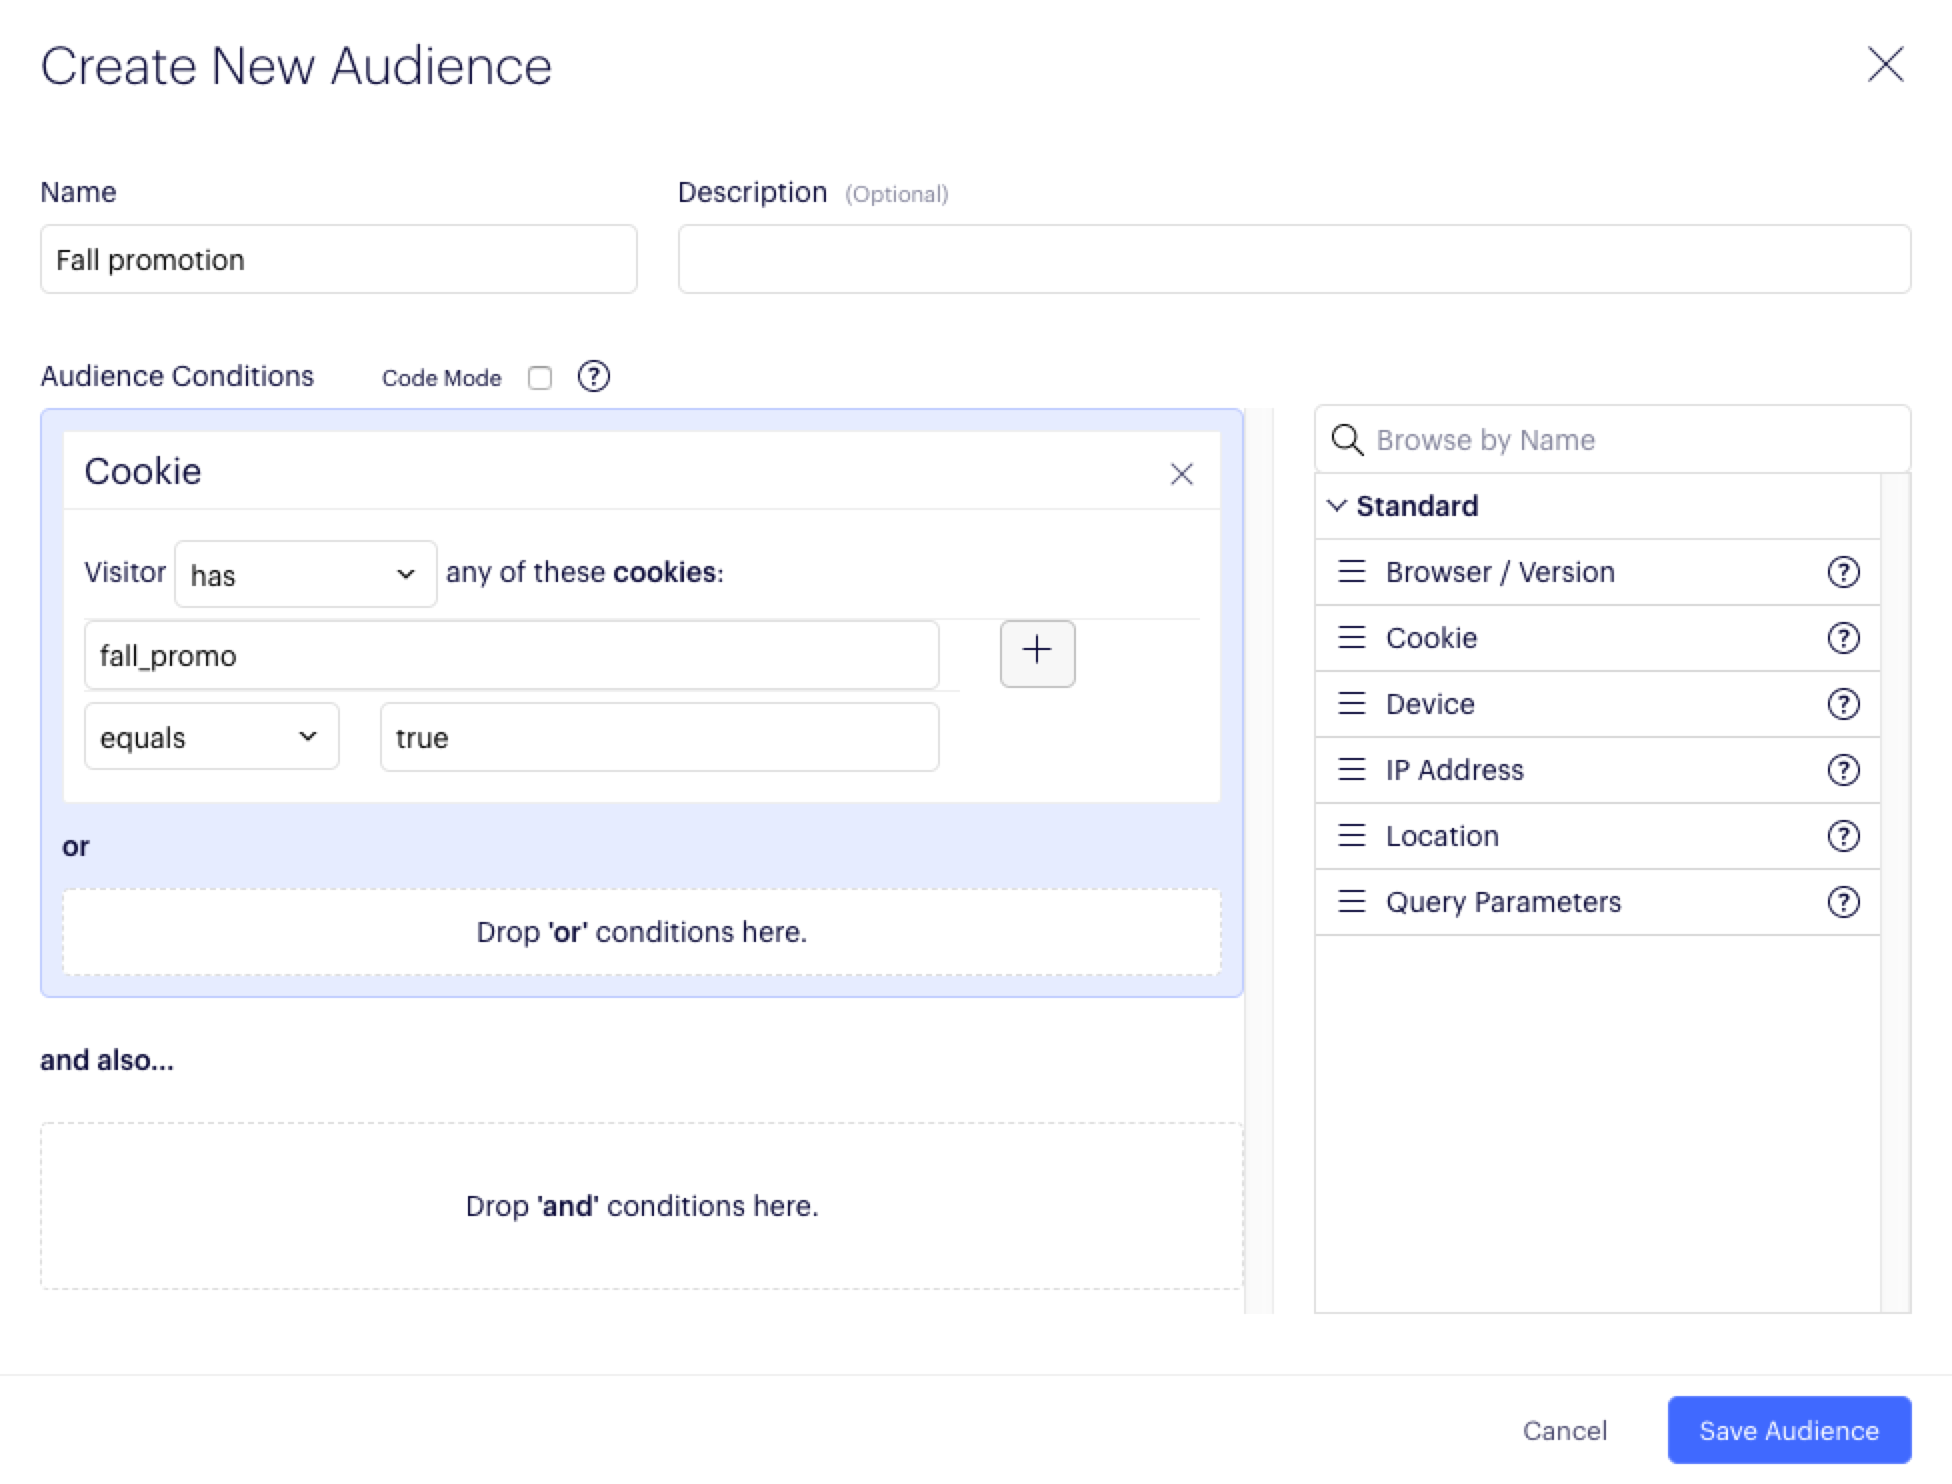
- Go to Audiences.
- Select Create New Audience.
- Name your audience.
- Drag and drop conditions to define who is eligible to enter your experiment. You can combine multiple audiences in your experiment using AND and OR conditions. To learn more, check out our article on setting up Audiences in Optimizely Performance Edge.
NoteIn Optimizely Web Experimentation experiments, you can create audiences out of a large set of out-of-the-box conditions, such as new/returning users and traffic source. In Optimizely Performance Edge, audience conditions are evaluated at the edge of the CDN, so you can target experiments based on browser, cookie, device type, IP address, location and query parameters.
4. Add metrics
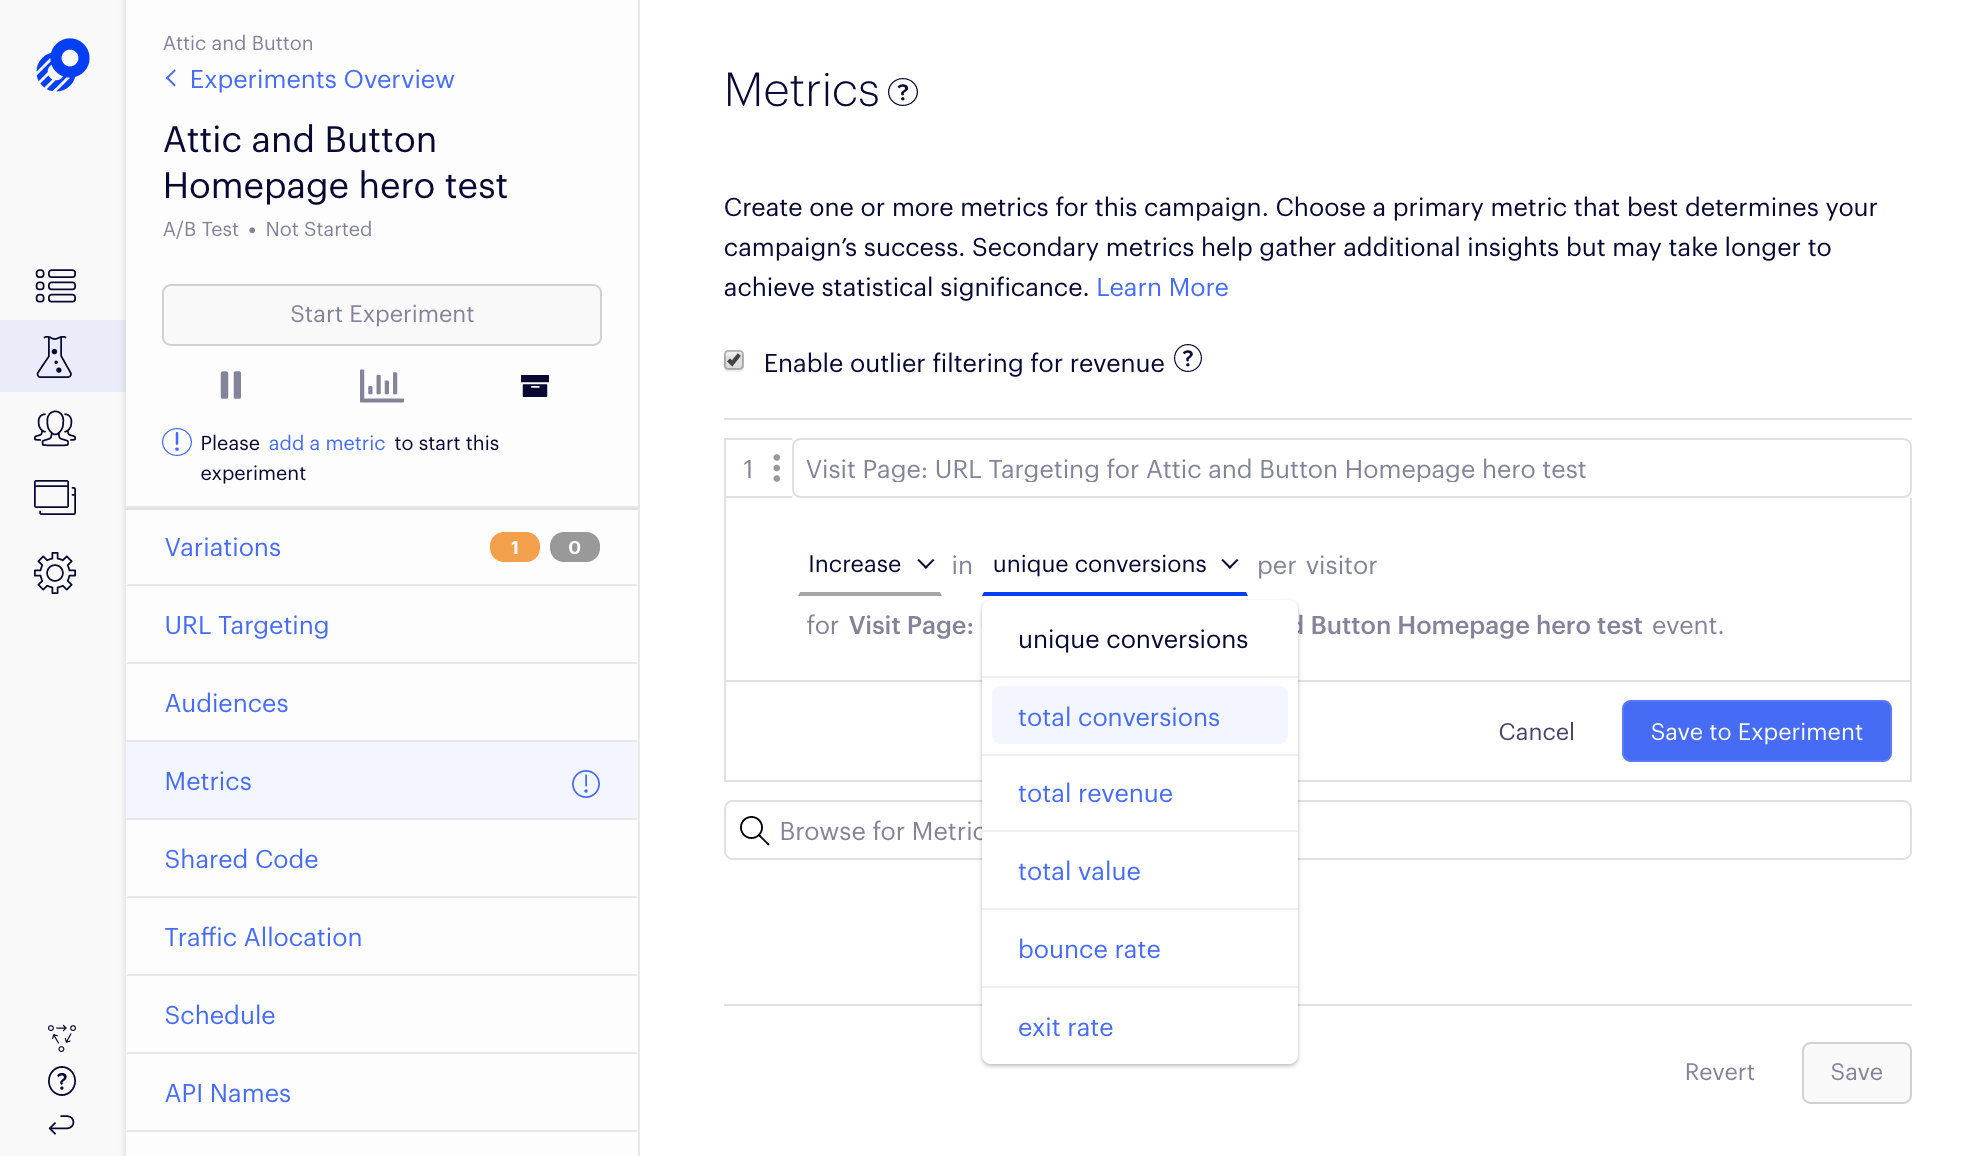
Metrics enable you to measure success for your experiment. If the changes in your variation are successful, what will you measure to show improvement?
Click to enlarge
Metrics are built out of events, or visitor actions, that you track on your page. You can create a metric from an existing event or create a new event for the experiment.
- Go to Metrics.
- Select Create New Event to define a new event for the page. Or, click to add an existing event.
- Save your metrics.
The first metric you add is the primary metric for the experiment. This metric determines whether your experiment "wins" or "loses," and should track an event that's directly affected by the changes you make in your experiment. Optimizely Performance Edge's Stats Engine makes sure that the primary metric reaches statistical significance as quickly as possible. You can also add secondary metrics to measure the downstream effects of your experiment.
5. Set traffic distribution
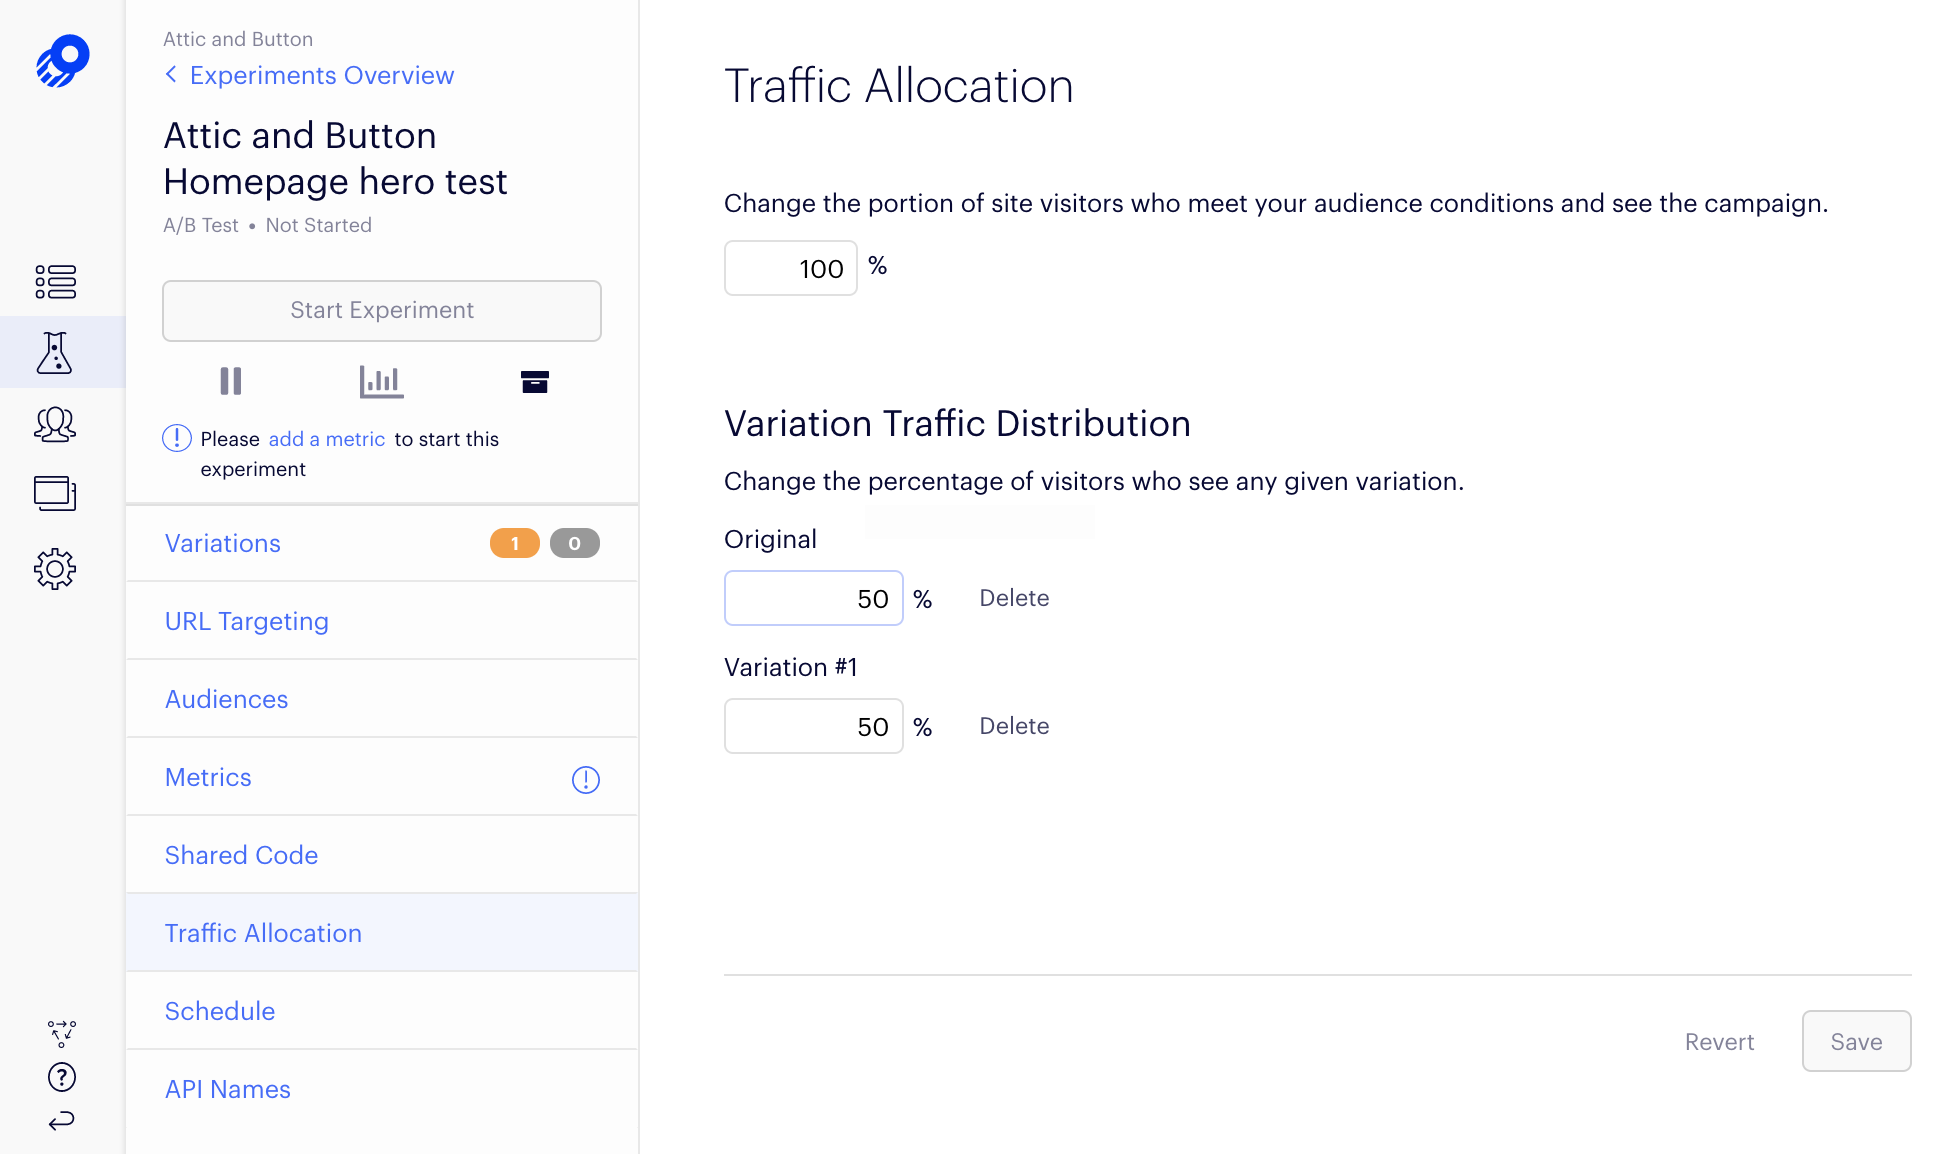
Traffic distribution lets you specify how traffic will be split between your variations. Optimizely Performance Edge randomly allocates traffic into different variations, including the original.
Click to enlarge
- Traffic allocation – You can specify the total traffic that goes into the experiment as a whole.
- Variation traffic distribution – You can specify the percentage of traffic that goes into each variation. We don't recommend changing your variation traffic distribution while an experiment is running, as this can affect your results.
6. Test and publish
After you’ve set up all components of your experiment, preview it to make sure it looks and works the way you intend.
- Test your experiment.
- When everything looks and works the way you'd like, click Start Experiment to set the experiment live for visitors.
Congratulations! You've created and launched an experiment with Performance Edge.
Updated 6 months ago
